Showing posts with label Bridesmaid Dress. Show all posts

Friday, 21 November 2014

::Sewing:: Special Dress for a Special Day - Behind the seams 2

Following on from my previous posts about this dress. I'm geekily recording the constructions steps of this dress. It can be a handy reference when I revisit in the future.

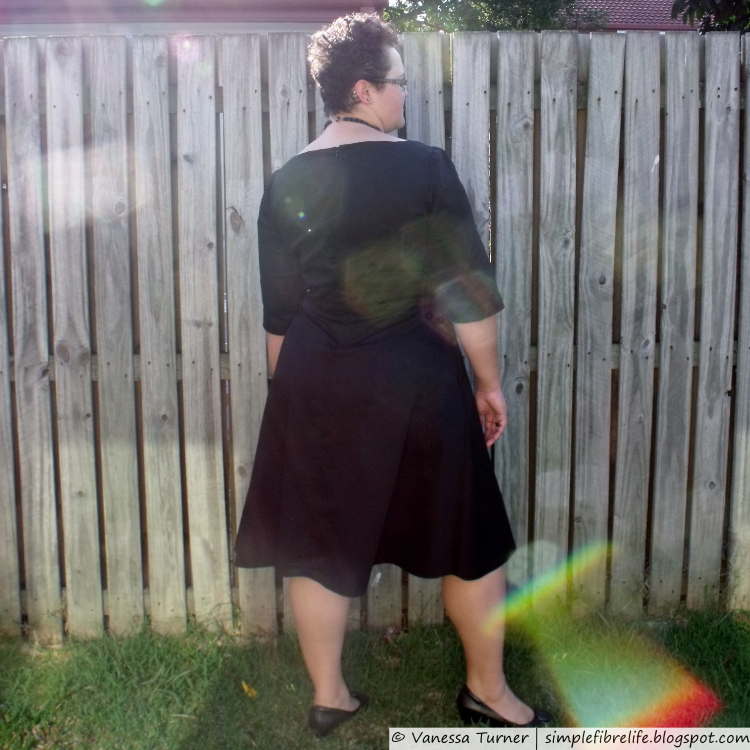
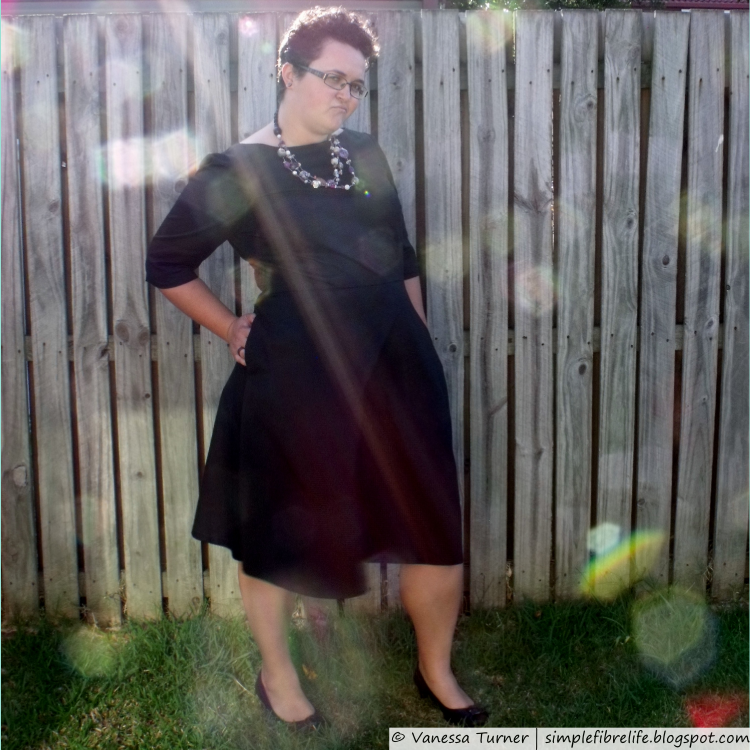
I actually ended up taking two lots of photos for the original post about this dress.
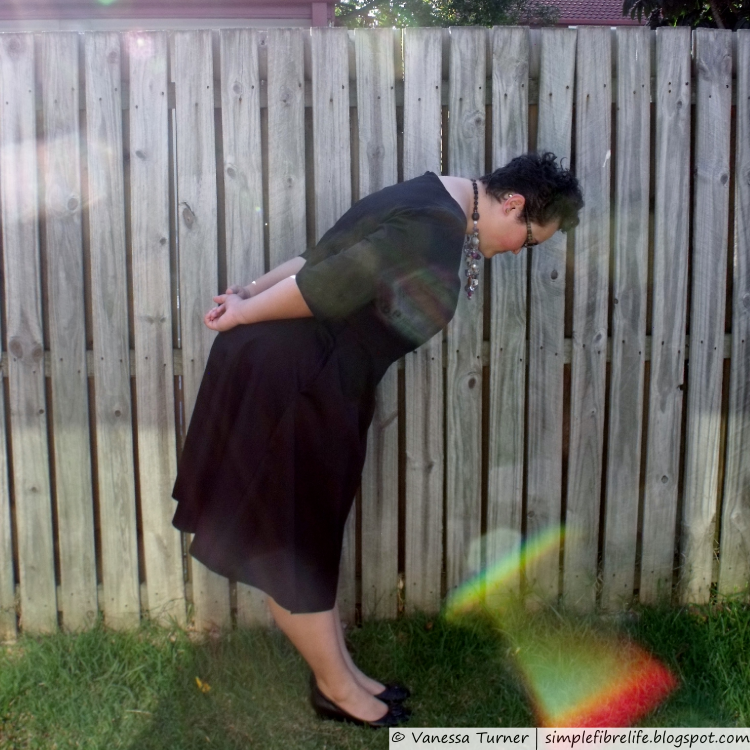
I used the second lot in the first post, but I wanted to include some from the first photo session because I really like the sun flare :)


~Construction~
When I'm sewing I usually try to sew as many seams as possible before I need to press or switch between machines. It means the project comes together quicker. And we all like getting a project finished :)

When I cut out the final garment I made sure that the seam allowances for the bodice, bodice lining and back skirt pieces liked up with the selvage edge so that I didn't need to finish these seams.

I started by assembling the bodice and sleeves and then inserted the sleeves. The skirt was made after which included sewing the inseam pockets. The zipper was put in after joining the bodice and skirt. I attached the zipper snap tab while I machine sewed the bodice lining centre back along the zipper. I was running out of time at this stage so I had to prioritise the next few steps, so I sewed the hem. To finish up I hand stitched the bodice lining waistline to the waistline seam allowance; sewed the snap to the zipper snap tab and finally the bra strap carriers.
Putting the bodice together
  • Stay stitched front and back bodice necklines, bodice lining necklines and waistline of skirt pieces.
  • Sewed front and back darts for bodice and bodice lining and darts at top of sleeve; pressed seams and pressed darts flat so they pointed to the centre of the body or down and pressed sleeve darts to the back.
  • Sewed 3 rows of gathering stitches at top of sleeves.
  • Overlocked the sleeve hem seam allowances without cutting any allowance off
  • Overlocked around the outside of pocket pieces.
  • Basted along the sleeve hemlines to make turning and pressing the hem easier; pressed hem up along the basted line
  • Sewed side and shoulder seams for bodice and bodice lining; sewed sleeve seam.
  • Pressed bodice and sleeve seams and flat, then open.
  • Overlocked sleeve seam allowance.
  • Pressed sleeve hem up along basting.
  • Sewed sleeve hems.
  • Basted the bodice and bodice lining around the armholes. Inserted sleeves into bodice.
Putting the skirt together
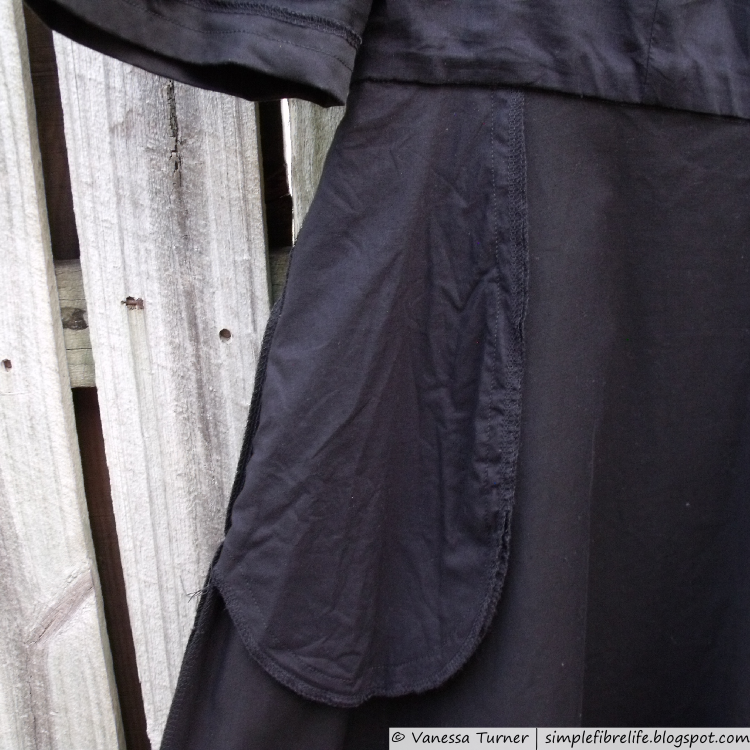
  • Sewed pocket pieces to side seam of skirt front and backs using a seam allowance slightly smaller than 5/8” (1.5cm). Pressed seam allowances flat and open.
  • Overlocked skirt side seams, including where the pocket joined the skirt piece, but not around the pocket (that was already done).
  • Sewed side seam of skirt at top, backstitched at top of pocket opening, basted along pocket opening, backstitched at bottom of pocket opening, sewed seams to bottom.
  • Sewed around pocket bag, backstitched at beginning and end. Pressed side seams and the pockets to the front.
  • Basted the top of the pockets bags to the skirt waistline
Finishing up
  • Sewed skirt to the bodice main fabric (thinking about it now I probably could have sewed the bodice lining in this seam too, but I’d probably have to finagle it at the zipper, hmmm, something to think about next time).
  • Overlocked the waistline seam.
  • I made the zipper snap tab by cutting a little rectangle of lining fabric and sewing along one long and short side, snipped the corner off, turned it the right way out and pressed it flat.
  • To insert the zipper I basted the centre back seam, pressed it open, and basted the tape of the invisible zipper to the seam allowance on either side. After unpicked the centre back basting I sewed the invisible zipper in properly.
  • I hand stitch the top of the zipper tape down, positioned and pinned the zipper snap tab where I wanted it, placed the bodice lining and bodice right sides together (remembering to fold under a little of the lining at the waistline) and sewed along the zipper tape to secure the lining down in the centre back.
  • Overlocked the hem of the skirt.
  • Hemmed the skirt by basting along the hemline to make turning the hem easier, pressed the hem up.
  • Hand sewed the waist of the bodice lining down.
  • Hand sewed the snap onto the zipper tab
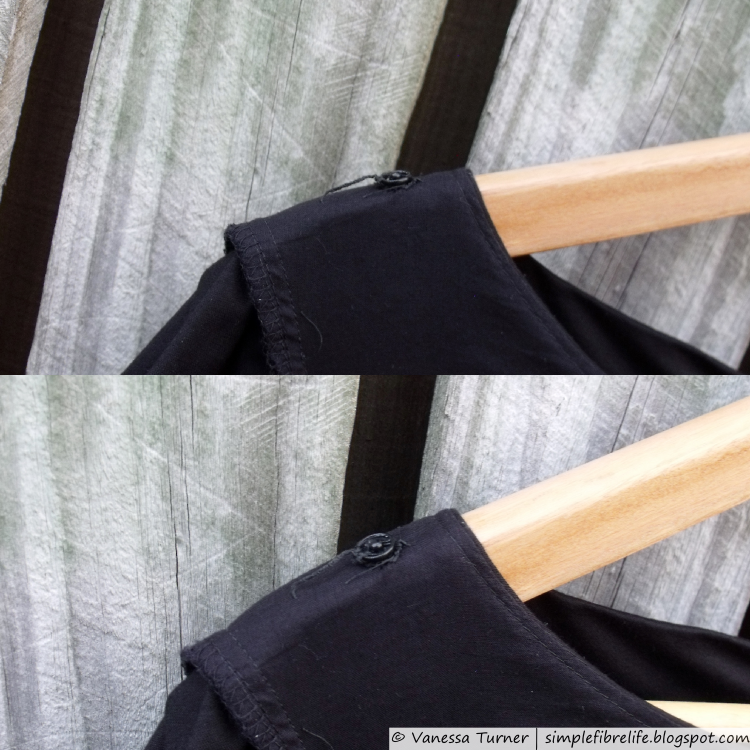
  • Hand sewed the bra strap carriers to the bodice lining shoulder seams


Here are all the related posts :)
This Post
Sewing FO post
Behind the seams 1 - Pattern Adjustments
Behind the seams 2 - Construction


~Final Comment~
So this wasn't the quickest make in the world, but it was pretty straight forward to sew together the final dress after sewing so many toiles. I think that bra strap carriers are going to be a new staple in my garments. I've made a few more formal garments this year, and I've seen my sewing improve a lot over that time.

Do you have any tips or tricks for sewing your garments quicker? Are there any special techniques or features you like to put in your garments?
Leave a comment below, I'd love to hear from you :)


Until next time,


Let's connect

Friday, 14 November 2014

::Sewing:: Special Dress for a Special Day - Behind the seams 1 (picture heavy)


This is a follow-up of this post. I really like geeking out and recording all the steps I’ve taken to make a more involved garment. It can be a handy reference when I revisit in the future.
In this case I was writing all about the pattern adjustment and construction notes for the bridesmaid dress I made and realised it was turning into another epic post so I’ve decided to split it up into 2 posts.

As I was drafting the patterns for the dress I decided that I wanted to add seam allowance to the pattern pieces instead of eyeballing it as I was cutting out fabric, so a lot of time was spent adding seam allowances to pattern pieces with a grading ruler.

Something else to note, as I was sewing each toile I traced all the pieces including markings onto the muslin fabric, so that was a bit time consuming, but I like doing it that way so I can also trace the markings onto the fabric too.

I decided to fool around with Inkscape to illustrate the changes I made to my pattern blocks. It took me a bit of time, but I found it really fun. The illustrations aren't to scale because I scanned in mini-patterns and used them to trace around in Inkscape and then chopped and changed them.

So here we go I’m diving straight into my pattern adjustments.

~Pattern Adjustments~

Pattern Blocks
Bodice and sleeves
To start I drafted the neckline shape that I wanted on the front and back bodice, making sure that they would meet in a smooth line at the shoulder seam. It had to be as deep at the centre front as the neckline on my bodice block; and wide at the shoulders, but not wide enough to show bra straps. That was going to be easy on the front bodice because there are side and waist darts on the pattern block. I traced the front bodice and then drew in a new neckline.
Front bodice adjustment
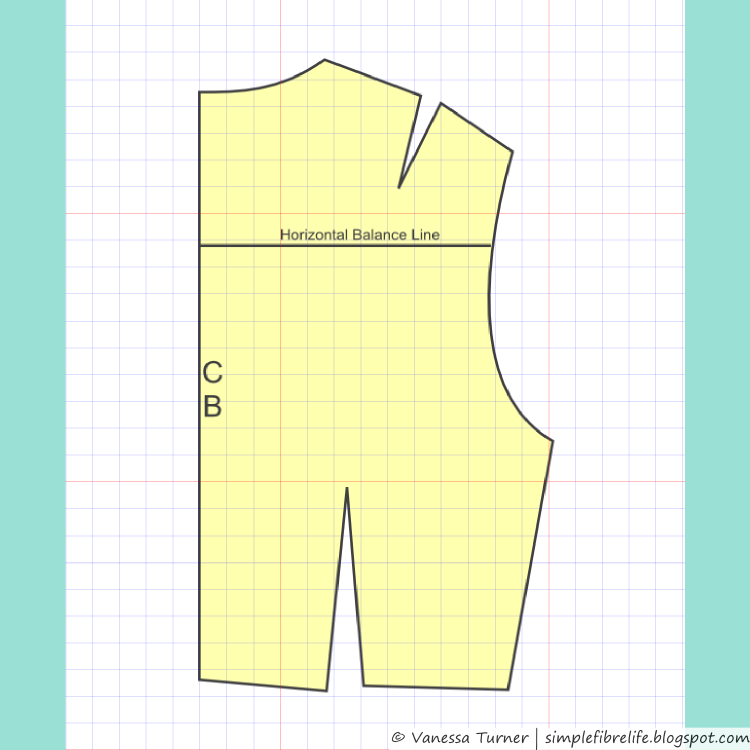
On the back bodice there is a waist and shoulder dart on the pattern block, so I had to move the shoulder dart to draw a new wide neckline. Otherwise, the new neckline would have crossed into the shoulder dart. After tracing the back bodice block I moved the shoulder dart to further along the shoulder so it would be out of the way of the new neckline. I did that by cutting just to the dart point and rotating it, but really I should have rotated it from the back horizontal balance line; which is kind of the part of the back that sticks out the most (I think).
Bodice Back Block
After drawing in the new neckline I decided I would rotate the back shoulder dart to the neckline, because that was what the peony has.
The sleeves were shortened for the first toile with no other adjustments.
Shortened sleeve

So after the first toile I decided I didn't like the back neck dart. I also needed to tweak the sleeve because there was too much fullness at the back of the sleeve.

So for my next toile I decided to make a couple of changes. I moved the back upper dart to the armhole, but rotated from the back horizontal balance line (so kind of where the shoulder blade sticks out). For the sleeves I removed 1 cm out of one sleeve head by moving the dart leg towards the back of sleeve over, but left the other one as was. When trying this toile on I didn’t like the back dart at all. Removing some of the sleeve ease helped reduce puckering when inserting the sleeve. But I didn’t like the way the back looked at all. It looked a bit too fitted (read tight).

I thought I would try to remove the upper back dart and keep the original sleeve to see how that would look. So I unpicked one side of the toile pressed out the darts in the bodice back and sleeve and resewed it up. I liked the way it looked way better.

Instead of illustrating each step of the changes I made to the back bodice I just illustrated what would have been the simplest way for me to make the changes I did.
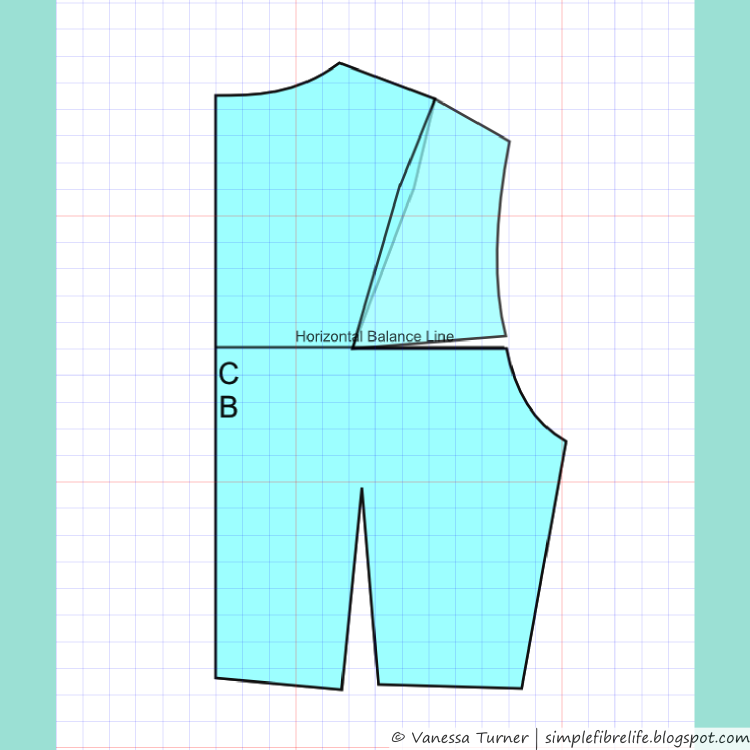
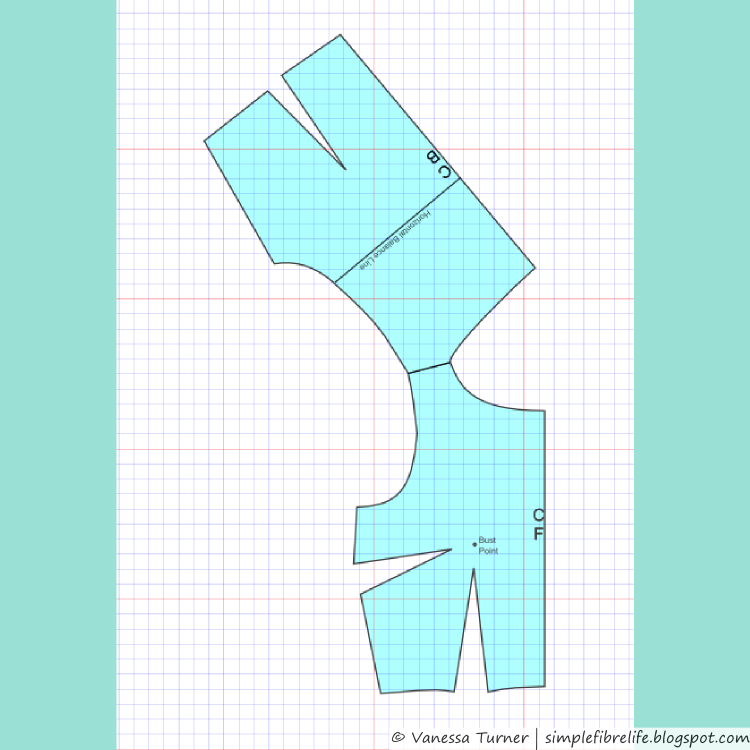
Horizontal Balance Line (HBL) lowered down the back like it is on my actual block.
Slash through the middle of the dart to the HBL and from the armscye along the HBL to the first slash
Rotate to close the shoulder dart.
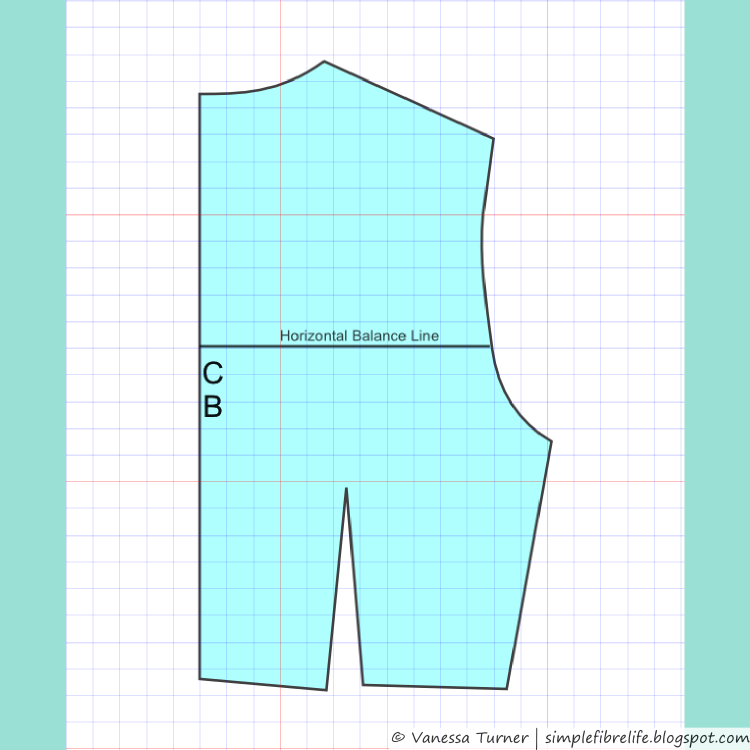
Smooth the shoulder and the gap in the armscye
Bodice pieces matched at shoulders at the outer shoulder.
Redraw the back neckline so there is a smooth join at shoulder

Bodice Back comparison. Yellow is the original and teal is the adjusted one.

The final bodice toile was made to make sure all style and fit adjustments worked and the bodice and sleeve pattern drafts were good to go.

Skirt and Pockets
Luckily drafting the skirt was relatively straight forward compared to the bodice. I only sewed one toile and made a couple of changes
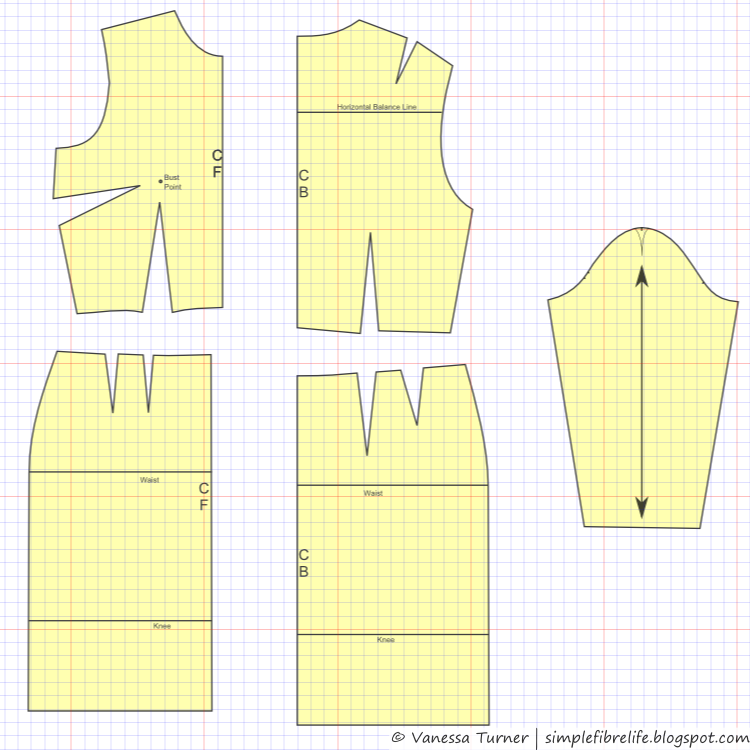
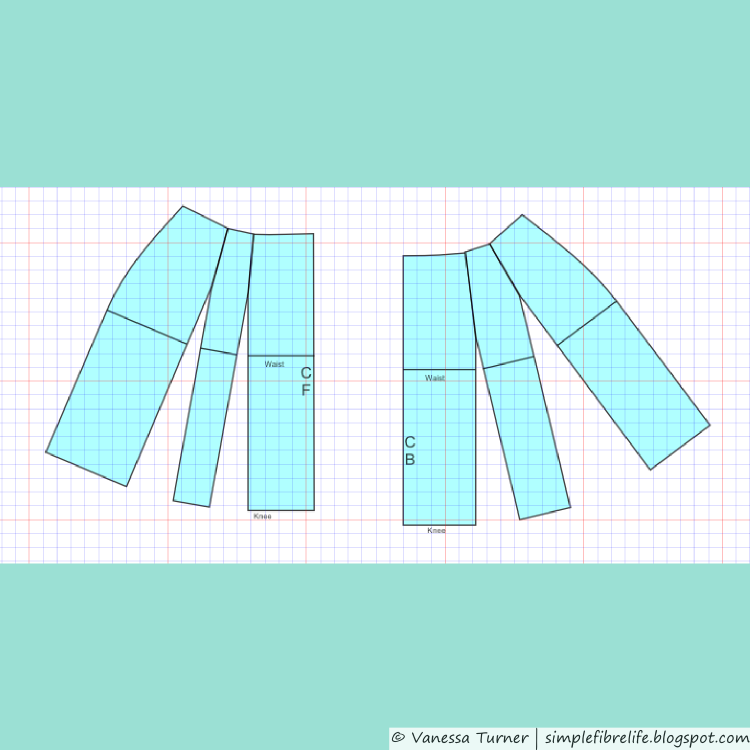
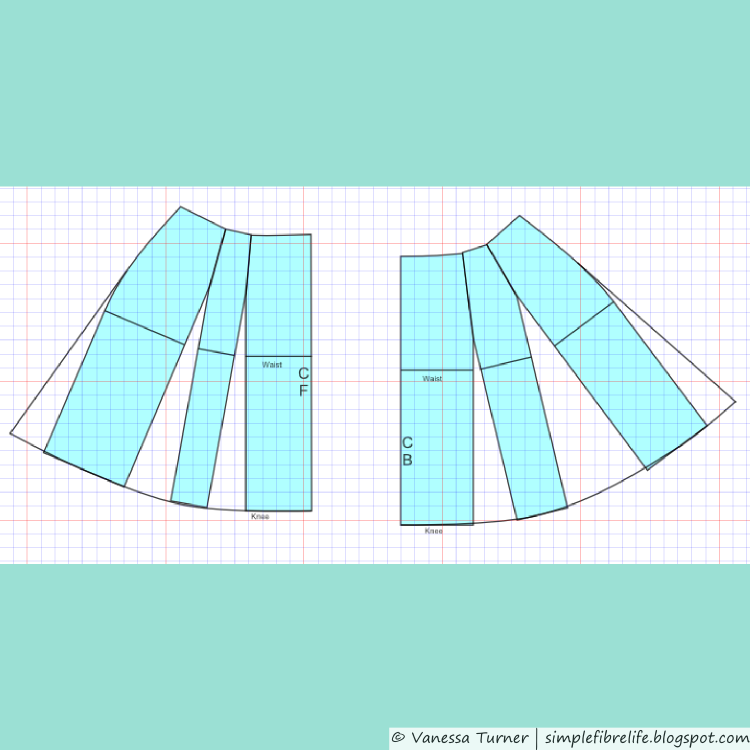
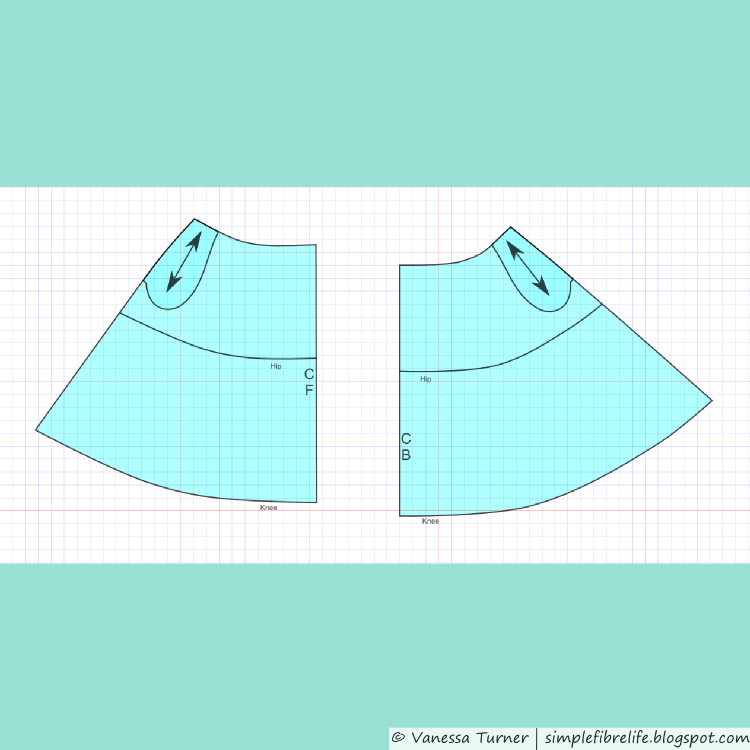
I traced off the front and back of my 2 dart skirt block and rotated out the darts. I wanted a little bit of extra flare at the side so there wasn't a 'bump' in the side seam so I extended the side seam from just above the hip line. I quickly checked to make sure the side seams matched up but placing the pattern pieces on top of each other.

Skirt Blocks
Blocks shortened to desired length
Skirt darts closed
Flare added to the side seams of skirt blocks.


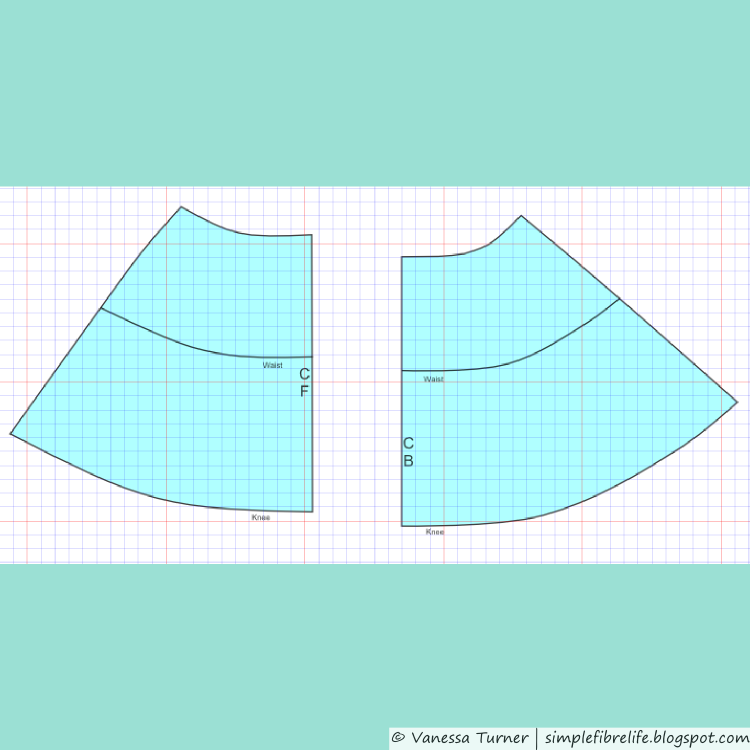
Hem drawn in so it hits the centre of each skirt panel hem

Finished skirt front and back patterns

I only made this first skirt pattern draft hip length, because I just wanted to see how it would fit in hip area and I could just extend the skirt sides by drawing a straight line as I was cutting out the toile.

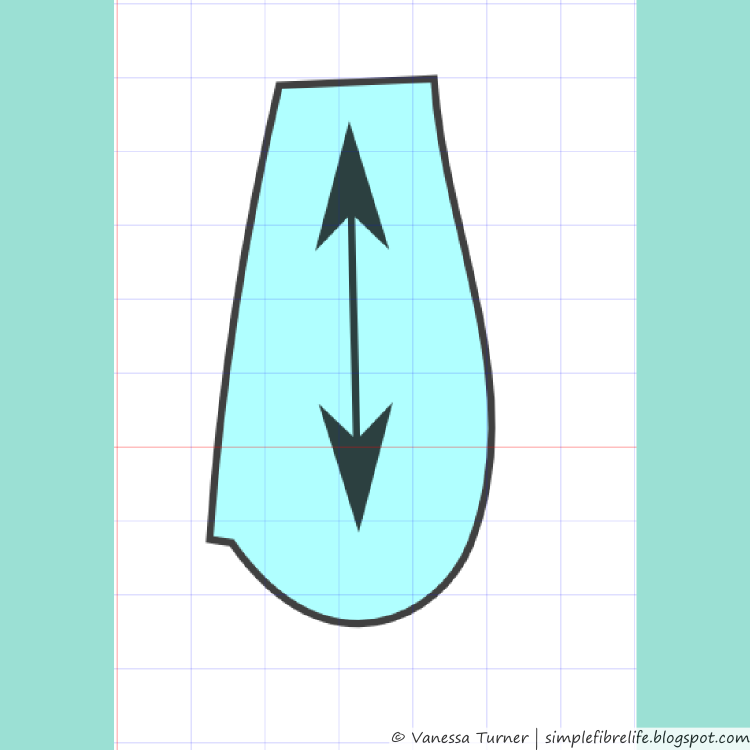
The pocket was the final piece I needed to draft. I traced around the top of my front skirt block and rotated out the darts again. I took the pocket I had drafted for my S2444 and positioned it to where I wanted it on the skirt piece and traced around it. Voila pocket done!
Pocket drawn drawn onto the skirt front pattern piece and
then matched against the back skirt piece.

I toiled the skirt and pockets and sewed it all up.
The fit was a bit off at the hips where the pockets were. The pocket opening sort of stuck out. I figured it was because I had added flare to the skirt sides too far down the side seam. So I drew new front and back skirt pattern pieces, the whole piece this time, not just the top, and moved the starting point for the side flare up to where the side seam started to curve down. I had to adjust the side seam line on the pockets too.
Skirt pocket pattern piece

I didn’t bother making another skirt toile because the changes were pretty basic.
Here are the final skirt pattern pieces

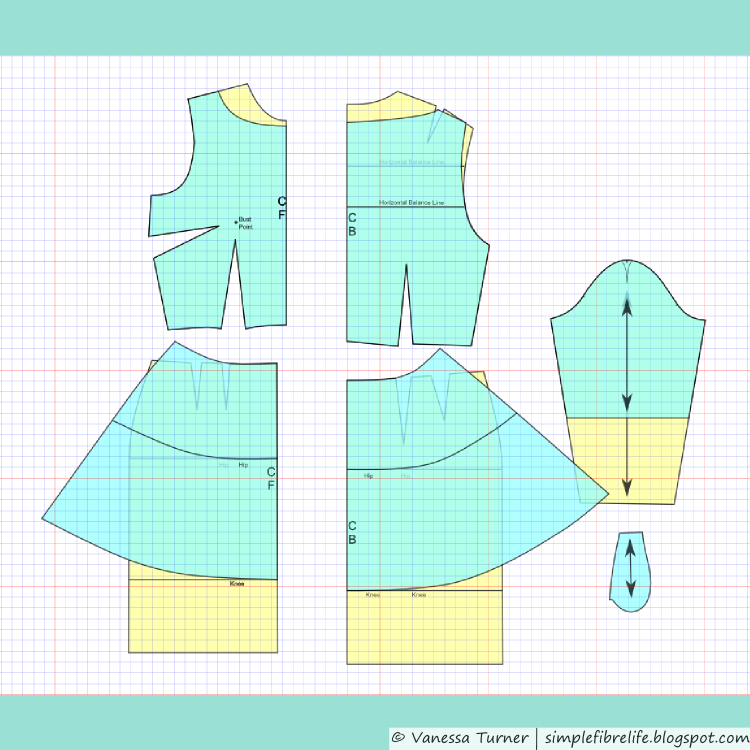
Here are the adjusted pattern pieces laid over the original block patterns.

~Final Comment~
I’m really glad I sewed so many toiles. It gave me a chance to work out how I was going to sew the final garment and was good practicing techniques like inserting sleeves and how best to sew inseam pockets.

Do you have any special fitting needs that make it difficult to buy RTW? 
If you could design your ideal party dress what would it look like?
Leave a comment below, I'd love to hear from you :)


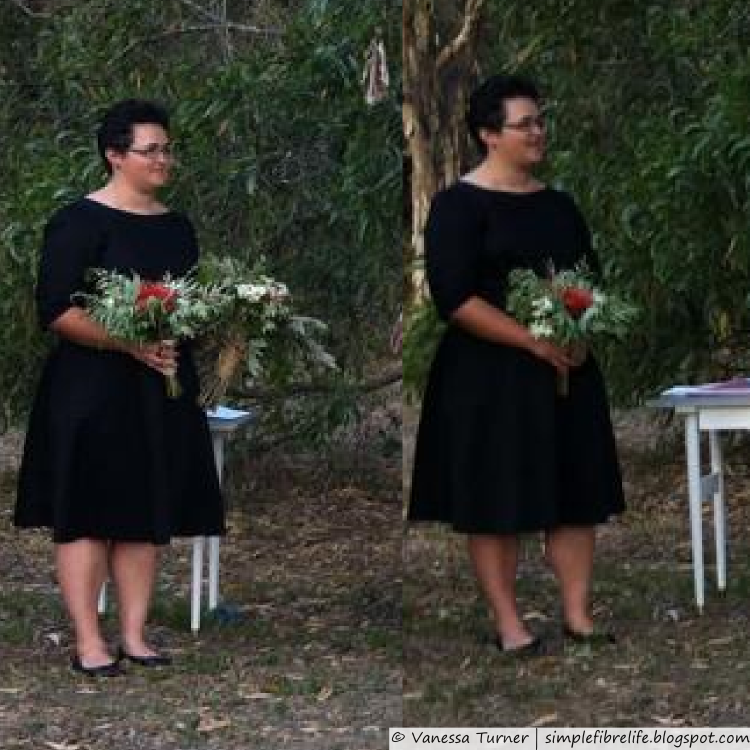
On the day I didn't get any photos of the dress and forgot to tell Mr S to get some for me.
So I 'borrowed' some from someone else so you could get a peak at the dress on the day.
  

Until next time,


Let's connect

Thursday, 30 October 2014

::Sewing::FO:: Special Dress for a Special Day


~Inspiration~
This dress is the climax to my year of sewing dresses for weddings. I was asked to be a bridesmaid by one of my closest friends early this year. Her only request, clothing-wise, was her bridesmaids wear black all the other details were up the bridesmaids. What an awesome bride!

I wasn’t 100% sure of what I wanted to wear. I just knew that I wanted to make my dress because then it would fit just the way I wanted and so I could be comfortable on the day and enjoy myself. I really like the bodice shape of the peony dress I made but I wanted a better fit through the shoulders and a slightly narrower neckline. So I thought I’d try drafting a bodice with a wide neckline using the blocks I made in pattern drafting class (yet to be blogged about).

In my usual fashion, I didn’t get started on my final dress until pretty late. I even bought a backup dress just in case I didn’t finish my me-made dress. I finished my me-made dress way ahead of time (ahem less than 24 hours) and even added a few handy details too.

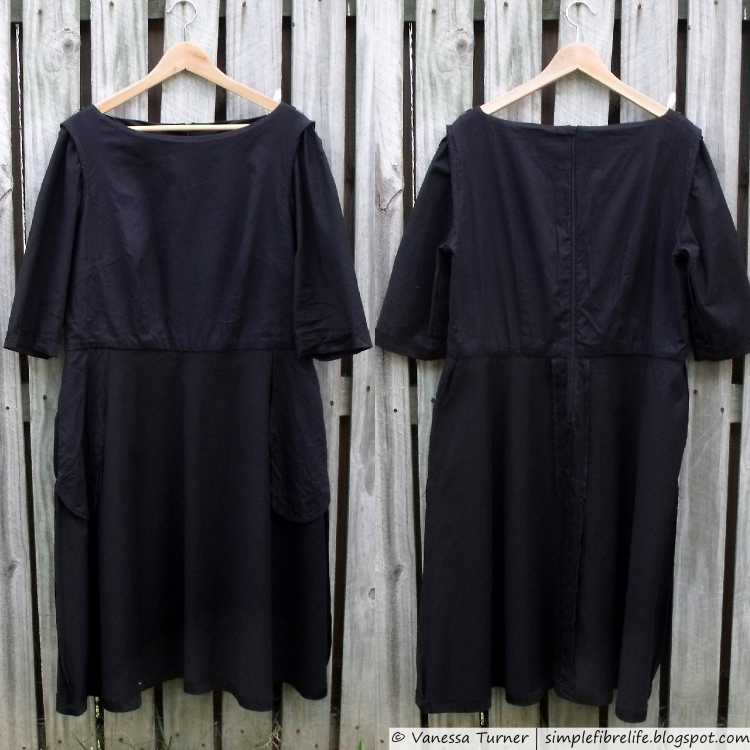
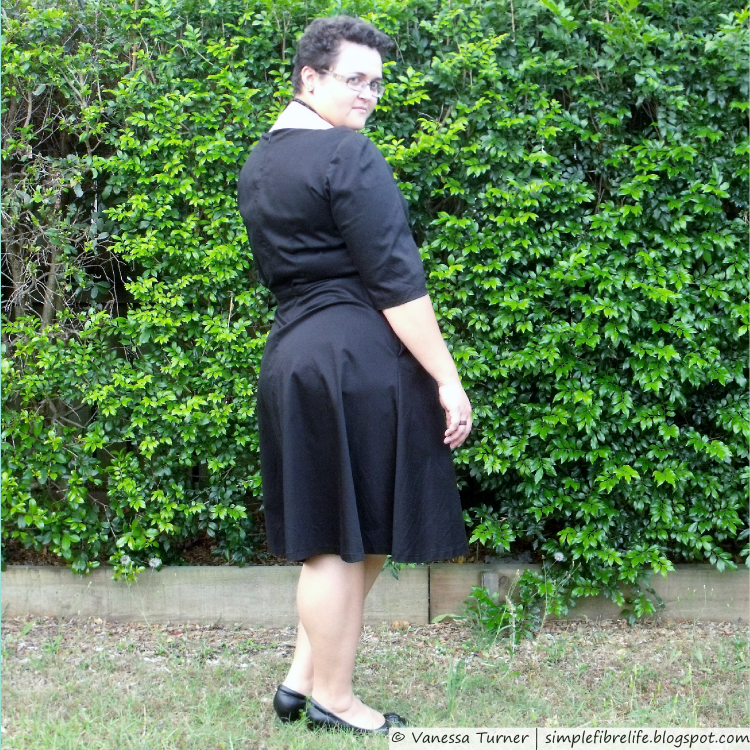
This dress has a bateau neckline, front waist and side bust darts and waist darts in the back. The bodice is the only part that is lined and the flared skirt has side seam pockets. Love me some pocket action! They were really useful on the day; somewhere to store written down ceremony readings and bridesmaid speeches :)

Didn’t need the backup dress in end, I’m glad too, coz that thing does not have pockets ;)


~Materials~
The fashion fabric is black stretch cotton sateen from Spotlight. I have other dresses made of the same fabric and I like the hand and drape of the fabric so I thought it would be ideal for a dress for a special occasion. The dress needed to be comfortable and breathable so I used a black cotton lawn to line the bodice and make the pockets, also from Spotlight.
I also used a 20” (51cm) black invisible zipper, some black snaps and of course some black thread :) – probably all from Spotlight

~Pattern~
Pattern & View
Self-drafted pattern using my block as a base – made in my size :)

Were the instructions easy to follow?
They sure were. I made them up myself and just followed the basic construction of a dress with a lined bodice

How was the pattern fit?
Using a block drafted to my measurements made it very simple to make this dress. However, I did have some large seam allowances when I cut the fashion fabric just in case I hit any snags while I was making it. You just never know how fabric is going to change the way a garment fits.

Would you recommend it?
I would totally recommend people making block patterns. Even if it was just to check the way commercial patterns are going to fit.

Would you make it again?
This patter is going to get used again. However, I think I’ll use a nice print to make a more casual dress :)


~Pattern Adjustments~
I started to write about the whole process I went through to make this dress and it was turning into an epic tale. So for this post I’ll just do a quick run of the style changes I made to my bodice block.

I widened the neckline, but made sure that my bra straps wouldn’t peek out.
I removed the back bodice shoulder dart.
The sleeves on my block were shortened to about elbow length.
A flared skirt was drafted from my 2 dart skirt block.

I’d like to record the whole process of making this dress; so I think I’m going to have to do another behind the seams post like I did for my S2444 - here and here.
More details to come :)

~Construction~
I made quite a few toiles in the two weeks leading up to the wedding. The final construction was very straight forward after all those toiles. I just followed the usual steps someone takes for sewing a dress with a lined bodice. Although I was a little cheeky and cut the back skirt pieces, bodice fashion fabric and lining fabric so the seam allowance was on the selvage, so need to finish those seam allowances.

Like the pattern adjustments, I’ll do a quick list of the construction steps in a behind the seams post.


~Changes I made this time~
  • As this was the first time I’ve made this dress pretty the whole dress was a change :P
~What I Like~
  • My absolute most favourite part of this dress are the bra strap carriers I sewed into the lining shoulder seams. I didn’t have to fiddle with my bra once! So great! (I used this method, it seemed the simplest and didn’t need any special equipment.)
  • The fabric is great, it looks good
  • Snap tab at the top of the zipper makes it easier for me to zip up on my own. Great alternative if you find sewing in hooks and loops too fiddly.

~What I Don't Like~
  • The pockets aren’t quite deep enough so things can fall out when I sit down. 
  • The zipper I used was a bit too short so there isn’t enough room for my caboose when stepping into the dress. I get into the dress from underneath.
  • There’s just a titch more ease in the waist than necessary. 
  • The fabric is definitely a fluff magnet, but I guess that’s one of the drawbacks of using dark a solid colour. Oh well, such is life. 

~Changes for Next Time~
  • Redraft the pockets so there are little deeper by raising the bottom of the pocket opening.
  • Use a longer zip
  • Nip the waist in little bit. Next time I might try constructing the garment with fronts and backs attached only at the shoulder and then sew up the side seam to adjust fit.
  • Perhaps make it in a patterned cotton sateen
~Numbers~
There was a lot of tweaking on this dress because of all the style changes that were made and had to be tested. So that time does add up…


PatternNA - Self Drafted-
Fabricblack cotton sateen $12.99 x 2.5m
black cotton lawn x 1m-ish – from stash
$32.48
-
Notions
  • Thread - 1000m – added to stash
  • 51cm (20”) Zip
  • Snaps – from stash
$15.99
$4.99
-
TimeTotal 30.5 hours (x $17-ish Australian min wage)
0.5 hours - fabric prep
5 hours - pattern adjustments
12.5 hours - sewing muslin
2 hours - cutting final garment
10.5 hours - sewing final garment
$518.50
Total
$571.96

That’s pretty expensive, but when you think about it. It’s a bespoke dress for a special occasion and really people have been known to spend HEAPS more. A lot of that time was spent perfecting the fit and the style changes so that time does add up; especially because I’m not a speed demon, I like to take my time :)

The eagle-eyed among you may note that I’ve changed the minimum wage from $16 to $17 that’s because the actual minimum wage is $16.87, so really I was cheating myself out of nearly a dollar an hour. We gotta give our time proper value, it’s finite.

~Final Comment~
I’m very pleased with the dress I made. The final result was a very plain black dress. Something I can dress up or down (mostly up). It got heaps of complements on the day and it was very comfortable on the day. I think this pattern draft is a keeper; I might even make a digital copy for keeps, maybe.


Have you made something special recently? What’s your favourite fancy fabric to use? How do you avoid bra straps peeking out? Leave a comment below, I'd love to hear from you :)

Until next time,


Let's connect