Showing posts with label Gift. Show all posts

Wednesday, 13 August 2014

::Crochet::FO:: Pink and Grey Pippy Slippers

Recently I've worn my Brown Pippy Slippers in the company of others and have received lovely comments about how comfy they look.

Side-note: I can't believe I've had these slipper for two years.
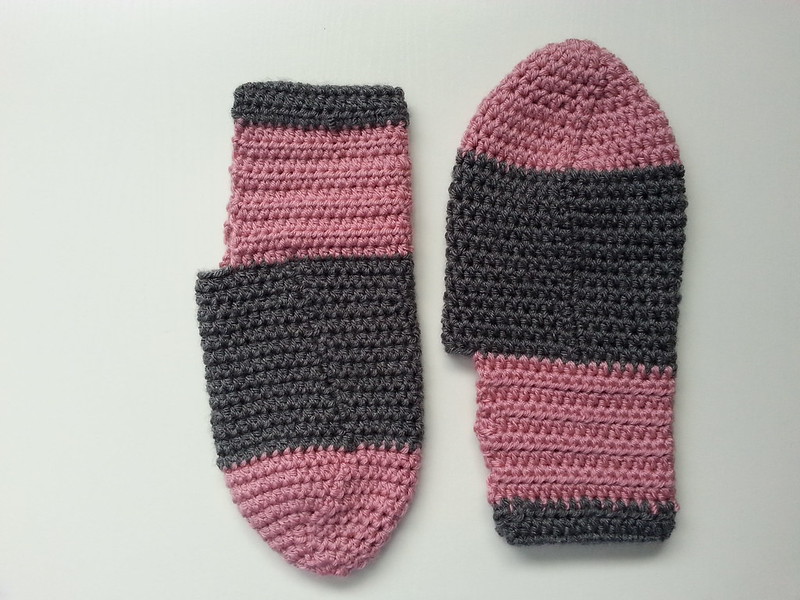

I'm not often a selfless maker, but when it comes to my nearest and dearest my selfish making defenses are compromised. (I'm a sucker, I know)
So when my sister put in an order for some slippers in hot pink and grey, of course I said yes; but they would have to be a made of what is in my stash, which meant they were going to be a dusty pink and grey.


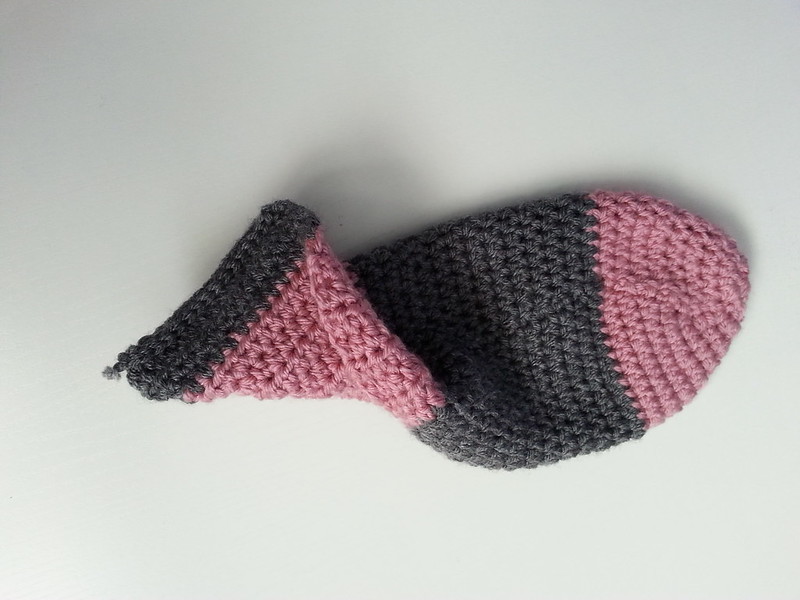
These seemed to come together pretty quickly. I might have something to do with making them both at the same time each segment at a time. So I did the goes of both, then the foot of both, then the pink heel and then the grey heel bits. They took me about a week on and off.

I do get a sore wrist from crocheting because I hold the hook like a pencil and flick my wrist to YO, but that's only if I go hard for more than an hour at a time. I find crocheting pretty mellow compared to knitting, because you're only working with one active stitch on the hook.

I made a few changes which I've made note of over on Ravelry.
Side-note: If you're on Ravelry say Hi :)

I crocheted the back seam instead of sewing it because that's how I roll :) and because when you're all snuggly and warm on the couch who can be arsed to get up and find a darning needle.

~Numbers~
I forgot to record how much time it took me to make these puppies, but I'm estimating about a 8 hours, but it was probably more.

I'm just estimating how much the yarn was worth because I probably didn't even use a whole ball and they from my stash anyway.

PatternPippy Slippers from Meet Me at Makes - found hereFREE
WoolIn Stash~$3.50
Notions NA $0.00
Time8 hours (* $16-ish Australian minimum wage) $128.00
Total
$131.50

Not cheap for house slippers, but it was still fun to revisit this pattern and do some crochet again.

~Final Comment~
These are pretty cute slippers. I like the colour combo, thinking about it know though I should have put the dark colour at the pressure points of the foot (toe and heel) because they'll probably get dirtiest.
I hope my sis likes them, uses them and appreciates them :)

Question time:
 
Do you crochet?
Do you begrudge making for others?  
What was the last thing you made for someone else?
Leave your answer in the comments :)

Until next time,


Let's connect

Friday, 7 March 2014

::Sewing:: Practical Present - Nifty Peg Bag

Wow, we're already in March. When the heck did that happen!
I'm still totes gonna tell you about a handmade gift I made for my Mum last Christmas :)

When I visited my mum late last year I notice that she was using an old shopping peg to store her pegs. So I decided I would make her a peg bag, but there were a few features that I wanted it to have to set it apart from the generic ones you can buy in the shops. After looking at the interwebs to see how other peops had made peg bags I decided to draft my own.

It needed to have a curved bottom. I hate it when you're down to the last few pegs in the bag and you can't find them because they're hiding in the corners. Ok hate is a strong word. It's a nuisance.

It needed to have a fold over tab at the top to hang it from either the clothes line or a clothes hanger. I could have sewn it to a clothes hanger, but what if the hanger needed to be replaced?

It had to be deep and have a large opening so that it could hold lots of pegs and be easy to use.

So with a basic shape in mind a drew up a small scale of the pattern and tried to figure out the best way to sew it all together. I wanted to find a way to sew it quickly but make sure that it was well finished and robust.

I took some fabric out of my stash (yeah stash-busting) and made up the final product.

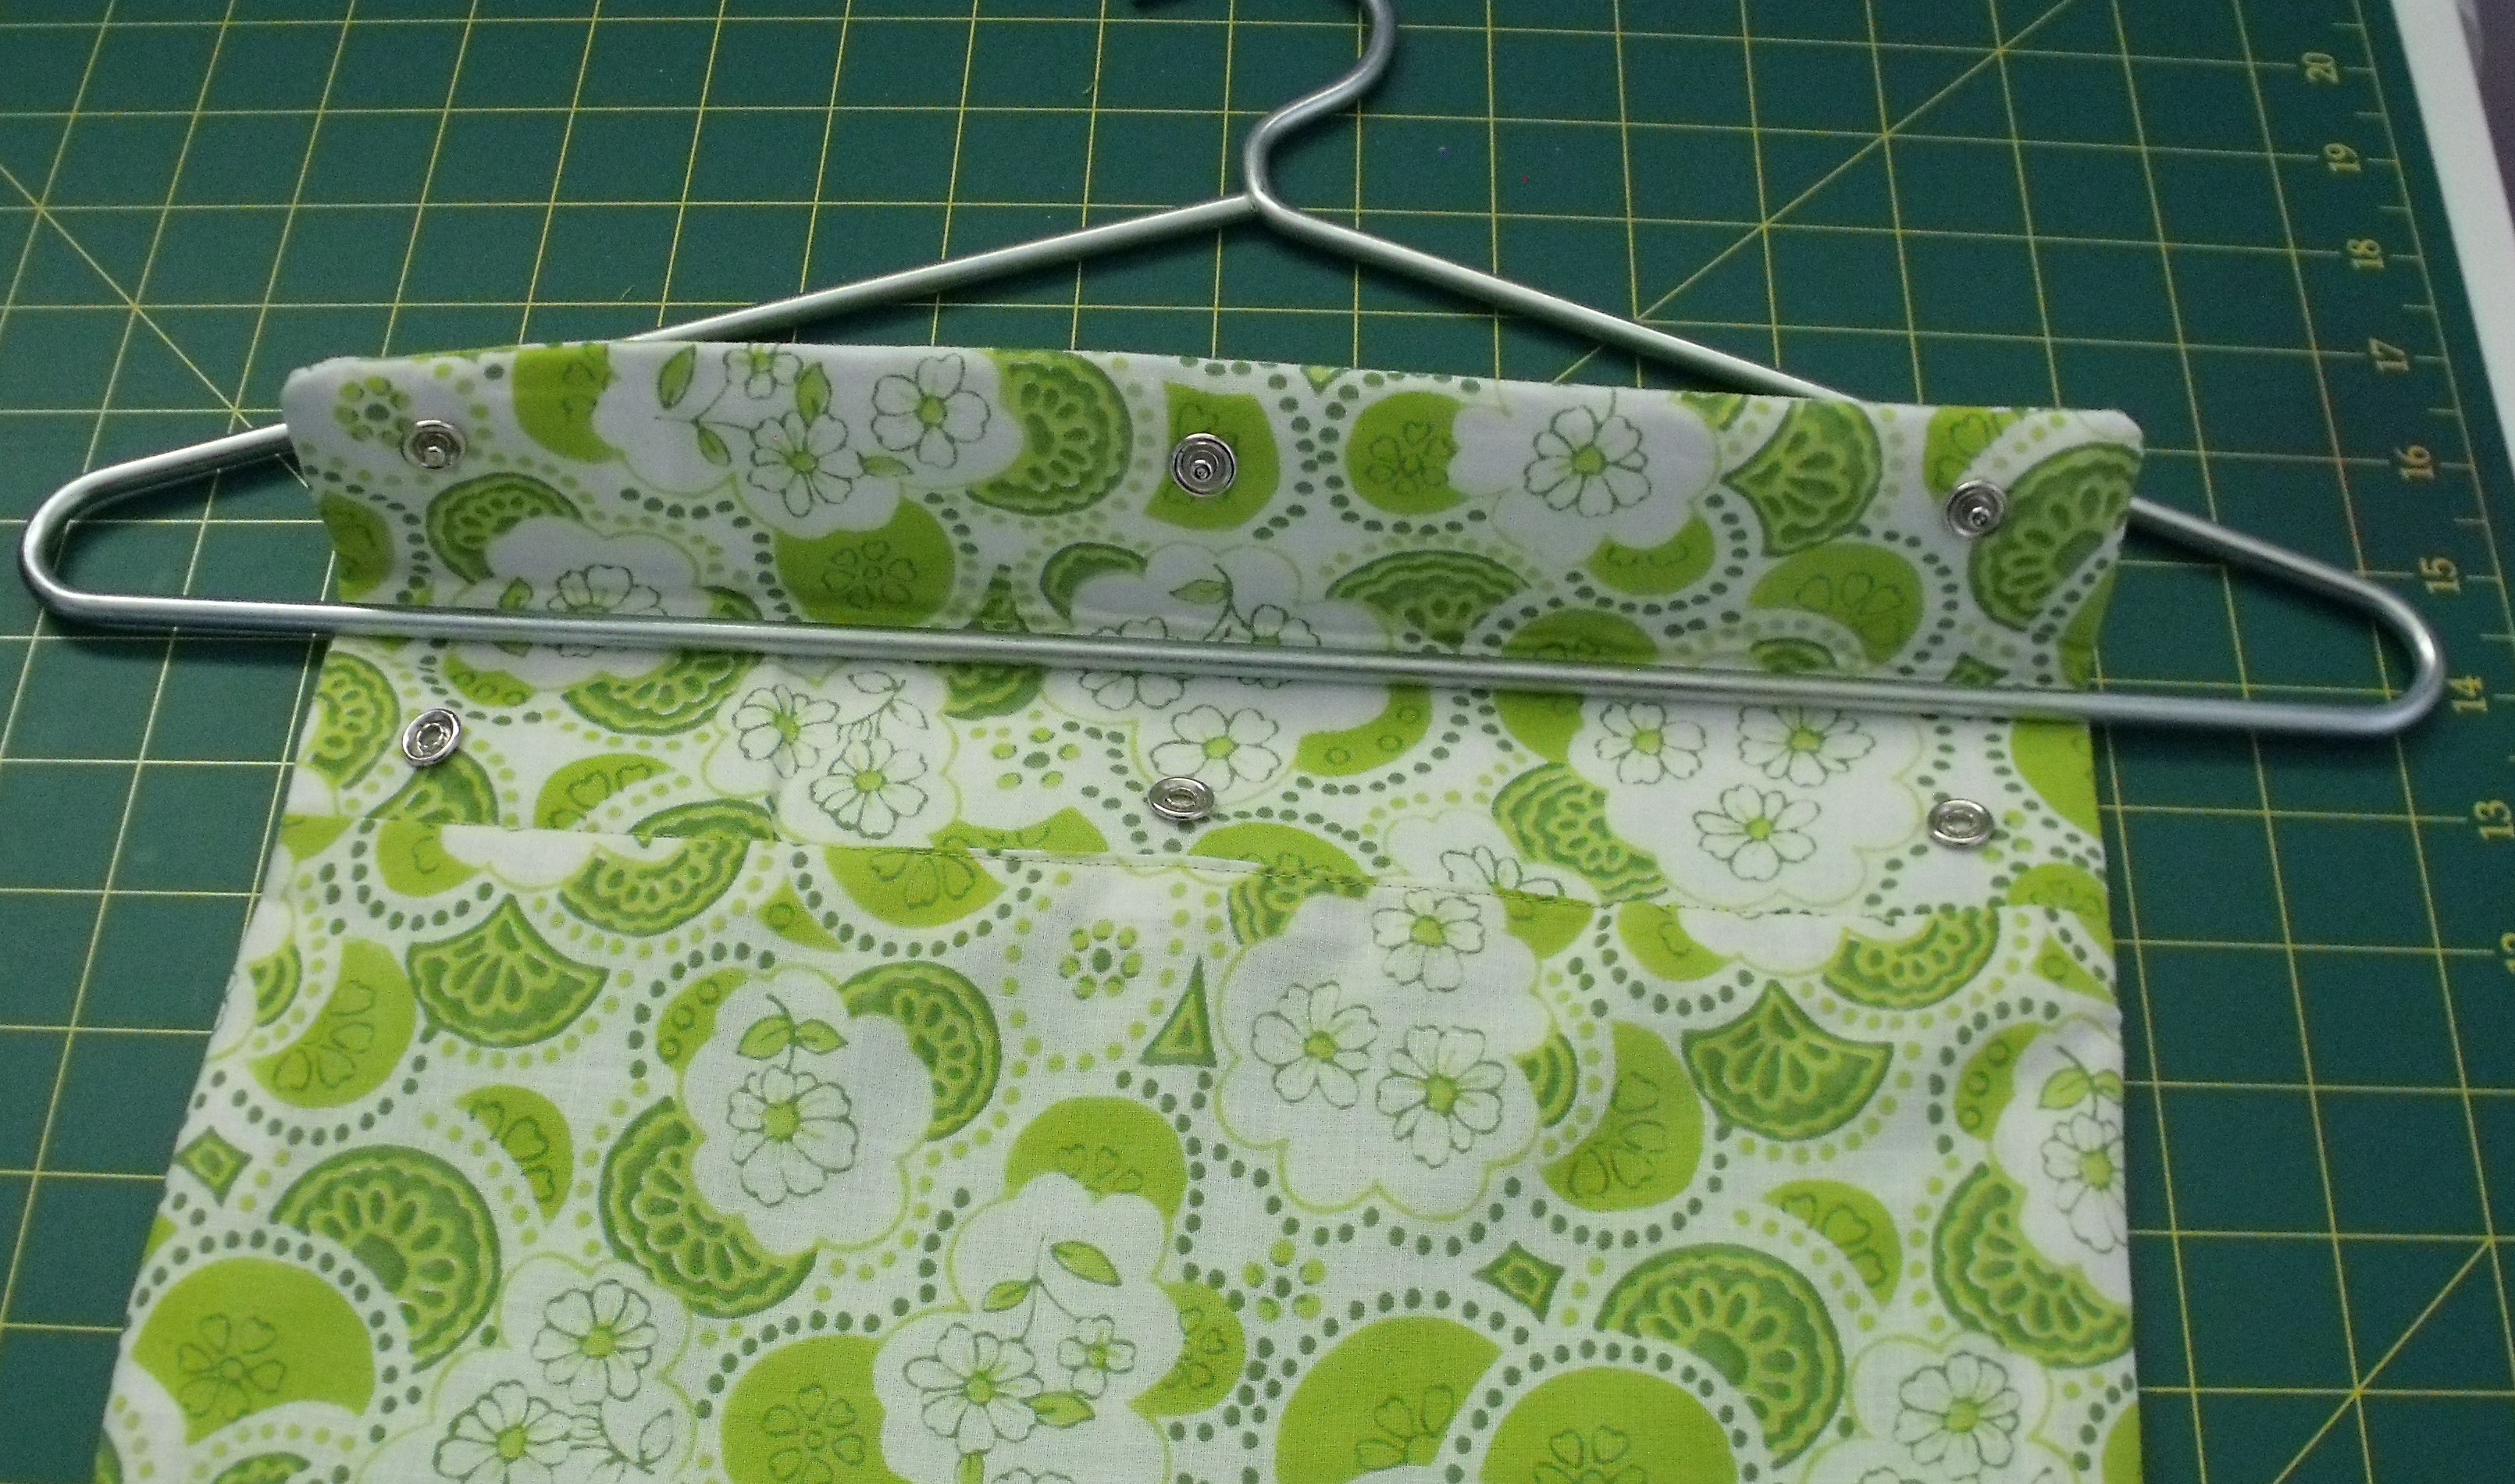
Peg Bag on clothes hanger
The peg bag is fully lined with an interfaced fold-over tab at the top. That way it can be attached to a clothes hanger or the clothes line.

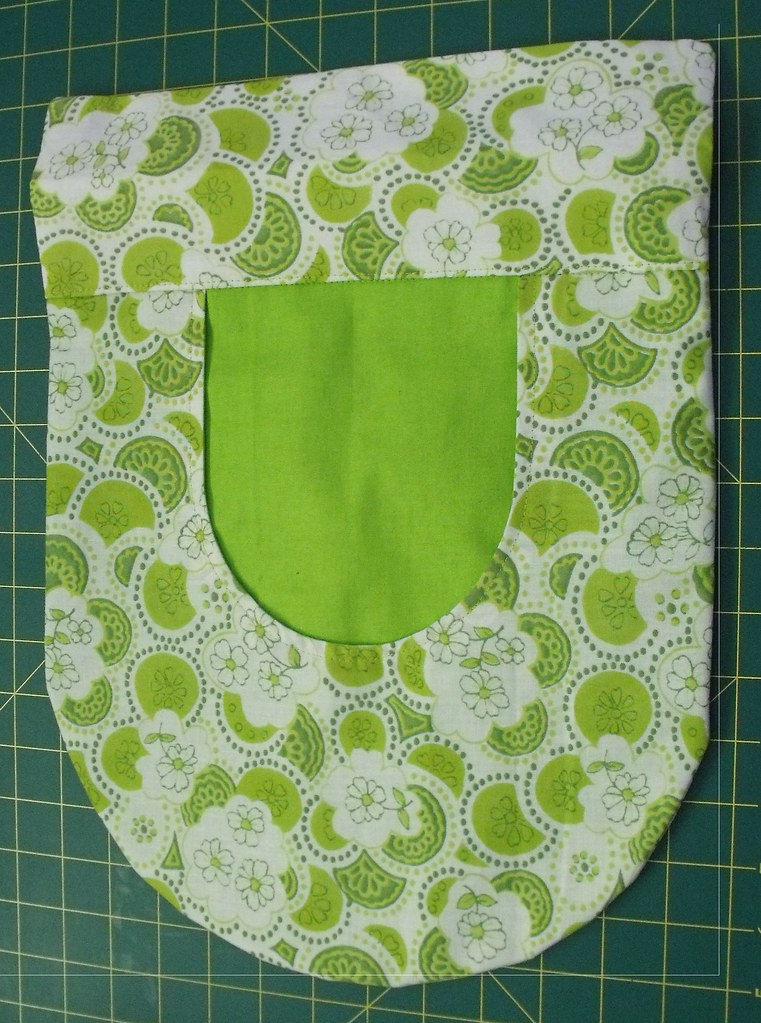
Peg Bag front
My mum is a big fan of lime green so I thought I'd personalise it with some interesting retro printed mystery fabric from my stash for the outside and a lime green lining. That's the whole point of handcrafted gifts is it; you can personalise it.

To make the bag I cut out 6 pieces - Opening outer & inner; Back outer & inner; Fold-over tab front & back. I interfaced the Fold-over tab back.
I sewed the hand opening by placing outer & inner RST and sewing around the curve.Then clipped the curve and turned RSO and pressed the opening. The back inner was attached to the opening inner at the bottom curve.

Peg Bag
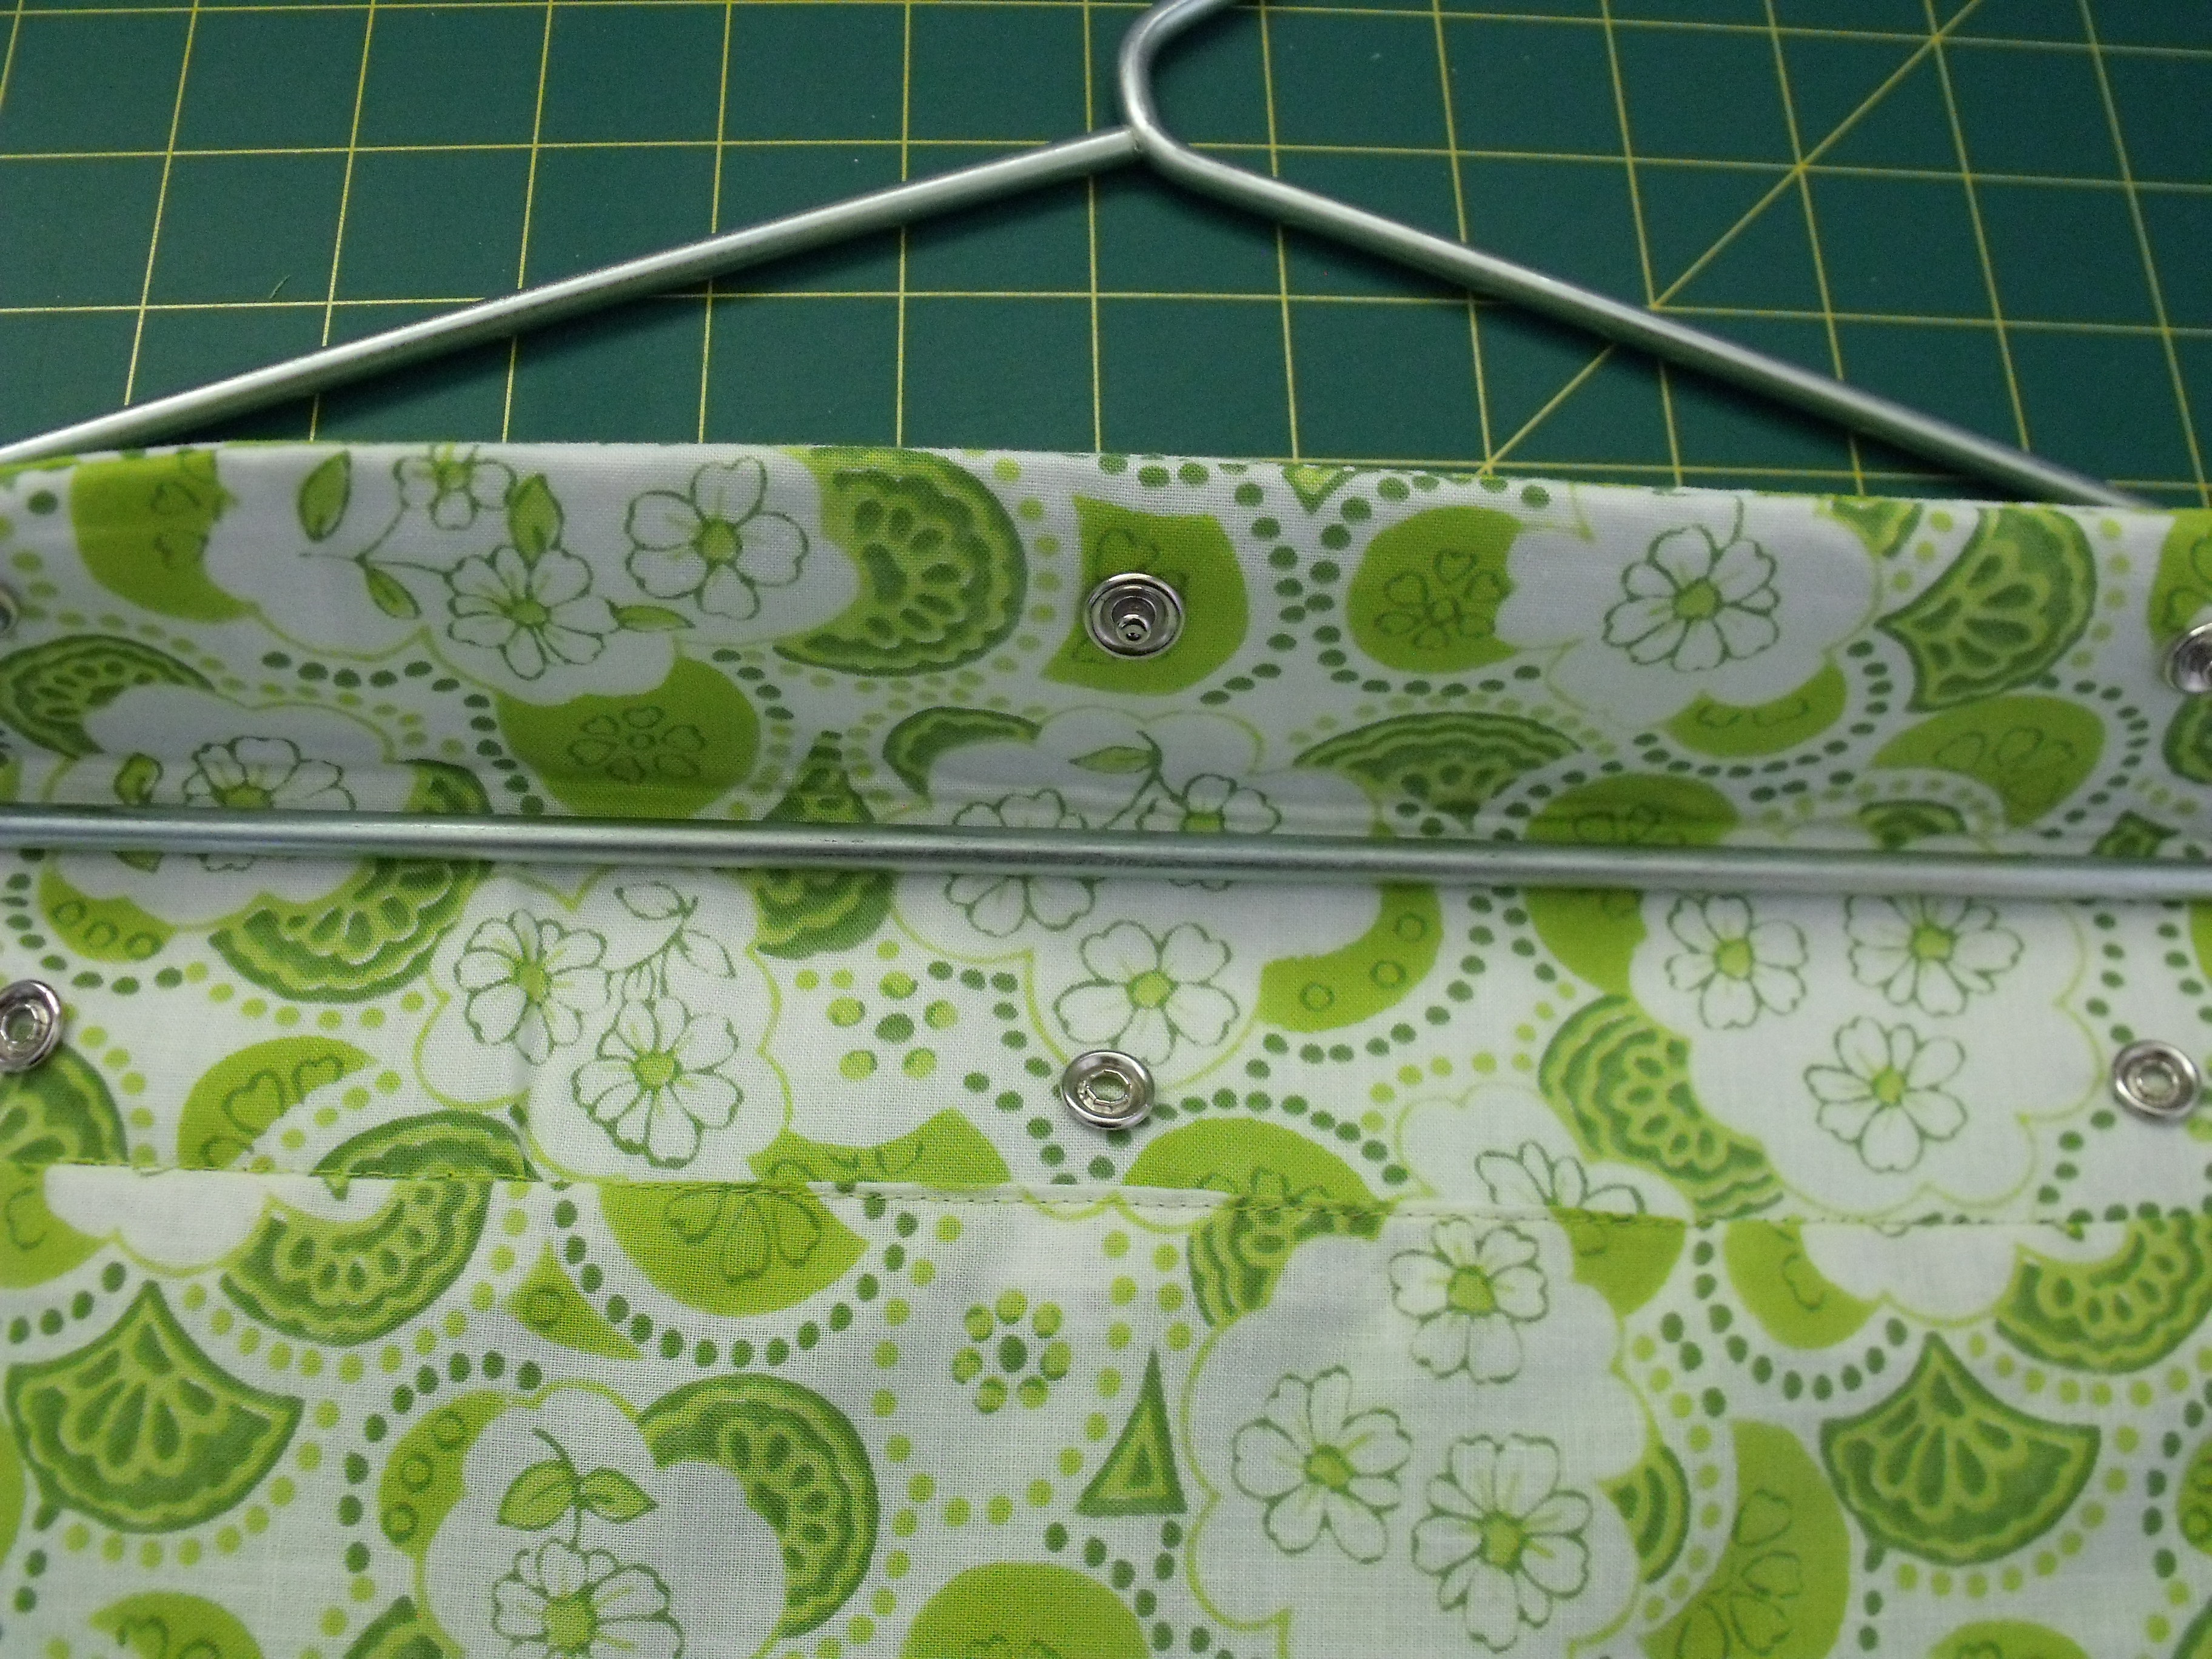
I didn't want the snaps to be seen from the outside so I attached them to the Folder-over tab back. Then I sewed Folder-over tab front to the top of the Opening outer and lining pieces and the Folder-over tab back to the top of the  Back outer, making sure to leave a gap in the middle (you'll see why in a tick)

Fold-over tab
With RST I sewed the Front and the Backs together all the way around the outside. Then, with corners and curves clipped, I turned it the right way out through the opening left between the Back Outer and the Fold-over tab back. I closed the gap in the back by stitching in the ditch at the front, but it would have looked nicer if I had sewn it closed by hand using blind/ladder stitch.

Close up of the snaps on the Folder-over tab
If I were to do it again. I would try to make the bag a bit bigger and make hand opening a little wider and lower. It would also be a good idea to use plastic snaps instead of metal.

I was in a bit of a rush to make this puppy so I forgot to take a picture of it in use. Oh well. I'm sure I'll make another some day. Thinking about it this Nifty Peg Bag could be used in a bunch of other ways. I could hang it in my wardrobe to stow things away in. If you're someone who likes to plan what they wear the day before you could put the accessories you want to wear with an outfit in the bag then hang the outfit over it. Of it could be hung from the wall and stow goodies in it. Yeah, it IS a Nifty Peg Bag. I will have to make another.

Do you make presents? Would anyone be interested in a pattern and tutorial?
I'd love to hear from you, leave a comment below using Disqus :)

Until next time,

Lets connect

Tuesday, 7 May 2013

::Quilting:: Stacked Coin 'Treasure' Quilt

This post is well overdue. I wrote up great big post about this aaages ago and before I got a chance to post it for some reason the internet farted or something and the post vanished.
On with the post...

A friend was having her first baby (the baby has been had and is 4 and a half months old - see what I mean by this post being overdue) and the lovely Sarah of Stitching Lyrical suggested we collaborate on a quilt for the impending arrival.

I agreed and immediately went on the hunt for a project that would be simple to collaborate on, yet effective. I stumbled upon this tutorial for a Stacked Coins Baby Quilt. This was ideal because Sarah and I could sew a few stacks each and then we could assemble the stacks and spacing strips later on.

Treasure Baby Quilt for baby Packitage
Chained Pieces
One lunch break Sarah and I went to Lincraft  in the city to get some fabric. As the gender of the bub was not to be revealed. we got a stack of  "warm" coloured charm squares and some navy fabric for the background and some mottled yellow fabric for the binding. A great combo for a "unisex" quilt I think.

Treasure Baby Quilt for baby Packitage
Pieced Strips
The colours are not typically "baby", but I think that makes the quilt timeless. The quilt can be used the bubba and then they can use it as throw on the lounge later on.

Treasure Baby Quilt for baby Packitage
Here is the top all pieced together and ready to quilt.
(Being held up by the lovely Sarah)
Sarah and I pieced the coin stacks for the top together using light thread. So I wasn't sure what colour to stitch the quilting in. I ended up going with a light colour.

Treasure Baby Quilt for baby Packitage
Close up of the quilting
I'm not sure if I could quilt a whole queen sized quilt using my sewing machine. This quilt was quite cumbersome to baste and quilt and it's only a baby quilt. I've bought the Craftsy class Quilting Big Projects on a Small Machine but haven't watched it all yet. Maybe there'll be some tricky tricks I can use in future.

'Treasure' Quilt - Front
The finished quilt front
I originally thought that I would just quilt vertically up and down the the "coin stacks". So I echo quilted along the sides of the columns. I didn't stitch in the ditch because it was just a little too tricky to wrangle the quilt and keep the stitches in the ditch. However, Sarah's mum (who is a quilting guru) said we should quilt horizontally as well. So Sarah quilted around  couple of the "coins" in each stack.

'Treasure' Quilt - Back
The back of the finished quilt.
Sarah's mum used her great handwriting skills to write a little note for us on the strip we used for the back of the quilt. We named the quilt "Treasure".

Unfortunately, we didn't get the quilt finished in time for the baby shower (although we certainly did try, we sewed right up to the start time of the baby shower, but alas by this stage we still didn't have the quilt bound). However, we were able to give it to her at the first meeting of the the little baby boy.

That my friends is the tale of the first quilt that I've made...and the first quilt I've given to anyone.

Until next time, I hope you're making lovely thing for the lovely people around you,
Vanessa xo

Thursday, 18 April 2013

::Sewing:: Housewarming Hot Pads


About a month ago I went to a friends housewarming. I wanted to made her something, but it had to be something useful. I'm not a fan of giving people frivolous useless things. I like the idea of people using the things I give them and thinking "Ooh, that's right, Vanessa gave me this"

So I wracked my brain, "What could I get someone who has just bought their own home..." I finally came to the conclusion that I'd make some hot pads. You now. The things you put under a hot pot to protect the kitchen bench. I've found that you can never have too many. Especially when entertaining.

I stumbled upon this great video. Then along my journeys I found out about Insul-bright. So I popped down to my local Spotlight & picked up some Insul-bright and some lovely fabric then got
home & set to work. After lots of cutting, struggling with sewing lots of layers and maybe a little (read: a Iot) of cursing l made 2 hot pads.

I ended up sewing the layered top together first then sewing all the layers and Insul-bright together. The hot pads had 2 layers of Insul-bright to make sure that as little heat as possible got through. I wouldn't want my gift to be faulty! I think next time I'd layer the top, then a layer of natural batting-like cotton or bamboo, a layer of Insul-bright then the bottom layer.


I sneakily (or lazily) popped the gifts into a container I was returning to the hostess. She didn't find them until the next day when she had sometime to do some tidying. :)


Until next time, I hope your making gifts for friends,
Vanessa xo

Sunday, 30 December 2012

::Crochet:: Starry Coasters

In my last post I showed some coasters that I gave to my sister. Here is the story of how they came to be.

I'm a member of a group called CWA. Now we're not a part of the Country Women's Association, but we are a Crafty Wonders Alliance (I just made that up). :)
The point of the group is that we get together and teach each other about our mad skillz. So an example of this is my friend Sarah of Stitching Lyrical did a session on crochet (she is a wizz with a hook and a ball of yarn) and a session on jam making (it was simpler to make than I thought.).

Anyway, anyway, anyway. I was due to have a session at my house in October and I decided that we would do crochet. I was going to do knitting, but I thought that it would be better to do crochet everyone seemed to enjoy the crochet session Sarah had and I thought it would be nice to continue with it. I pondered about what we could make for some time, I did some searching on Ravelry and then a plan starting forming in my brain. Veeerrryyy ssslllooowwwlllyyy. I found this pattern and then I found this tutorial.
I made this tester and I new this was going to be the pattern to use.


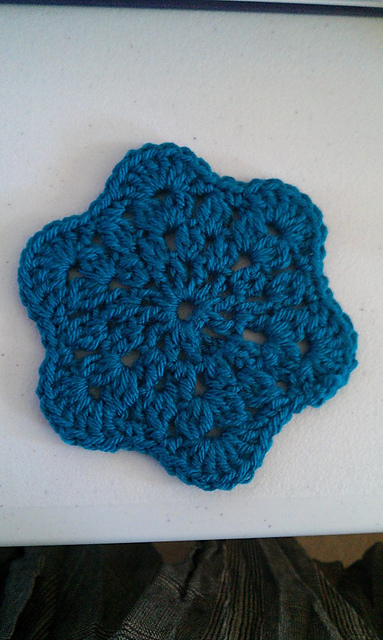
These star shaped coasters would make great Christmas presents. A great idea that Sarah came up with was to put them in watered down glue gently squeeze out the excess and then hang them on the Christmas tree as decorations. I guess you could do this with all sorts of crochet/knit items. The mind boggles at the possibilities. :)

I was telling my sister about me crochet coasters and I showed her one that I'd made. She requested some and I hauled out my yarn stash for her to select some yarn.

I made all 6 of her coasters in one evening. That's right. I am a machine. Check it!
So that is the story of how I made my sister some Starry Coasters for Christmas.

The End.

Until next time, I hope your making things to put drinks on too,
Vanessa xo

::Sewing:: Christmas 2012 Giftings

Hey there!

I hope you had a great Christmas. This year I made most of my/our gifts. I did it because I am not a big fan of shopping and I'm even less of a fan of the crazy pre-Christmas shopping frenzy.

Using the free Craftsy course Bag-Making Basics: Reversible Tote & Zipper Pouchwith Kristin Link I made my sister, MIL and SILs a zipper pouch each.

Here are my fabrics all cut out and ready to go.
Christmas 2012 Giftings - Zipper Pouches - raw materials
Exterior, lining and zippers all ready to go!

When I use interfacing I like to cut it slightly larger than intended to make a cleaner finish once I've trimmed it down. So an improvement on the process for future would be to cut out all the external pieces as one block of fabric. Fuse the interfacing and then cut the separate external pieces to size. This would mean that I could avoid this mess of interfacing scraps after trimming it down all the individual external pieces after fusing the interfacing to it.
Christmas 2012 Giftings - Zipper Pouches - Interfacing Scraps
All my interfacing scraps. And this wasn't even all of it!

Making four pouches at the one time meant that I was able to do some chain sewing.
Chain sewing pouch tabs top-stitching.

Here are the finished pouches. The tabs are made of the same fabric in the lining.
Christmas 2012 Giftings - Zipper Pouches
Clockwise from top left: my sisters; MIL; younger SIL; older SIL
The mushroom one went to my sister who picked out the fabric on a trip to the fabric store a few days before. The white and teal one went to my MIL; black one with doors and keys went to my younger SIL and the teal one went to my older SIL. For more pouch pictures check out my flickr.

For pouch fillers I gave my MIL and SILs a travel size bottle of The Body Shop body wash and either a loofah, face chamoise or shower cap. Here are the crocheted coasters I made for my sister and popped in her pouch. Ravelled here.
Crochet Coasters
Six crocheted coasters for my sis

I gave my sister's BF and Mr S's nephew a Christmas stocking each. The plain calico one went to Mr D (my sister's BF) and the other other one went to LP (the Mr's nephew). Mr D got a gift card (the thingy sticking out in the picture) and I filled both of the stockings with lollies and baste stitched the tops closed for ease of transport.
Christmas 2012 Giftings - Mini Stockings
Mini Christmas Stockings FTW!
After I took the picture I added a crochet chain loop to each of them so they could be hung for next year.

Here are all my pressies ready with gift tags ready for gifting.

Christmas 2012 Giftings - Gifts Ready!
Gifts made? Check! Gifts tagged? Check! Alright, let Christmas commence!

I have a couple more gifts to give, but as they haven't yet been delivered to the recipients I best not disclose their details just yet.

Until next time, hope you making lovely things for the ones you love (especially yourself),
Vanessa xo

Monday, 10 December 2012

::Sewing:: Sturdy Striped Tote


The Mr's nephew is turning three last weekend and I gave him something that I've been working on for longer than he has been alive. If you follow me on Instagram (I'm @simplefibrelife) you'd have seen glimpses of it.


I gave him a rainbow granny square throw. I was thinking about how I was going to wrap his present. Then I remembered the Reversible Tote Course on Craftsy. I thought it would be a neat idea to give him his gift in another gift.

So on Friday evening I made a tote following the instructions from the free
Bag-Making Basics: Reversible Tote and Zipper Pouch Craftsy course.


Well, I did make a few changes. Seeing as I was just using what I had on hand I had to cut the the external pieces to different lengths, but I made sure (at least I thought I had) to match the 16 x 17.5 inches of the lining piece. As I was only working with fat quarters I cut the external pieces as 16 x 9.5 inches and 16 x 8.5 inches; I forgot the 1/2 inch seam when sewing the two pieces together. Making the final piece 16 inches. DOH! Oh well it wasn't too much of a bummer.

I also fused some iron-on interfacing to the exterior of the tote after I had sewn the seam for each of the exterior panels, but before I joined them. When I joined them I sewed up both sides, attached the straps, then I sewed the bottom. Speaking of the straps, I'm a perfectionist so I used my adjustable edger foot to do the top-stitching along the long edges of the handles.

When I sewed the lining together I left a whole at the bottom to turn the bag out the right way; that way I wouldn't need to leave a gap when I sewed the lining to the exterior. When I boxed the corners of the lining and exterior I made the base of the bag 5 inches wide as I really wanted a sturdy bottom on the bag. I also omitted the pocket.

I made something from a Craftsy course! Yay! It makes me feel a little better after my last post. Are you crafting gifts this season? If so, what are you making? Leave me a comment :)

Until next time, I hope you're improvising on your projects ;)
Vanessa xoxo

Monday, 30 July 2012

::Sewing:: FO Pleated Pouches for my lady friends :)

Wowzers! It's been forever since I last posted. My excuse is that I've been off in the land of moving house. And my oh my it's a very busy place.

I haven't done a great deal of crafting lately, but last weekend I made a couple of cute pouches for a couple of my lovely friends.

My friend Jess had her birthday last week and her sister hosted a high tea for her on Sunday. My friend Sarah and I were invited and we didn't know what to get the birthday girl. On our Thursday lunch break we put our heads together and came up with the idea of getting her a bag full of movie-watching munchies and a gift card so she can buy a DVD of her choice as Jess is very much a movie buff.  Sarah was to make the bag bag out of a pillowcase. Have a look at the bag on her blog-Stitching Lyrical.

I really wanted to contribute something I'd made as well seeing as Sarah was taking some time out of her schedule to make something. So I thought I'd make Jess a little pouch to go with her bag. By chance the Mr wanted to go for a drive and I suggested we go to Spotlight. They were having a 30% off fabric sale - but I didn't mention that ;)

Jess likes elephants so when we got to Spotlight I gave the Mr instructions to keep an eye out for some elephant fabric (Sidenote: I've found the best way to keep the Mr occupied while out shopping for something he's not interested in is to give him a specific task or something to look for - but don't tell him that ;) ) He found some fantastic fabric with elephants on it and I picked this red and white one. I like the red white combo and I thought the size of the elephants would suite the pouch I was making.

While I was at Spotlight I picked up a few other things as well - naturally :) . I picked up a pack of fat quarter quilting cottons and when I was flipping through them I found this great pebbley fabric and I instantly thought it was the sort of pattern that Sarah would dig.

Once home I shoved my fabrics in the washing machine so I could press it and use it in the coming days.

To make the pouches I used a Pleated Pouch Tutorial by Skip to my Lou which I found via this great Gathered Clutch Tutorial (I think I'll have to make this soon!).

The Pleated  Pouches I made for my lady friends <3


I thought if I was going to make one pouch I may as well make two so I made the elephant one for Jess and the pebbly one for Sarah. They both turned out pretty great, even if I do say so myself. The only hiccup that I came across was my zippers where either too long or a little too short so I just extended the too-short zippers so they would fit in the opening by adding fabric at each end. I think I found this technique on Craft Passion maybe in this tutorial.

(Sidenote: I'm a bit of a fan of Craft Passion, she does some amazing things and I love her tutorials for purses and bags and...and...and... well it's all good :) )

I'm hoping to get my creative space in order soon so I can get back into creating things again and perhaps finishing off some projects too. The Mr and I did a furniture shuffle in my craft room last night so I'm one step closer to creating order in the chaos.

Until next time, I hope you make something lovely to give to someone special to you,
Vanessa xo

Monday, 12 December 2011

How-to: Button Brooches

Hi,
How are ya? How are you faring so far this silly season?
I'm doing well. I have a few gifts sorted out, but there are a definitely a few more that I need to find.

Today I'm going to show you how I made myself a simple and sturdy button brooch.
(I would like to apologise in advance for the horrible photos. I made my brooch at night. I'm most creative at night I, think I need to sort out a better lighting system for night photography. Anyway, I digress.)

At the beginning of the year I bought a big packet of Beutron buttons. They have been sitting in my stash for aaages. About a month ago I dusted off the packet . Because I'm a little crazy, I sorted them into their colour groups. 


While I was playing I found three that fit in each other and looked nice.
So I decided to make a brooch with them.

Here, I'll show you how I did it. Firstly here are the three buttons I found.


I grabbed a bottle of gem bond. But you can use any sort of permanent glue you have lying around. Just as long as it dries clear.


I dabbed a spot of glue into the middle of the blue button and placed the green one on top, making sure to line up the sewing holes as best I could.  I did the same with the heart button
(I took photos of these steps, but they came out sooo hideously blurry and I didn't realise until too late!)

Once the buttons are glued together I grabbed some thread and a needle and sewed a cross through the sewing holes. Next time I do it I'm going to wait until the glue dries, my needle got all sticky and yuk! To speed up the process I would probably use thicker embroidery thread.

This is what the front looked like when I was done sewing.

Onto the back, where all the pinning happens.
So on my first attempt I thought I'd just glue the brooch pin directly onto the button. FAIL! It just wouldn't stay in place.
So I glued a circle of felt onto the back of the button.


I then glued the brooch pin onto the felt. BTW these are very small brooch pin backs.

And then glued a small rectangle of felt over the brooch pin to give it a nicer look.

And that's it. Ta-da! Button Brooch complete.

I've since made a whole bunch of two-button brooches for stocking stuffers this Christmas.

What do you think? Would you wear one of these puppies?

I'm interested to know. When are you most creative? Why is that?

Monday, 21 November 2011

Kanzashi Brooch


Hello there!
How are you doing? I'm doing well, but I kinda feel like this is the calm before the chaos that is the festive season.

I mentioned in my last post that I was getting all laissez-faire about housework and got all crafty up in my own grillz. I showed you this puppy in my a couple of weeks ago.


I thought it was about time I showed you how and what I made.
This is the back. Very profesh! 


First and foremost I got the idea from Kanzashi in Bloom (book website here) by Dianne Gilleland of CraftyPod fame. I really love this book; it's full of fantastic projects, that are pretty and I would actually make.

On to the brooch...I started by folding 6 rounded Kanzashi petals (I could show you how, but there are so many tutes online on how to do them, just Google 'Kanzashi rounded petal') and then trimmed them too.

Taking a loooong piece of knotted thread and a needle I sewed the petals with the needle catching all the foldey layer bits at the bottom.


I like to stack them on to the needle in lots of three. I don't know why, I just do. :)


Pulling the needle through I left a long tail at the beginning


If I only sew one row I find the flower goes a bit flopsy, so I like to sew through the petals again at the top to catch all the top foldy bits. Making sure to leave a lot of loose thread between the bottom and top row of sewing. You don't have to if you don't want to. I'm just a bit insecure about having a flopsy flower :)

Then I snipped the thread between the top and bottom rows.

Taking the long loose tails of thread from each row of sewing; I tied them using a surgeons knot. Making sure not to tie it too tight, just tight enough to bring the bottom of the outside two petals together, but not so tight they squish together (I forgot to take a picture when I had tied the thread...Oops).

I played with the petals to make sure they sat nicely when the petals were folded and when they were spread out like they will be when the brooch is finished.


The next bit you don't have to do at all. I just did it because I found that with the first Kanzashi brooch I made the fabric I used wasn't stiff enough and petals just collapsed back into their folds. So with this brooch I thought that gluing the petals together a bit might stop that from happening.

I dabbed a spot of fabric glue between the petals and hold two petals together for about a minute and a half. Then I did the next petal.

I glued three petals together and then glued the other three together. I held the petals together for a bit and then put them aside to dry.

While the glue was drying I took a deodorant cap and used it to trace a circle on some felt.

This was to be the backing of the flower. So I had to make sure the circle wasn't too big and then I cut it out.

I needed a rectangle of felt to cover the back of the brooch pin back. So I just sized up how wide and how long a piece a needed then snip-snipped the piece I wanted.

I glued the brooch back to the felt circle using some gem glue. Gem glue is the best kind of glue to stick something hard and non-porous to fabric. I put it aside to dry and went back to gluing my flower.

I put a dab of glue between the last two unglued petals and held the petals together for a bit.

While I set the flower aside for a bit for the glue to cure, it's time to finish the brooch back.

Open the brooch back, take the rectangle of felt, glue it over the brooch pin back using fabric glue and set aside.

Once the glue is dry it's time to try on a few buttons! Yippee! It's really interesting how much difference the button makes to the flower.

Too phafy!

Too small and black!

Just right! 

With the button chosen I was just a matter of putting all the bits together.
I started by gluing the felt circle to the back of the flower using a 'generous' amount of fabric glue.

I set the flower aside to give the glue time to dry.

I tried to sew the button on, but I pulled too hard on the thread and it pulled the thread through the fabric of the flower. I didn't want to risk the fabric fraying so I abandoned that idea.

To stop the fabric from fraying I put some fray stopping glue in the centre of the flower and set it aside to dry.

To make it look like the button is sewn on I sewed some thread onto the button.
I put some gem glue on the button and pressed  and held it onto the flower.

And there you have it. A lovely Kanzashi Brooch.

And here is the back.

I gifted this one to my mum. Bit I think they're a great idea for stocking fillers.

And in other news on Friday I drove to my favourite craft store. Here is a pic of my haul.
Loving the bright fat quarters!


That's all folks! Until next time, do something creative that makes you smile.
V xoxo