Showing posts with label Sewing. Show all posts

Wednesday, 31 December 2014

::Sewing::I've got a need for knits

I have a couple of makes that I want to sneak into 2014. I've had the leggings all made up for about a month (and I've had this post all ready to go for about that long too), but I haven't gotten around to taking pictures until today. That was mainly because I was hanging out to make a tee to wear as well. I finished making a tee yesterday so I got off my behind and went out to take photos using my new camera(scroll to the bottom of the post)! :) I couldn't wait until the 'golden hour' to take my pictures today so your getting 'in front of the shed door' pictures :)

A knits ensemble. Oooh yeah!


Self-Drafted Leggings

Here is a peek into my internal monologue while I was making these... Be scared!

I should really go exercise. But I don't have any comfortable pants/trousers to wear. I know, I'll make some leggings. Great idea.
...months pass...
I should really get some exercise. Oh. I haven't made those leggings yet. I don't want to buy a pattern, that costs money and it would need to be adjusted heaps anyway. I've got mad skillz; I'll draft a pattern... Ooo, I better go buy some fabric too. I think there's a sale on!
...months pass...
I should really go for a walk. That's right I'm going to make some leggings. I've still got to draft the pattern. I'll go draft it right now.
...weeks pass...
What a great day outside. I'm totally in the mood for a walk. Wait, I'm making some leggings to wear while I do that. I better go cut the fabric out.
Well I've cut them out now. I'll just sew them a little...
 ...days pass...
Well I've got no elastic for these.  I better go buy some. (meanwhile I have perfectly good elastic that could be used to work with these *shakes head at self* silly!) Oh. I'll hem these first.
Right let's attach this elastic. Oops. I did that a bit wrong. It still looks alright and I'm not going to unpick overlocking stitches. All done! Let's see what these look like on... Um. They are little too short and the hems are uneven. Bah! I can't be bothered fixing the hem. But I'm going to take pictures of these before I use them.
 ...days pass...
Oh a cuff is a great way to to add length to leggings. I'll do that. I better go unpick the hems on my leggings.
 ...days pass...
Just get these damn leggings done will you! You're so flipping close! Go. And. Finish. Them!
Alright, alright, I'm going to go and do that.
Then I'm going to take some pictures.
Then I'm going for a walk :)

That was the story of these leggings. I drag my feet on a project that is very likely to be awesome.
It happens ALL. THE. TIME. What the heck?!?!?!?!
Aaaaanyway. Moving right along...


~Inspiration~
For ages I've been checking out the leggings that the ladies over at Fehr Trade and How Good Is That? and Suzy Bee Sews and thinking. I should make some leggings.


Sidenote:
Having been a teen during the 'lo-rise era' there weren't a lot of fashionable options for 'hi-rise' garments. As I've gotten older and started sewing for myself I realise I prefer 'hi-rise' pants/trousers/skirts. Good-bye muffin top, plumbers crack and camel-toe caused by the waistband trying to find room at my narrow waist away from my large hips and therefore raising the crotch seam. TMI?
Although, it means I get rolled/crushed waistbands from slumping over while sitting with terrible posture. Hmmm. I'll just have to sit up straight I guess :)

~Pattern~

Self drafted based on this tutorial

~Pattern Adjustments~

I wasn't happy with the measurements given in the tutorial for the crotch curve guides in steps 14 and 16. I thought the fixed distances to measure in from the thigh circumference length (drawn in step 6) were not very useful when drafting the pattern in my size. The measurements weren't scaled to accommodate a longer thigh circumference length, so when I was drafting my leggings pattern the crotch curve looked way too shallow.

Looking at the diagram in the tutorial, I noticed that the front curve guide hit the thigh circumference line about halfway along the front rise depth (measured in step 9) and the back curve guide hit about a third in of the back rise depth (measured in step 11).

So I calculated half of my front rise depth and a third of my back rise depth and used them instead of the 1" measurements given in steps 14 and 16. Both measurements I calculated were more than double the 1" given in the tutorial! Proportions people, it's all about the proportions.

I made these leggings so they'd hit the knee for two reasons.  It's too hot in Brisbane for full length leggings at the moment... and I didn't buy enough fabric :) The fabric is a 2-way stretch but I still wanted to cut these on grain. I'll use this fabric to make other things. Contrast panels anyone?

There was a noticeable difference of leg circumference at the thigh just above my knee and at my knee. So I made a note of that and included that in my drafting for the pattern.

I didn't add any seam allowance because I was following the tutorial. I didn't make any negative ease adjustments to account for stretch because I wanted to see how these would fit with minimal negative ease from the seam allowances.

~Materials~
  • Black Performance Cotton Lycra 148 wide from Spotlight
  • Elastic
  • Black Thread
  • Bias tape - for a tag

~Construction~

I did the leg seams and crotch seam on my overlocker/serger. Then I attached the elastic to the waistline using my overlocker/serger and top-stitched it down on my sewing machine. I thought I was doing this but I did it wrong a slight adaptation by attaching the elastic on the outside in the first step then rolling the elastic to the inside and then folding the elastic over again. It added a little extra bulk. So next time I'll actually follow the tutorial.

When I was drafting these I didn't put a curve on the hem which meant that when I hemmed the hems were longer at the sides and shorter at the inner leg seam. Doh! I was contemplating what to do when I read this post and did a face-palm. Of course! A hem bands will fix this! So I went back, unpicked the hem and re-cut the hem so that it was perpendicular to the inner leg seam.

I measured the hem and cut some bands. I joined the bands at the short edge on the overlocker/serger and pressed them RST matching the raw edges. Then I attached the bands to the leggings hem on the overlocker/serger making sure to match all the raw edges. Finally to finish them off I used a zig-zag stitch to top-stitch the seam allowance up towards the leggings.

~Changes I made this time~
  • Slimmed down the lower thigh area by taking some width out of the inner leg seams
  • Added cuffs at hem to add length
~Tech Specs~
  • 70/10 ballpoint needle for seams
  • Zig-zag stitch width: 3; length: 2.5
  • 80/12 ballpoint needle for sewing waistband (the smaller one snapped)
  • Overlocking/serging Stitch length: 4; Differential: 1.5; Thread tensions: ln:4; rn:3; ul:3; ll:3.5

~What I Like~
  • I really like the fabric
  • I actually like the hem bands in the end. They add interest and give a snug fit
  • I'm so glad that these are high-waisted so hopefully they won't ride while I'm wearing them.
Self drafted leggings fist pump!

~What I Don't Like~
  • The added bulk at the waistband because of the way I attached the elastic
  • The zig-zag top-stitching at the waistband is a bit dodgy in some places
  • When I was taking in the inner leg seam I started midway through the seam, which means there is a slight angle in the stitching with sometimes shows, but it's not a show stopper

~Changes for Next Time~
  • Attach the waistband by following Melissa's Tutorial
  • Adjust the pattern to take into account some negative ease. It feels like the crotch sits a little too low at times.

~Numbers~
PatternFree - Self Drafted (time accounted for below)$0.00
FabricBlack Performance Cotton Lycra 148 wide $11.97/m (40% off) x 0.75 m $8.98
Notions
  • Thread - in stash
  • Elastic
  • Bias Tape - in stash
$0.00
$4.99
$0.00
TimeI forgot to record time for this make so I'm guestimating here
5 hours (* $17-ish Australian minimum wage)

fabric prep - 15min
patterndrafting - 30min
cutting - 15min (including
sewing - 4 hours (including unpicking and fixing cuff)
$85.00
Total
$98.97

This was a really nice quick make so that definitely kept the cost down. Although this make did some time to sew it was mainly because I was fixing the leg hems and tweaking the fit.


The Tee in a Racy Red


~Inspiration~
I've been meaning to make this top for years. Years! Back before Cake Patterns was born StephC published her free Blank Canvas Tee. I downloaded it with the intention of making it. She updated the pattern a while back and made it a Cake Patterns Freebie. So I downloaded the updated version got around to making this wearable muslin.

~Pattern~
Cake Patterns 2224 The Tee
I traced and cut a 40-45 neckline; a 40 sleeve; a 48 hem width; at a 25 hem depth. I made sure to mark my tracing with all this info :)

~Pattern Adjustments~
I was a bit nervous about making this top after my experience with the sizing with the Cocoa Shrug.
I was going to go all pattern hack and cut it so there was more waist definition, but then decided that I wanted a more loose fitting top.

~Materials~
  • Red combed cotton jersey
  • 90mm clear elastic
  • Polyester thread

~Construction~
I sewed this make on my sewing machine using my walking foot. I wasn't sure how it would turn out and I wanted to avoid having to unpick overlocking/serging if I hit any snags.

I stabilised the shoulder seam with some clear elastic instead of interfacing because I had it on hand.
I attached the neckband using the traditional method outlined in the instructions (sew one shoulder, attach neckband, sew other shoulder) but as I've mentioned before I much prefer the finish that comes with attaching a neckband in the round.

At this point I popped the top onto my dressform to get an idea of how it would fit. I liked how it looked so I kept going. I didn't hem the sleeve opening at this point because I don't like how it meets under the arm when done before sewing the side seam. I finished the top by sewing the side seams and attaching the hem band. I was going to finish the sleeve hems at this stage, but then decided against it. Purely out of laziness, not wanting to deal with the rolling fabric edges and because it's not going to fray anyway.

The only complaint I have about this make is the fabric curled like no-one's business. It was a major PITA to attach the neck and hem bands so I ended up basting the raw edges of the bands together before attaching them to the body.

~Changes I made this time~
  • Not hemming the sleeves

~What I Like~
  • Great fabric - quality and colour
  • Like the fit across the bust and arm opening size
  • With a blousing around the waist I like the hem band.

~What I Don't Like~
  • There is a bit of pooling at the back of the shirt, that that's only if I'm being picky

~Changes for Next Time~
  • Make this on the overlocker/serger
  • Try making a version that is a snugger fit through the waist

~Numbers~
PatternCake Patterns 2224 The Tee - Free$0.00
FabricCombed Cotton Jersey, Red, 112cm wide (40% off) $6.59/m * 1.6m~$10.55
Notions
  • 60cm 9mm wide clear elastic
  • Polyester Thread - in stash - FREE
~$2.40
$0.00
TimeI didn't record time for this project because I sewed it in fits and starts so I'm guestimating

3.5 hours (* $17-ish Australian minimum wage)
Considering fit - 20 min
Tracing Pattern - 10 min
Cutting Fabric - 30 min
Sewing - 2.5 hr
$59.50
Total
$72.45

The mucking around with considering the fit etc. and trying to wrangle the rolling edges of the fabric are what added to this make. I think if I made it on my overlocker/serger it would far less time. But I'm very happy with this make considering it's a wearable muslin.


~Final Comment~
Phew! Another epic post!
I couldn't wait until the 'golden hour' to take my pictures today so your getting 'in front of the shed door' pictures. It was only when I was editing the pictures that I notice the circle. It's the sun reflecting off the camera lens. LOL. I'll know not to do that again :)

These are both wearable toiles/muslins really. It was really good to practice using knits and get more familiar with working with them. These are going to be great to wear when I exercise and I'm going to have to make repeats. I much prefer the finish on the leggings because they mostly sewn on the overlocker/serger; so I'm looking forward to making a Tee on the overlocker/serger too.

I'm really glad I got this ensemble done before the end of this year. I really wanted to close this year off as best I could. I have one WIP, but I'm going to try to finish it so I can wear it tonight.

If you made it this far congratulations :)

Epic fist pump for an awesome knit outfit :)

Is there something that you've been wanted to make for years?
Do you drag your feet about making projects sometimes? 
What are your thoughts on self-stitched active wear?
Do you prefer lo-rise or hi-rise?
Lots of questions :) Leave your answers in the comments

Until next time,

Let's connect online :)
Instagram Icon Facebook Icon Pinterest Icon Twitter Icon

Thursday, 11 December 2014

::Sewing::Free Pattern Alert! - StyleArc Ann T-Top


The other day, as I was perusing Stitches Magazine (an Australian sewing mag) I came across an advertisement for StyleArc.They are giving away an Ann T-Top when you sign up for their newsletter. If you're interested go here and sign up so you can get a copy too.

But do it quick, it only lasts until the end of the year!


I've never used a StyleArc pattern before so I downloaded it to see what they're like. I haven't used it yet, but I'm looking forward to trying it out.

I also got their Barb's Stretch Pant as part of Threads Magazine promo a few months back on the last day of the promo! Lucky!

This is not a sponsored post. I just love me a free pattern and sharing the free pattern goodness.

Have you used StyleArc patterns before?
Did you like it?
What do you think about the free patterns indie pattern companies put out? 
Are they generous or just another marketing tool? 
Tell me in the comments :)


Until next time,

Let's connect online :)
Instagram Icon Facebook Icon Pinterest Icon Twitter Icon

Thursday, 4 December 2014

::Sewing::Self-Drafted Polly Pencil Skirt


Here is the first wearable garment I made using my pattern block and the patternmaking skills I honed during the patternmaking course I wrote about in my last post.

I'm calling it my Polly Pencil skirt, as in Polly Pocket Pencil Skirt :)

I wanted to wear this skirt to the last pattern drafting lesson I took. I also wanted to wear this skirt on a trip I was taking to visit my parents too. So that pressure was on! But that didn't stop me from making the final skirt the day before my last patternmaking lesson :)

I had all the supplies in my stash so I power-sewed the heck out of this skirt and I'm so pleased with it.

~Inspiration~
[source]

This skirt is one of the inspiration pictures I took into the patternmaking course. I thought it would be interesting to see the process to make the pattern from a basic pattern block. In class the teacher drafted the pattern, but omitted the pocket bands. I thought that the pockets bands where the best part so when I drafted the pattern I made sure to include them. The main thing that drew me to this skirt was the pockets and how they were constructed.

~Pattern~
Self drafted using my 1 dart skirt block from taking the patternmaking course.

~Pattern Adjustments~
I started by using my 1 dart skirt block. I decided that I wanted the skirt to be about knee length so I traced off a centre front panel and then a side panel from waist to knee. The centre front panel was set aside and I moved on to the side panels.

I drew in the style lines on my tracing of the side panel. I drew an outline for the pocket band, and the pocket lining. This became my working pattern and I used it to trace off the pattern pieces I needed to sew the skirt.


Then I marked notches and grain lines. I decided that I wanted to cut the pocket bands so they ran along the straight grain so they wouldn't stretch out over time. Once that was all done it came time for the toile. I was pretty happy with the toile and didn't make any changes.

~Materials~
  • Slate coloured cotton drill fabric - most likely from spotlight.
  • Black cotton lawn
  • Zipper
  • Interfacing
  • Thread
~Construction~

Skirt Front
Sewed each of the pocket panels together.
Attached to centre front panel.
Attached to waistband.


Skirt Back
Sewed darts in skirt back.
Attached to back waistband pieces
Inserted centre back zipper


Assembly
Sewed up side seams and adjusted sided seams for better fit
Folded over waistband and secured by stitching in the ditch from the front

Hemmed the bottom of the skirt

~Changes I made this time~
  • As I was sewing I realised that I wanted the skirt to be a little shorter so I ended up sewing a wide hem, but I'm glad I did because it adds some heft and weight to the bottom of the skirt.
  • I took a little of extra time while making this skirt and top-stitched along the long edges of the pocket bands and along the seam joining the front side panels to the centre front panel. I also top-stitched along the bottom edge of the waistband.

~What I Like~
  • the fabric is great because it breathes and has been wearing really nicely into a softer fabric.
  • The pockets! They are so useful and are really great to stash my phone wallet and keys when I need to quickly duck into the store.
  • I really like the centred zipper I put into the skirt, it's help up really well and conceals the zip
  • I really like the way the top stitching I did on the skirt give is a more 'polished' look. 
  • I'm really glad I did a zig zag tack across the bottom of the zipper. I usually wear  out the fabric here and it's held up well with wear.

~What I Don't Like~
  • The waistband rolls a little
  • The pocket bands get droopy sometimes

~Changes for Next Time~
  • The waistband rolls, so next time try a narrow waistband like this
  • I would interface the pocket bands next time because they have started to warp a bit over time
  • The top of the pocket bands curl into the pocket if I have something a little heavy in my pocket so to stop that I would stitch in the ditch of the lower pocket band seam and catch the lining

~Numbers~
PatternFree - Self Drafted (time accounted for below)$0.00
Fabric1.5m slate coloured cotton drill - $8.99/m~$13.50
Notions
  • Black Thread - stash
  • Interfacing - stash
  • Black Zipper - stash
$0.00
$0.00
~$2.00
TimeI forgot to record time for this project so I'm guestimating here
12.75 hours (* $17-ish Australian minimum wage)

fabric prep - 15 minutes
patterndrafting - 3 hours
sewing toile - 2 hours
cutting -  30 minutes
sewing final garment - 7 hours
$216.75
Total
$232.25

I was going to list the fabric as from stash because I couldn't find a price after a quick flip through my fabric stash record, but then I caved and had a proper look through my craft receipts.

Sidenote
I have a habit of keeping the reciepts from my crafty purchases in a folder where I keep other crafty paperwork I want to keep. It comes in handy when I'm costing out my projects. I have them in date reverse order and and the end of each year staple together the years reciepts. I've only been doing it for 3 years, but I like the idea that I can go back and see how much I paid for various supplies. OCD much :)


~Final Comment~
Awesome Skirt Fist Pump!
I'm so pleased with this skirt. It has been on very high rotation in my wardrobe ever since I made it.
I wear it at least once a week if not more. It's so comfortable and I'm really pleased with the fit. I keep meaning to cut out another and make the changes I've mentioned above. This is definitely a win in my books.

Do you have a self-made garment that you wear all the time. Are you pocket obsessed? Do you keep receipts from your crafty shopping? Did you ever play with Polly Pockets as a child (or now, no judgement here)?
Tell me in the comments, I love reading what you have to say :)


Until next time,

Let's connect online :)
Instagram Icon Facebook Icon Pinterest Icon Twitter Icon

Friday, 28 November 2014

::Sewing:: Patternmaking Short Course


The mini patterns we got in class
[source]
I mentioned in this post that I had been to a patternmaking short course, but I haven't really written about it here. You may have seen a couple of Instagram posts. I spent the later part of last year and the early part of this year trying to figure out what I want to do with my life. I quit my job, before it ate me up, at the end of November last year and was lost. There were a lot of options but I didn't have a lot of direction.

Aaanyway, I got it in my head that I wanted to learn how to draft patterns, well really I'd been thinking about it for a long time. I read a lot about sewing and have a lot of sources of information for my obsession interest. I read blogs, sewing magazines, sewing books, fitting books, dressmaking books and patternmaking books. My sister did fashion at TAFE (the Australian equivalent of community college I guess) so I've learnt a bit about patternmaking from a few of her text books.

I could have learnt pattern drafting out of a book, or looked around on the web, but I'm the kind of person who needs to be face-to-face with someone showing me how to do something and the added accountability of having someone to answer to, homework and having paid for a class in order to push myself to do something. So finding a patternmaking class was the obvious option.

I knew that I didn't want to take an accredited course, because they are flipping expensive, and I don't intend on applying for fashion industry jobs, so I don't need a piece of paper saying that I know things.

Now something to mention here, Brisbane is divided by a big river that essentially divides it into North and South. I try to avoid crossing the river as much as possible because it's time consuming and if you're crossing at toll bridges it can get expensive. So I looked for courses in my area on the north side...there wasn't much happening. I did email a sewing school that was near my house, but I never heard back from them. Lame!

So I finally narrowed the search to a sewing school...on the south side. Sigh... I got over myself and sent an email asking for a course outline and got an email that afternoon. I looked over the course summary I got and after uhmming and ahhing I enrolled.

A frilled mini-skirt done for homework
[source]
The course was ten classes for 3 hours on Thursday mornings and went from mid-July to mid-September. One class had to be cancelled because the instructor was sick, but an extra class was added at the end to make up for it. There were a few materials we needed before class, most of which I already had. I did need to buy a tailors awl though.

In the course we learnt the first 2 principals of patternmaking - dart manipulation & adding fullness. The third principal - contouring is covered in the next patternmaking course. We did our pattern drafting in class and sewed our toiles (muslins, test garments) at home. At the end of most classes we had to do some sort of homework whether it was work on our own blocks or making mini garments from half scale patterns (mini-patts) we were given or both.


On the first day after a brief introduction we dove straight into taking body measurements and  drafting a 2 dart skirt block. We were asked to bring pictures of skirts that we liked to the next class. We had to sew our skirt toiles for the teacher to check the fit at the next lesson. These pictures were used to teach us patternmaking techniques, which I thought was a great idea.


We covered how to do a design analysis, some of the key things to look for when picking apart a design to 'be inspired by' (*cough* copy *cough*). The teacher talked about dart manipulation and demonstrated on the mini-patts. The difference between pivot and slash & spread methods of manipulating darts was covered.

Here's a quick look at what was covered in class:
  • Taking body measurements for a skirt blocks
  • Drafting a 2 dart skirt block
  • Adding flare by closing darts
  • The rules of  how to manipulate darts
  • The effect grainline has on drape
  • Gored skirts
  • Making a 1 dart skirt block from a 2 dart skirt block
  • Ways of using the 2 dart vs 1 dart block for different styles by separating at the darts
  • Godets
  • Skirt yokes
  • Circular patterns - e.g. circle skirts, sleeve ruffles
  • Frills vs. ruffles
  • Peplums
  • Pleats
  • Taking measurements for bodice blocks
  • Determining bust cup size
  • Using body measurements to adjust a commercially drafted bodice blocks block 
  • Dart manipulation on a bodice
  • Cowl necklines
  • V necklines
  • Shaped necklines
  • Using body measurements to adjust a commercially drafted sleeve block
  • Changing sleeve styles using fullness
  • Facings
  • Collars
  • Button bands
  • Converting a pattern for wovens to be used for knits
  • And way more bits and pieces...

The main thing I learned out of the course was that I knew a lot more about patternmaking than I thought. I did learn some tips and tricks along the way, but for me the main thing was putting into practice a lot of what I already knew. So that has given me way more confidence with my patternmaking.

I'm not going to take the next patternmaking course, I'm pretty happy with the skills and confidence I got from this course. I want to practice using the skills I have before I continue if I want to.

Working on my bodice toile
[source]

~What I Liked~
  • The instructor was lovely and approachable.
  • At the end of the course I had a 2 dart and 1 dart skirt block, a bodice block and a sleeve block.
  • I learnt that experimentation and toiles are very important when designing your own styles.
  • The teacher used some of the pictures of skirts that we had brought in to demonstrate patternmaking techniques. I thought that was a great way to make it a more personal learning experience.
  • One of the biggest take aways for me was how to adjust a woven pattern for stretch fabrics.
  • The small class size of 5 people meant there was a lot of one-on-one attention. Each person got, body measurements were taken by the teacher and the fit of our toiles was checked by her too.
  • We did a lot of exercises in our sketch books so that was a good way of practicing what we learnt and I use it as a mental prompt now that the class is over.
~What I Didn't Like~
  • The teacher also has an alterations, dressmaking and a patterndrafting business so this meant there were lots of interruptions and distractions during class. There was a lady doing digital patternmaking in the same room and whenever she started the plotting machine up it make a lot of noise. The teacher didn't always have someone to answer the phone for her so she had to answer it when it rang sometimes. So that was annoying, but a necessary evil.
  • I really wish we had learnt how to draft bodice and sleeve patterns from scratch. Instead we traced off our patterns from her set of blocks and made adjustments from there, but I guess it was a good lesson on how to adjust patterns to fit our measurements. However, it really would have taken a long time do that which would mean we wouldn't have covered as much content in the class.
  • I found the course was missing a little structure and I wished that there were more teaching resources like fabric samples/step outs to help explain things. I grasped the concepts eventually but there were a couple of times where it would have been handy for her to have a couple of samples or examples or pictures of what she was trying to say.
  • Most of the reading materials we were given were mainly photocopies of books the teacher had in her library. I wouldn't mind so much if photocopies were supplements, but most of the materials were photocopies. I just expected that there would be more original content.
Drafting using a 1 dart skirt block to draft
[source]
~Numbers~
Other than the course expense itself, I didn't need to buy too much for the class. I already had a lot of the stationary and tools. However, I bought a sketch book and folder for all the printed materials we were given and after a few classes I also ended up buying a set of curves and a grading ruler. Even though I had sewing curve/ruler from way back here.


Course10 X 3 hours$745
Additional toolsTailors awl
Grading Ruler
Curved rulers
Sketch book
Folder
~$5.50
$25.00
$20.00
~$6.00
~$9.00
Travel Bridge Toll - 10 * 2 * $4.25
Car expenses - just throwing a number out there
$85.00
~$100.00
Total
~$995.50

That sounds like a lot, but really if you break it down that is about $34 per hour, so not too bad really. That's about the hourly rate for private sewing classes. When I think about the one-on-one attention each person got it is pretty good.


Do you make lots of pattern adjustments? Do you make your own patterns? Have you taken a sewing or patternmaking course? What was your favourite thing about it?
Let me know, I love reading your comments :)

Until next time,

Let's connect online :)
Instagram Icon Facebook Icon Pinterest Icon Twitter Icon

Friday, 21 November 2014

::Sewing:: Special Dress for a Special Day - Behind the seams 2

Following on from my previous posts about this dress. I'm geekily recording the constructions steps of this dress. It can be a handy reference when I revisit in the future.

I actually ended up taking two lots of photos for the original post about this dress.
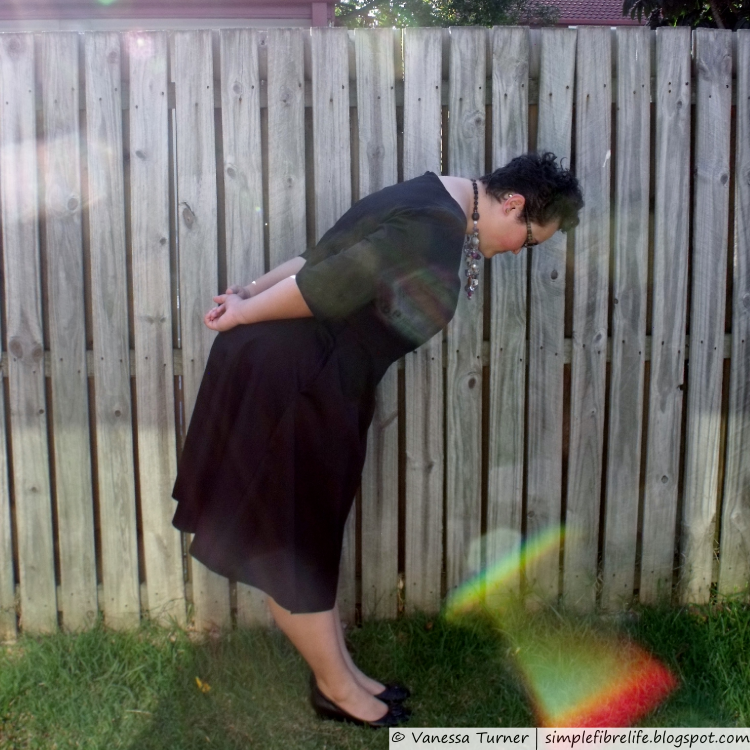
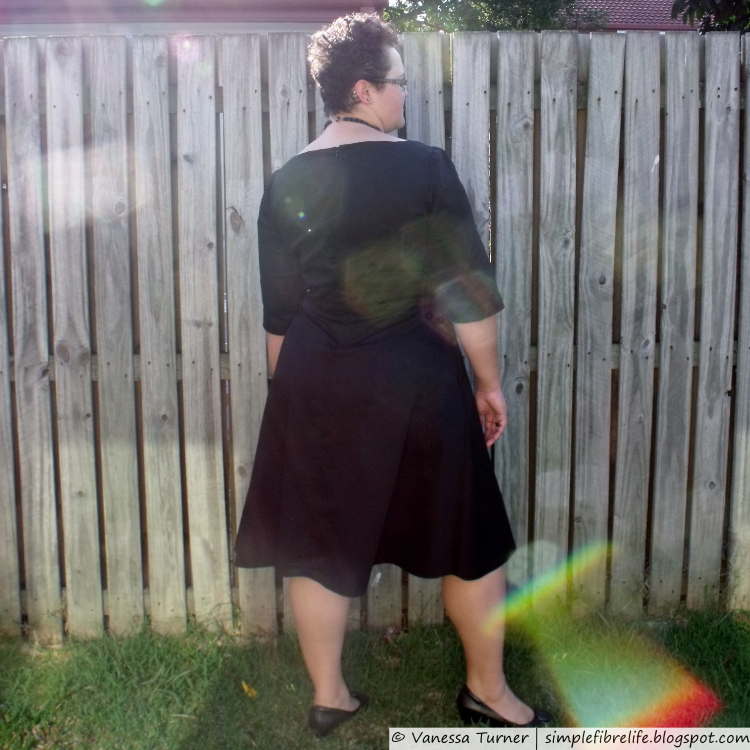
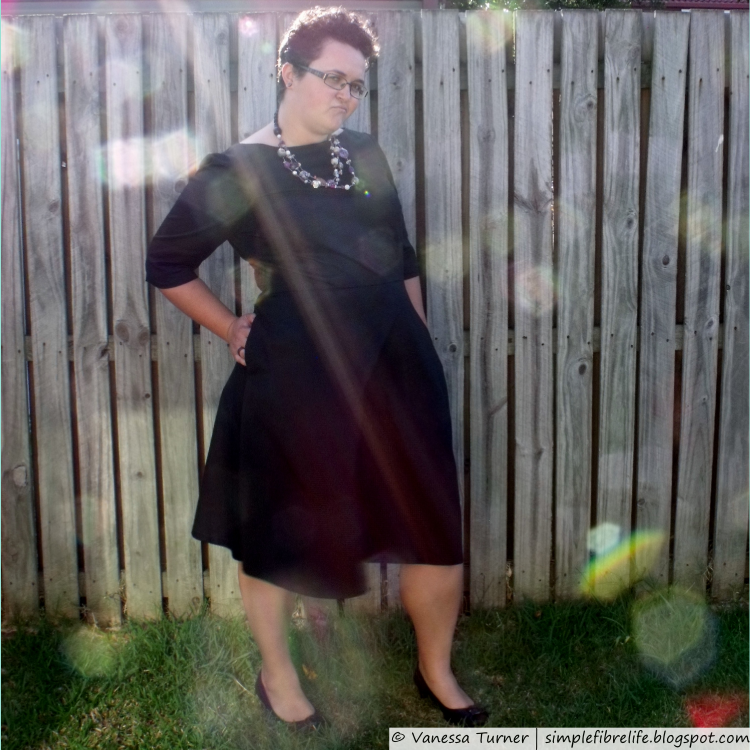
I used the second lot in the first post, but I wanted to include some from the first photo session because I really like the sun flare :)


~Construction~
When I'm sewing I usually try to sew as many seams as possible before I need to press or switch between machines. It means the project comes together quicker. And we all like getting a project finished :)

When I cut out the final garment I made sure that the seam allowances for the bodice, bodice lining and back skirt pieces liked up with the selvage edge so that I didn't need to finish these seams.

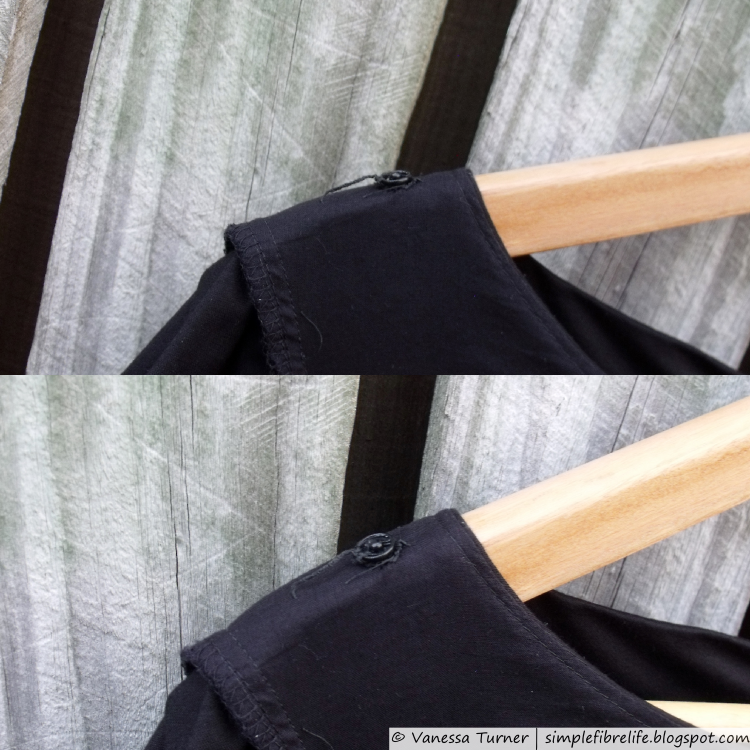
I started by assembling the bodice and sleeves and then inserted the sleeves. The skirt was made after which included sewing the inseam pockets. The zipper was put in after joining the bodice and skirt. I attached the zipper snap tab while I machine sewed the bodice lining centre back along the zipper. I was running out of time at this stage so I had to prioritise the next few steps, so I sewed the hem. To finish up I hand stitched the bodice lining waistline to the waistline seam allowance; sewed the snap to the zipper snap tab and finally the bra strap carriers.

Putting the bodice together
  • Stay stitched front and back bodice necklines, bodice lining necklines and waistline of skirt pieces.
  • Sewed front and back darts for bodice and bodice lining and darts at top of sleeve; pressed seams and pressed darts flat so they pointed to the centre of the body or down and pressed sleeve darts to the back.
  • Sewed 3 rows of gathering stitches at top of sleeves.
  • Overlocked the sleeve hem seam allowances without cutting any allowance off
  • Overlocked around the outside of pocket pieces.
  • Basted along the sleeve hemlines to make turning and pressing the hem easier; pressed hem up along the basted line
  • Sewed side and shoulder seams for bodice and bodice lining; sewed sleeve seam.
  • Pressed bodice and sleeve seams and flat, then open.
  • Overlocked sleeve seam allowance.
  • Pressed sleeve hem up along basting.
  • Sewed sleeve hems.
  • Basted the bodice and bodice lining around the armholes. Inserted sleeves into bodice.

Putting the skirt together
  • Sewed pocket pieces to side seam of skirt front and backs using a seam allowance slightly smaller than 5/8” (1.5cm). Pressed seam allowances flat and open.
  • Overlocked skirt side seams, including where the pocket joined the skirt piece, but not around the pocket (that was already done).
  • Sewed side seam of skirt at top, backstitched at top of pocket opening, basted along pocket opening, backstitched at bottom of pocket opening, sewed seams to bottom.
  • Sewed around pocket bag, backstitched at beginning and end. Pressed side seams and the pockets to the front.
  • Basted the top of the pockets bags to the skirt waistline

Finishing up
  • Sewed skirt to the bodice main fabric (thinking about it now I probably could have sewed the bodice lining in this seam too, but I’d probably have to finagle it at the zipper, hmmm, something to think about next time).
  • Overlocked the waistline seam.
  • I made the zipper snap tab by cutting a little rectangle of lining fabric and sewing along one long and short side, snipped the corner off, turned it the right way out and pressed it flat.
  • To insert the zipper I basted the centre back seam, pressed it open, and basted the tape of the invisible zipper to the seam allowance on either side. After unpicked the centre back basting I sewed the invisible zipper in properly.
  • I hand stitch the top of the zipper tape down, positioned and pinned the zipper snap tab where I wanted it, placed the bodice lining and bodice right sides together (remembering to fold under a little of the lining at the waistline) and sewed along the zipper tape to secure the lining down in the centre back.
  • Overlocked the hem of the skirt.
  • Hemmed the skirt by basting along the hemline to make turning the hem easier, pressed the hem up.
  • Hand sewed the waist of the bodice lining down.
  • Hand sewed the snap onto the zipper tab
  • Hand sewed the bra strap carriers to the bodice lining shoulder seams


Here are all the related posts :)
This Post
Sewing FO post
Behind the seams 1 - Pattern Adjustments
Behind the seams 2 - Construction


~Final Comment~
So this wasn't the quickest make in the world, but it was pretty straight forward to sew together the final dress after sewing so many toiles. I think that bra strap carriers are going to be a new staple in my garments. I've made a few more formal garments this year, and I've seen my sewing improve a lot over that time.

Do you have any tips or tricks for sewing your garments quicker? Are there any special techniques or features you like to put in your garments?
Leave a comment below, I'd love to hear from you :)


Until next time,


Let's connect