Showing posts with label Finished Object. Show all posts

Thursday, 30 October 2014

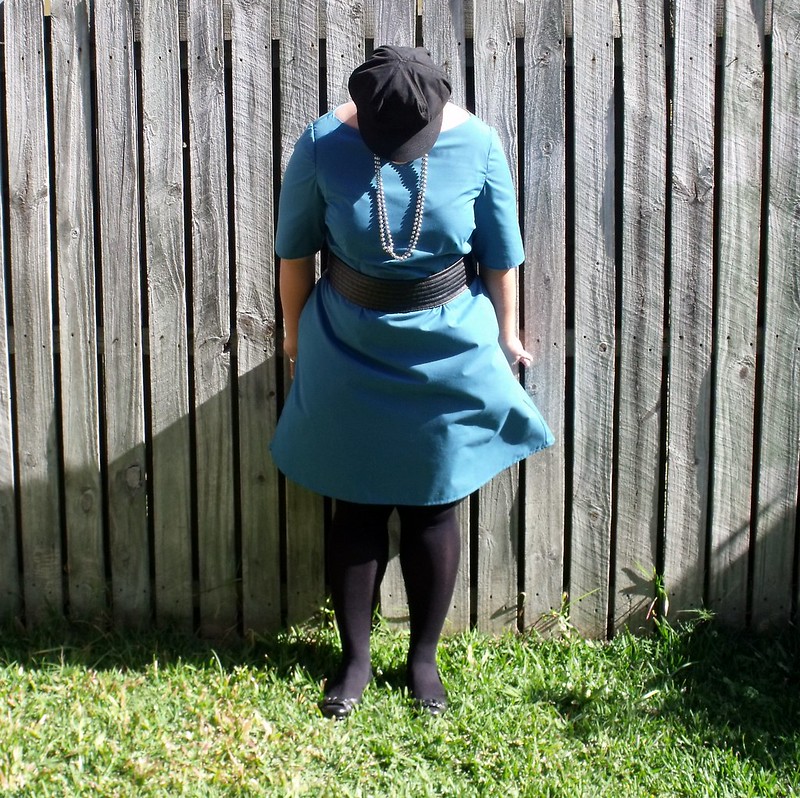
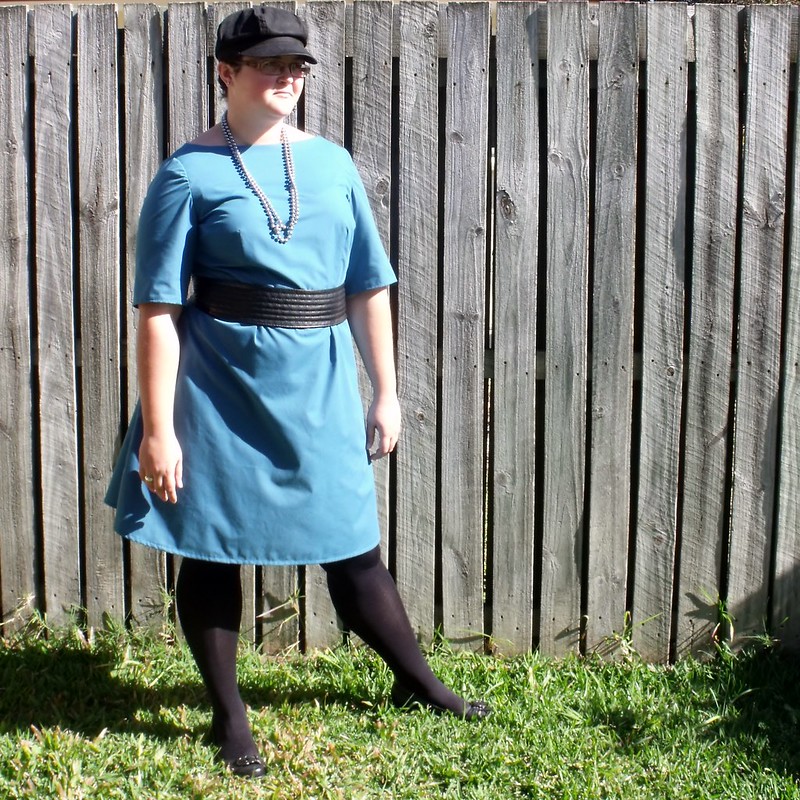
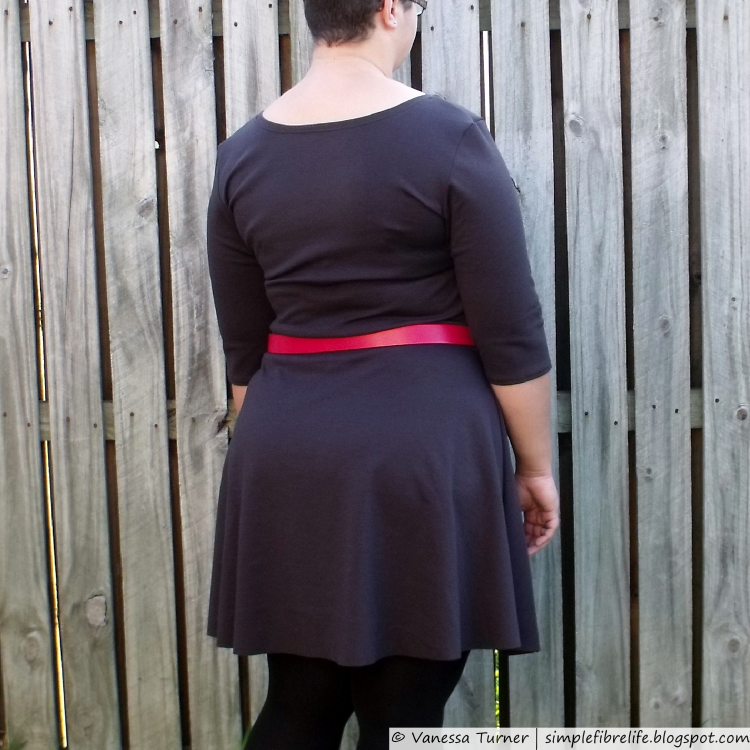
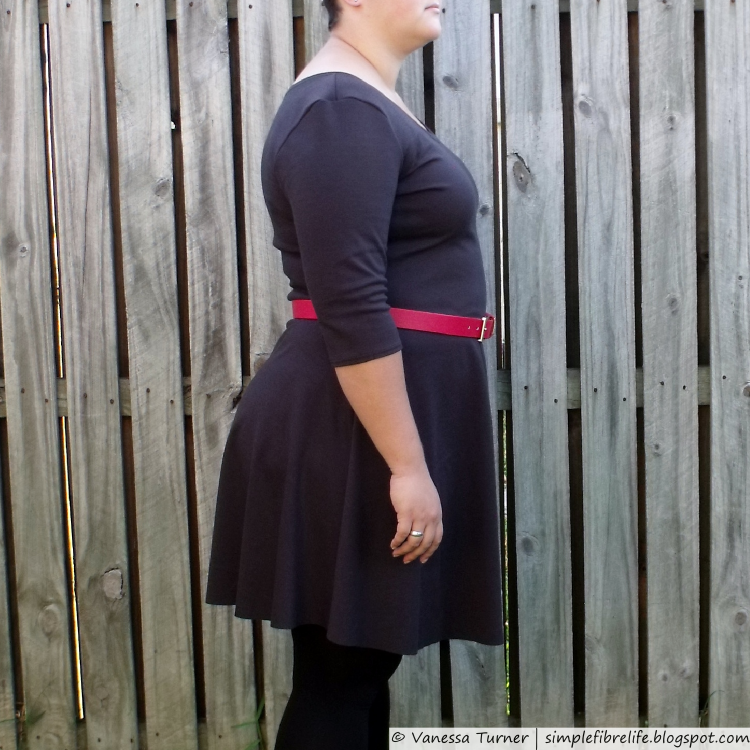
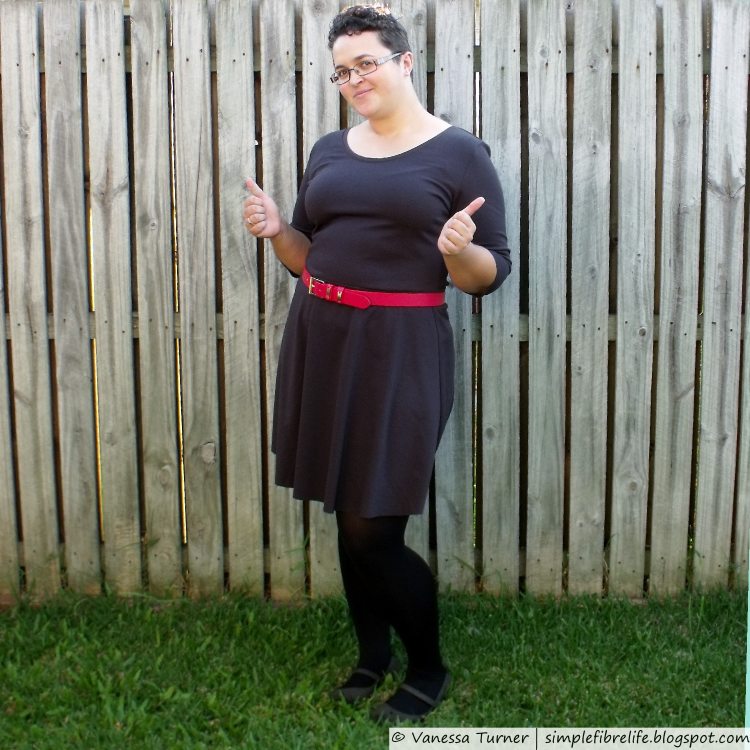
::Sewing::FO:: Special Dress for a Special Day


~Inspiration~
This dress is the climax to my year of sewing dresses for weddings. I was asked to be a bridesmaid by one of my closest friends early this year. Her only request, clothing-wise, was her bridesmaids wear black all the other details were up the bridesmaids. What an awesome bride!

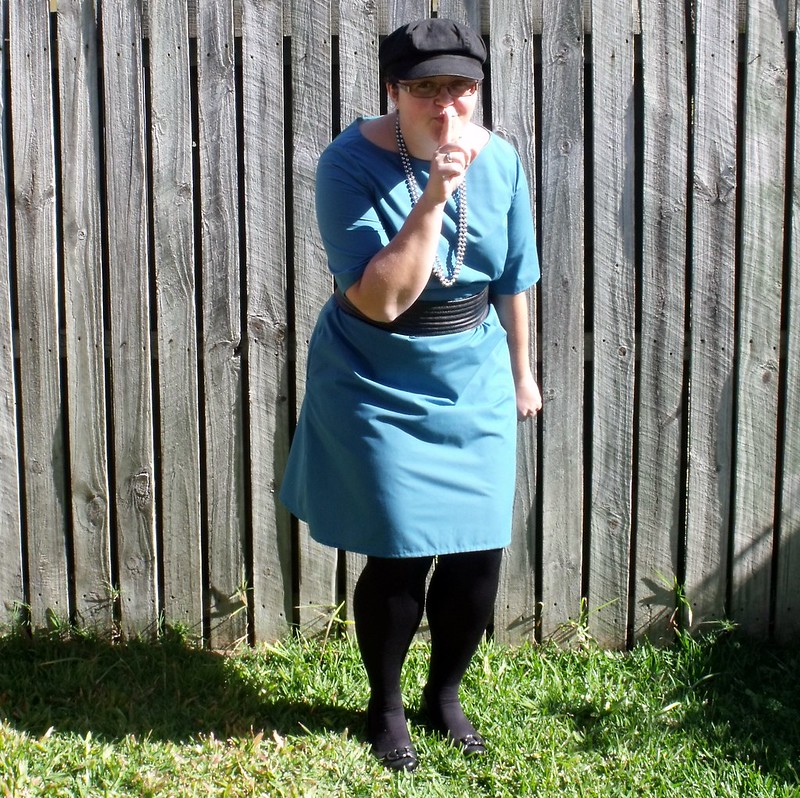
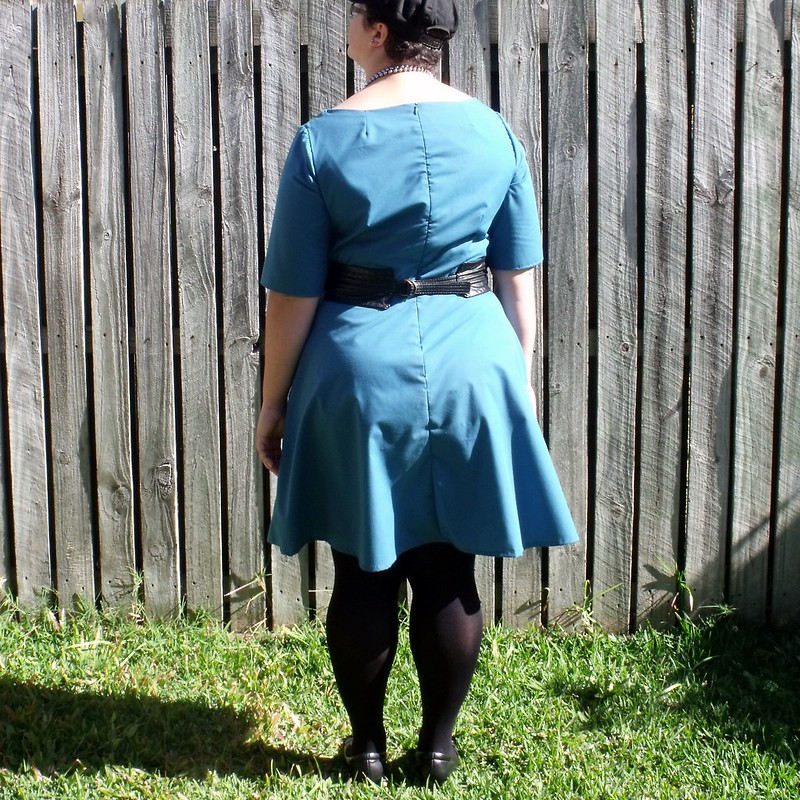
I wasn’t 100% sure of what I wanted to wear. I just knew that I wanted to make my dress because then it would fit just the way I wanted and so I could be comfortable on the day and enjoy myself. I really like the bodice shape of the peony dress I made but I wanted a better fit through the shoulders and a slightly narrower neckline. So I thought I’d try drafting a bodice with a wide neckline using the blocks I made in pattern drafting class (yet to be blogged about).

In my usual fashion, I didn’t get started on my final dress until pretty late. I even bought a backup dress just in case I didn’t finish my me-made dress. I finished my me-made dress way ahead of time (ahem less than 24 hours) and even added a few handy details too.

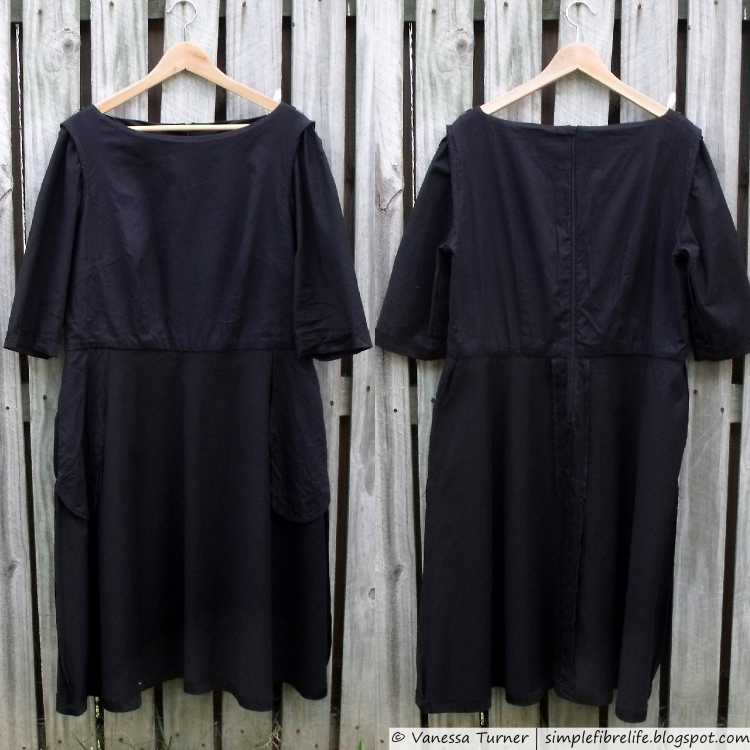
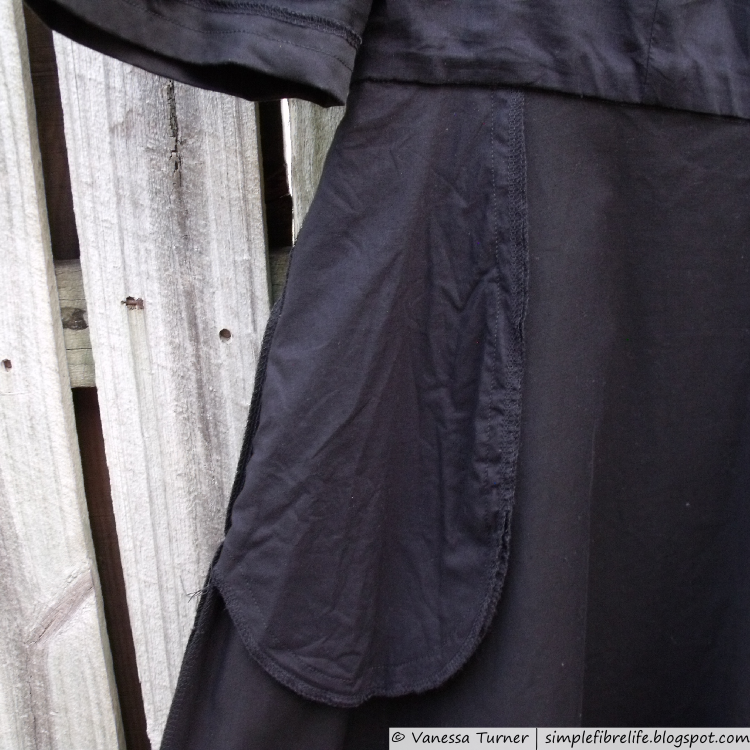
This dress has a bateau neckline, front waist and side bust darts and waist darts in the back. The bodice is the only part that is lined and the flared skirt has side seam pockets. Love me some pocket action! They were really useful on the day; somewhere to store written down ceremony readings and bridesmaid speeches :)

Didn’t need the backup dress in end, I’m glad too, coz that thing does not have pockets ;)


~Materials~
The fashion fabric is black stretch cotton sateen from Spotlight. I have other dresses made of the same fabric and I like the hand and drape of the fabric so I thought it would be ideal for a dress for a special occasion. The dress needed to be comfortable and breathable so I used a black cotton lawn to line the bodice and make the pockets, also from Spotlight.
I also used a 20” (51cm) black invisible zipper, some black snaps and of course some black thread :) – probably all from Spotlight

~Pattern~
Pattern & View
Self-drafted pattern using my block as a base – made in my size :)

Were the instructions easy to follow?
They sure were. I made them up myself and just followed the basic construction of a dress with a lined bodice

How was the pattern fit?
Using a block drafted to my measurements made it very simple to make this dress. However, I did have some large seam allowances when I cut the fashion fabric just in case I hit any snags while I was making it. You just never know how fabric is going to change the way a garment fits.

Would you recommend it?
I would totally recommend people making block patterns. Even if it was just to check the way commercial patterns are going to fit.

Would you make it again?
This patter is going to get used again. However, I think I’ll use a nice print to make a more casual dress :)

~Pattern Adjustments~
I started to write about the whole process I went through to make this dress and it was turning into an epic tale. So for this post I’ll just do a quick run of the style changes I made to my bodice block.

I widened the neckline, but made sure that my bra straps wouldn’t peek out.
I removed the back bodice shoulder dart.
The sleeves on my block were shortened to about elbow length.
A flared skirt was drafted from my 2 dart skirt block.

I’d like to record the whole process of making this dress; so I think I’m going to have to do another behind the seams post like I did for my S2444 - here and here.
More details to come :)

~Construction~
I made quite a few toiles in the two weeks leading up to the wedding. The final construction was very straight forward after all those toiles. I just followed the usual steps someone takes for sewing a dress with a lined bodice. Although I was a little cheeky and cut the back skirt pieces, bodice fashion fabric and lining fabric so the seam allowance was on the selvage, so need to finish those seam allowances.

Like the pattern adjustments, I’ll do a quick list of the construction steps in a behind the seams post.


~Changes I made this time~
  • As this was the first time I’ve made this dress pretty the whole dress was a change :P
~What I Like~
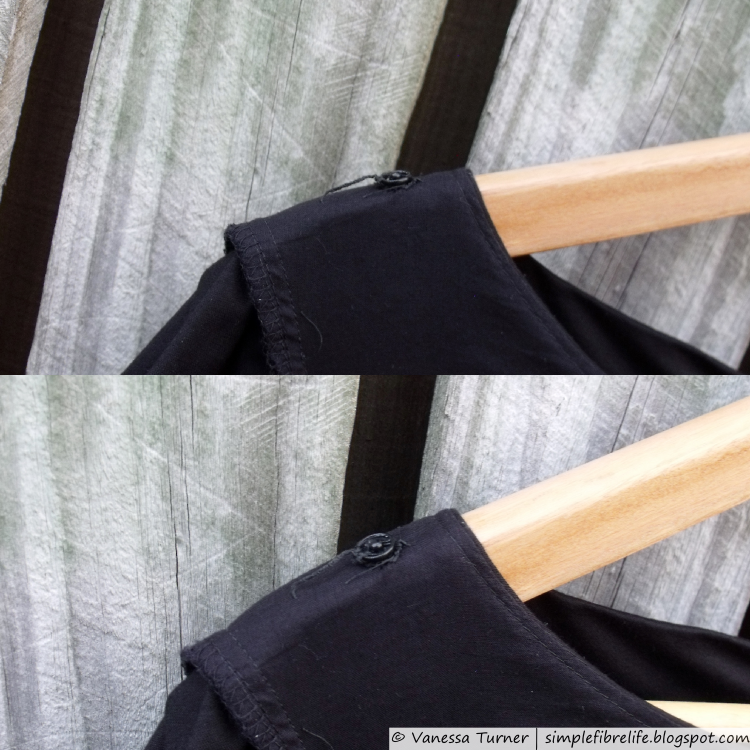
  • My absolute most favourite part of this dress are the bra strap carriers I sewed into the lining shoulder seams. I didn’t have to fiddle with my bra once! So great! (I used this method, it seemed the simplest and didn’t need any special equipment.)
  • The fabric is great, it looks good
  • Snap tab at the top of the zipper makes it easier for me to zip up on my own. Great alternative if you find sewing in hooks and loops too fiddly.
~What I Don't Like~
  • The pockets aren’t quite deep enough so things can fall out when I sit down. 
  • The zipper I used was a bit too short so there isn’t enough room for my caboose when stepping into the dress. I get into the dress from underneath.
  • There’s just a titch more ease in the waist than necessary. 
  • The fabric is definitely a fluff magnet, but I guess that’s one of the drawbacks of using dark a solid colour. Oh well, such is life. 
~Changes for Next Time~
  • Redraft the pockets so there are little deeper by raising the bottom of the pocket opening.
  • Use a longer zip
  • Nip the waist in little bit. Next time I might try constructing the garment with fronts and backs attached only at the shoulder and then sew up the side seam to adjust fit.
  • Perhaps make it in a patterned cotton sateen
~Numbers~
There was a lot of tweaking on this dress because of all the style changes that were made and had to be tested. So that time does add up…


PatternNA - Self Drafted-
Fabricblack cotton sateen $12.99 x 2.5m
black cotton lawn x 1m-ish – from stash
$32.48
-
Notions
  • Thread - 1000m – added to stash
  • 51cm (20”) Zip
  • Snaps – from stash
$15.99
$4.99
-
TimeTotal 30.5 hours (x $17-ish Australian min wage)
0.5 hours - fabric prep
5 hours - pattern adjustments
12.5 hours - sewing muslin
2 hours - cutting final garment
10.5 hours - sewing final garment
$518.50
Total
$571.96

That’s pretty expensive, but when you think about it. It’s a bespoke dress for a special occasion and really people have been known to spend HEAPS more. A lot of that time was spent perfecting the fit and the style changes so that time does add up; especially because I’m not a speed demon, I like to take my time :)

The eagle-eyed among you may note that I’ve changed the minimum wage from $16 to $17 that’s because the actual minimum wage is $16.87, so really I was cheating myself out of nearly a dollar an hour. We gotta give our time proper value, it’s finite.

~Final Comment~
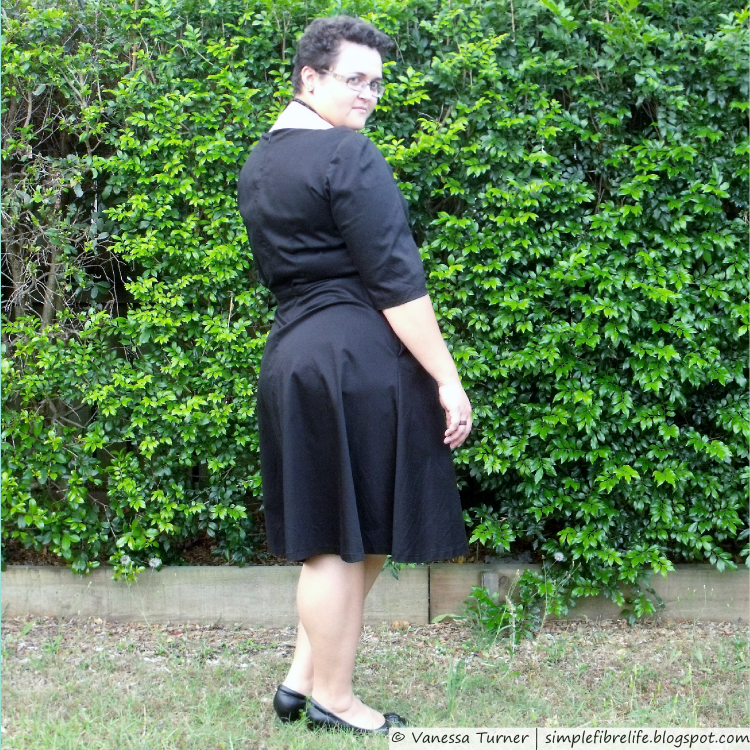
I’m very pleased with the dress I made. The final result was a very plain black dress. Something I can dress up or down (mostly up). It got heaps of complements on the day and it was very comfortable on the day. I think this pattern draft is a keeper; I might even make a digital copy for keeps, maybe.


Have you made something special recently? What’s your favourite fancy fabric to use? How do you avoid bra straps peeking out? Leave a comment below, I'd love to hear from you :)

Until next time,


Let's connect

Wednesday, 13 August 2014

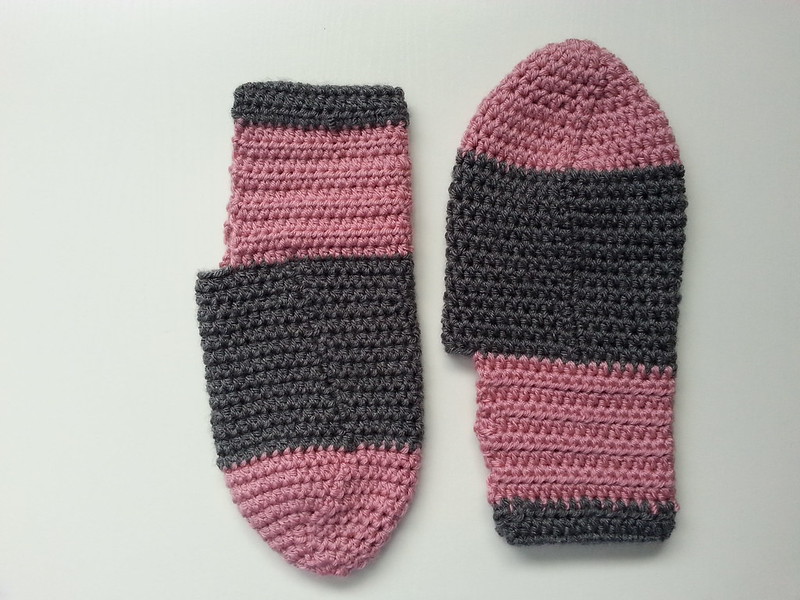
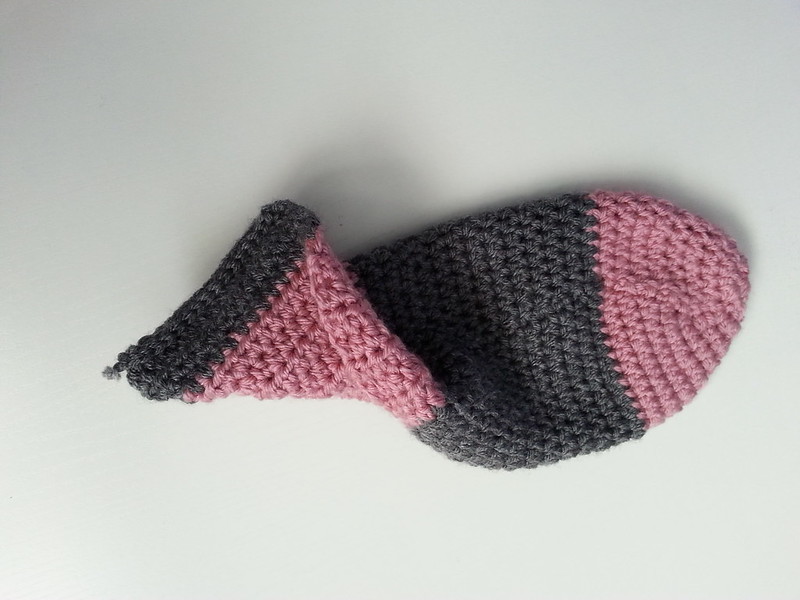
::Crochet::FO:: Pink and Grey Pippy Slippers

Recently I've worn my Brown Pippy Slippers in the company of others and have received lovely comments about how comfy they look.

Side-note: I can't believe I've had these slipper for two years.


I'm not often a selfless maker, but when it comes to my nearest and dearest my selfish making defenses are compromised. (I'm a sucker, I know)
So when my sister put in an order for some slippers in hot pink and grey, of course I said yes; but they would have to be a made of what is in my stash, which meant they were going to be a dusty pink and grey.


These seemed to come together pretty quickly. I might have something to do with making them both at the same time each segment at a time. So I did the goes of both, then the foot of both, then the pink heel and then the grey heel bits. They took me about a week on and off.

I do get a sore wrist from crocheting because I hold the hook like a pencil and flick my wrist to YO, but that's only if I go hard for more than an hour at a time. I find crocheting pretty mellow compared to knitting, because you're only working with one active stitch on the hook.

I made a few changes which I've made note of over on Ravelry.
Side-note: If you're on Ravelry say Hi :)

I crocheted the back seam instead of sewing it because that's how I roll :) and because when you're all snuggly and warm on the couch who can be arsed to get up and find a darning needle.


~Numbers~
I forgot to record how much time it took me to make these puppies, but I'm estimating about a 8 hours, but it was probably more.

I'm just estimating how much the yarn was worth because I probably didn't even use a whole ball and they from my stash anyway.

PatternPippy Slippers from Meet Me at Makes - found hereFREE
WoolIn Stash~$3.50
Notions NA $0.00
Time8 hours (* $16-ish Australian minimum wage) $128.00
Total
$131.50

Not cheap for house slippers, but it was still fun to revisit this pattern and do some crochet again.

~Final Comment~
These are pretty cute slippers. I like the colour combo, thinking about it know though I should have put the dark colour at the pressure points of the foot (toe and heel) because they'll probably get dirtiest.
I hope my sis likes them, uses them and appreciates them :)

Question time:
 
Do you crochet?
Do you begrudge making for others?  
What was the last thing you made for someone else?
Leave your answer in the comments :)

Until next time,


Let's connect

Monday, 4 August 2014

::Sewing::FO::Teal Peony for the Lady?

I wore this dress out for the first time over the weekend and someone asked if I made the dress and whether I had posted it on my blog. It wasn't until I got home that I realised that I haven't posted about this make here. Wha!?
So here she is on le blog.

I did make this dress over a month ago and posted about it on The Monthly Stitch.


 But, I've got a little secret. The dress wasn't completely finished when I posted it on TMS. I still had to hem the sleeves and skirt and hand stitch the bodice lining to the waist seam. Shhh!
I finished it not too long after posting it, so it's not that big a deal :P


My hair is at the at weird length where it looks like there is a koala attached to my head, but I can't really do much with it. So, I popped on a hat for these photos.
Note to self: Sort out the hair situation.

~Inspiration~
I've been wanting to make this dress for ages.
I've had the pattern printed, pasted and ready to go for awhile now, so when The Monthly Stitch announced that the first challenge for their Indie Pattern Month would be dresses I knew exactly what I was going to make. Thanks TMS for giving me the boot :)
There were quite a few adjustments made to this dress, but I'm pretty pleased with the way it turned out in the end.
I was sewing like women possessed trying to get this puppy sewn up before we headed off for a long-weekend vacation. I took the pictures just as the light was fading over the horizon.

~Pattern Adjustments~
Full Bust Adjustment  C cup to D cup (3/8" spread) - I can never remember whether Colette Patterns are drafted for a C cup or D cup, but I've come up with a way to remember C for Colette Patterns!
When I did the FBA the darts ended up a bit wonky
Moved waist bust dart point and reduced the dart intake by 1/2"
Big Butt Adjustment-cut & pivot at the waistline total of  2 inches spread over to vertical cuts
Lengthened skirt 1 inch all over and an extra 1 inch at the back to compensate for Big Butt Adjustment
Shortened sleeves by 6.5 inches


~Construction~
I  didn't follow the instructions on this one. I don't like facings so I lined the bodice with the main fabric.
So because I went  'off piste' here is a quick summary of my construction steps.
-Sewed darts, in the bodice and bodice lining and joined bodice and lining at the shoulders. Clipped, pressed and finished seams on the overlocker.
- Sewed the bodice and lining together at the neckline pressed clipped and turned
- Sewed the side seams of the bodice and lining - separately, pressed
- Basted the armholes of the bodice and lining together so they wouldn't shift when inserting the sleeve
- Sewed bias tape to the sleeve cap to ease it into the arm hole
- Sewed the sleeve seam
- Inserted the sleeve
- Finished the edges of the pocket pieces on the overlocker & attached them to the skirt pieces. Pressed. Finished the skirt side seams on the overlocker.
- Sewed the skirt pieces together at the side seams, sewing around the pockets
- Gathered sections on the front skirt
- Attached the skirt to the bodice
- Inserted the zipper
- Sewed the lining to the zipper and bodice-skirt seam
- Hemmed the sleeves and skirt.
Pheew!

I have come to the conclusion that I am not a big fan of setting in sleeves. This time I used the "bias tape" trick where instead of gathering the sleeve cap with basting stitches you sew a strip of bias tape to the sleeve cap while keeping it pulled taut. I think it worked pretty well here.

 ~Pattern~
Colette Patterns 1017 (Peony) Version 1 with shortened sleeves and no belt.

~Materials~
Teal poly cotton fabric I've had in my stash for ages.
22" invisible zipper

~Changes I made this time~
Heaps! See the pattern adjustments above!

~What I Like~
- I wasn't sure about the colour initially, but now I quite like it. - When I wore the dress out I got a few compliments on the colour. So that's a definite winner.
- I'm pretty pleased about the success of my Big Butt Adjustment
- I like that the waist seam matches at the zipper
- Pockets!

~What I Don't Like~
- The zipper puckering
- The invisible zipper peaking out
- The fabric - after making my Navy S2444 and this dress I've come to the conclusion that I need to move away from this poly cotton. Too bad I've still got some in my stash :(

~Changes for Next Time~
- Definitely different fabric.
- There are a heap more fitting adjustments I want to do on this dress. I think a big one is to raise the lower armscye on the bodice. I'm thinking that will help a bunch with arm movement. Or maybe I'll have to sew in a gusset. Hmmm.
- I also want to lower the centre and shorten the width of the neckline.
- I also want to re-adjust the waist bust dart on the bodice - change it so that the dart centre is vertical and not at an angle.

~Numbers~
Pattern
Colette Patterns 1017 (Peony) view
$14.00
FabricTeal Poly cotton x 4m - had in stash can't remember cost$-
Notions -Thread - had in stash
-Bias Tape (for sleeve easing) - had in stash
-22" Invisible Zipper
$-
$-
$5.00
Time2 hours pattern adjustments
11 hours sewing
13 hours (* $16-ish Australian minimum wage)
$208.00
Total
$227.00

This is the first time that I've used the Peony pattern so I've included it in the tally.
Also, because it is the first time I've used the pattern there was a lot of time spent making pattern adjustments.

A lot of the sewing time included the muslin making process, so lots of sewing, seam ripping, re-cutting fabric and sewing again.  I also experimented with techniques for setting in the sleeves so that took some time too.

In future I want to break down my sewing time a bit more. While I was making this project I was using a time tracker app on my phone. I think a project based time tracker would be a better option in future because the time tracker app only really broke time down by description and category - although thinking about that now. I guess I could make each project a category. Hmmm, something to ponder.

~Final Comment~
I'm fairly pleased with this make. I did rush it a bit because of the looming deadline and running out of time because we are going away, but I think this will be a good dress for 'everyday' wear. I have to go back and reinsert the zipper again I think….maybe  ;)
Spoiler: I didn't reinsert the zipper :P

You can pop over to the post I did on The Monthly Stitch to see some more (unfinished dress) pics :)


Question Time:
Do you follow instructions when you make something?
What are some the 'standard' things you change when you make something?
Do you ever go back and 'fix' things when you make something? I rarely do.
What are your tips for inserting sleeves?


Until next time,


Let's connect

Tuesday, 15 July 2014

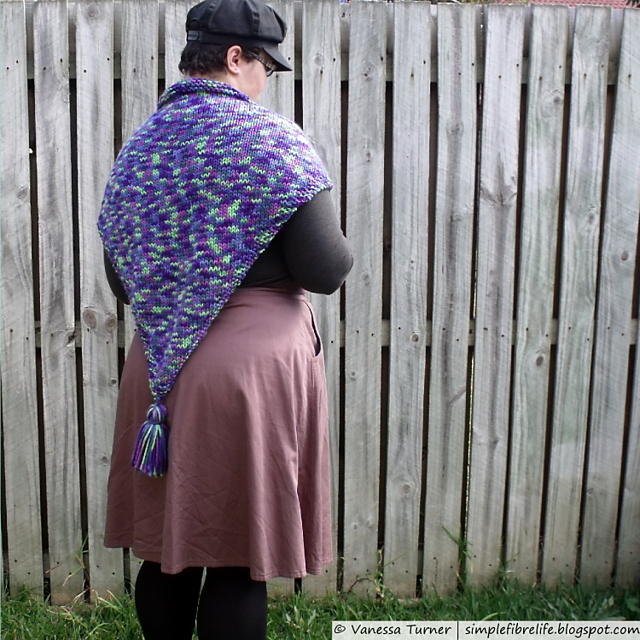
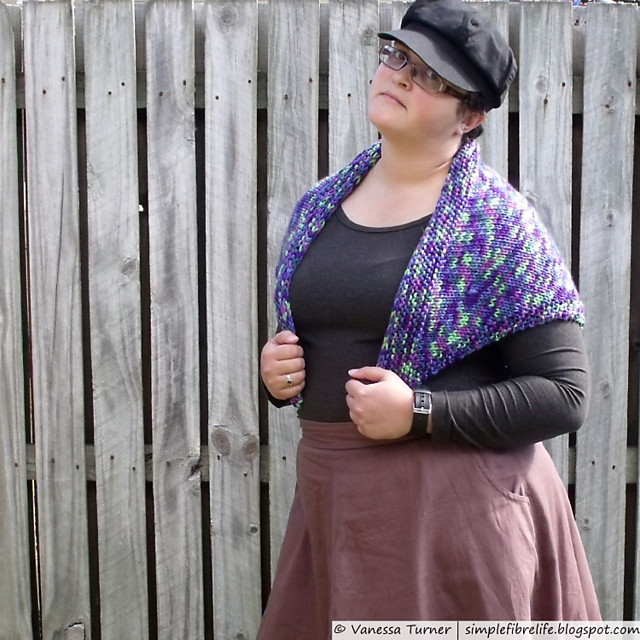
::Knitting::FO:: Cold Back There Shawl


~Inspiration~
I've been knitting, I guess it's the cool weather in Brisbane.

I've wanted to make a shawl for a very long time and I finally finished it this week. Lately I've been trying to stash bust instead of buying, so I dug through my stash and found some cheap bulky 100% acrylic yarn I've had my stash for years. I cast on and just knit my way through the ball of yarn and cast off when I thought I was near the end.

It's a bit smaller than I had envisioned but it still does the job. The colour is not too bad. After all it's just for schlepping around home.


Details and construction notes on Ravelry.

Lately I've lost my sewjo. I've got a couple of projects cut out and waiting patiently to be put to action, but I'm just not feeling it at the moment.

~Changes I made this time~
  • None this was a completely improvised make.

~What I Like~
  • the Tassel!
  • it sits quite well

~What I Don't Like~
  • Not as wide as I would like


~Changes for Next Time~
  • Perhaps making it a bit wider by increasing on every row
  • changing where I put the increases so they're not at the very edge.
~Numbers~
I can't remember how much this wool was but I can't imagine I'd have bought it if it was more than $10.
I didn't record my time with this make, but at a rough guess I'd say maybe 8-ish hours.
So materials were cheap, but it took a while to make.

PatternNone$0.00
YarnIn stash - from pre-blog$8.00
Notions none
$0.00
Time8 hours (* $16-ish Australian minimum wage) $128.00
Total
$136.00

    ~Final Comment~
    I'm pretty happy with my shawl. It sits well and was a bit of fun to make.
    My favourite part is the swishy tassel.


    Do your sewing/knitting/creating habits change with the seasons? Have you done any stash busting lately? I'd love to read your comments :)

    Until next time,
     

    P.s. About my last post. It was quite a personal post. I've thought about taking it down because it doesn't really fit with the 'theme' of this blog. But I've come to the conclusion that it is still a part of my journey so I will keep it published. 

    Lets connect

    Thursday, 5 June 2014

    ::Sewing::FO:: Two-Tone Colour Block Scout Woven Tee


    ~Inspiration~
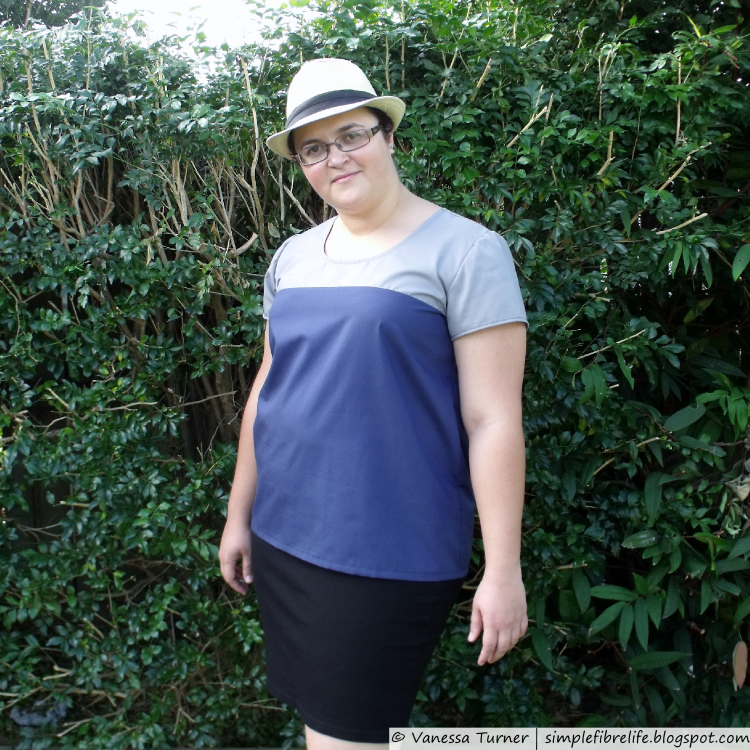
    During the Kollabora Scout Woven Tee sewalong I stumbled upon this fantastic tee. I'd been toying within this idea for awhile when the The Monthly Stitch Sew Double Challenge was announced. I wore my first Scout Tee at least once a week during the warmer  months and I wear my knit Scout Tee at home and to bed during the cooler months. I thought it would be a fitting  candidate for a sewing double challenge.

    In the end I didn't get around to sewing it up in time to post to the monthly stitch. Although I did manage to slip in a sewing double post about my Hollyburn skirt. I actually made this before I made my Grey Skating Lady dress.

    ~Pattern Adjustments~
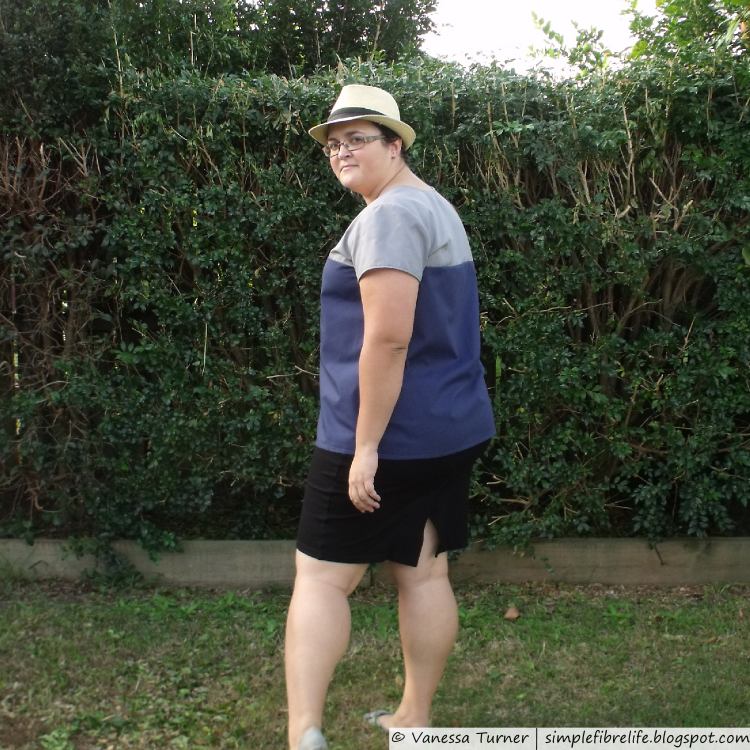
    I traced off the pattern I had used in my previous scout tees (lengthened by 3 inches and size 16 on top and 18 on bottom) and modified the pattern buy cutting across the front and back pattern pieces about 1 inch below the armscye. I wanted to make this as simple as possible so I decided to avoid cutting through the armscye and sleeve so it was less work.

    ~Construction~
    The top and bottom for the front and back were sewn together. Sleeves were sewn in flat after joining the shoulder seams. The sides and sleeves were sewn as one, trying to line up the seams crossing the body pieces. Neckline was finished with bias tape as facing and sleeves and waist were hemmed.

    ~Pattern~
    Modified Grainline Studio Scout Woven Tee

    ~Materials~
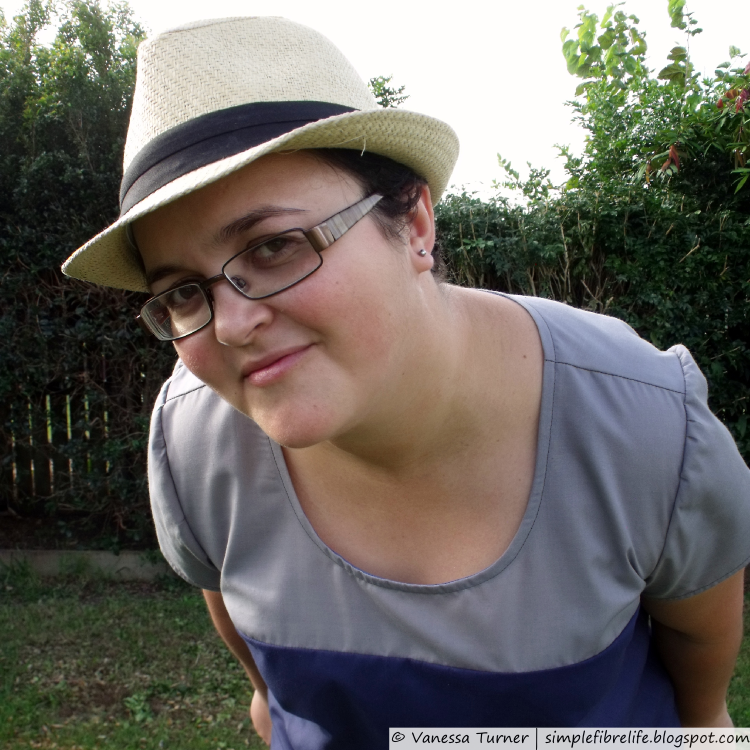
    Left over poly cotton poplin fabric from my first S2444 dress and the M5591 skirt I made mum (the grey fabric wasn't pre-washed so we'll see what happens after a few washes). I chose a lighter colour for the top in an attempt to balance out my pear shape. I think it worked, but I think having it so close to my face washed me out. You'll have to tell me what you think.

    ~Changes I made this time~
    • Traced a graded version of the pattern I have used in the past
    • Modified pattern for colour blocking

    ~What I Like~
    • It's a loose airy fit and will be good to wear next summer or with a long sleeved knit
    • I like where the line between fabrics falls

    ~What I Don't Like~
    • The seams puckering
    • I'm not sure about the colour choice


    ~Changes for Next Time~
    • I think using a different fabric might help with the puckering problem - maybe a a smaller stitch length
    • Perhaps use a patterned and solid fabric next time
    • Perhaps try a back opening with buttons like the inspiration tee

    ~Numbers~
    PatternScout Woven Teed - Used before$0.00
    FabricIn stash - left overs from previous makes$0.00
    Notions Thread - in stash
    Bias Tape - in stash
    $0.00
    $0.00
    TimeAbout 1 hour to trace and adjust pattern
    About 1 hour to press and cut fabric
    About 5 hours to sew
    7 hours (* $16-ish Australian minimum wage)
    $112.00
    Total
    $112.00

    ~Final Comment~
    As soon as I finished this top I put it on. This was a great way to experiment with colour blocking and modifying a pattern. It will be interesting to see how the fabric changes with wear. This is going to be an 'everyday' wear top I think and I'm sure I'll get a heap of use out of it.

    Have you been inspired to make something recently? Where do you get you're inspiration for your projects?
    Leave a comment below, I'm interested to hear where others get inspiration.

    Until next time,


    Let's connect

    Wednesday, 28 May 2014

    ::Sewing::FO::Grey Skating Lady

    ~Inspiration~
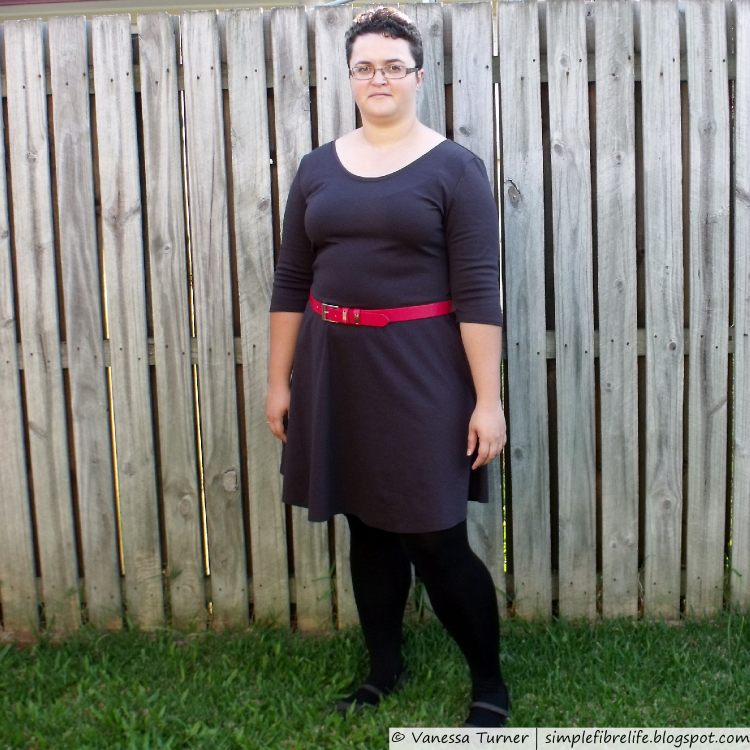
    I've wanted to make a knit dress for ages. I'm really drawn to knits as the weather turns cooler here in sunny Queensland. Most of my winter wardrobe is long sleeve knit tops. I was spurred on to make this dress by The Monthly Stitch Sew Stretchy challenge  for May (here are my posts over there...there's not many...yet).

     I've been eyeing off The Lady Skater dress for a long-time, especially after it exploded all over the sewing blogasphere when it was released. I eventually bit the bullet and bought it in the first Perfect Pattern Parcel.

    ~Pattern Adjustments~
    I looked at the sizing on the pattern and it said I should cut a 7 in the upper bodice and grade to an 8 in the waist. Of course, me being me, I just cut a straight size 8. In future I will grade from a size 7 to an 8.
    (Note to self: stop being silly and just go with what the pattern says)

    ~Construction~
    I changed up the construction a little. I'm not a fan of sewing on shoulder seam, attached the neckband and then sewing the other shoulder seam. I attached the clear elastic as it says in the instructions; then sewed both shoulder seams. I sewed the neckband into a loop by sewing the short ends together right sides together; then folded and basted it along the long edge wrong sides together. Then attached the neckband to the neckline in the round.

    Sewing this dress was a bit back and forth. As I wasn't sure about the dress I used mostly my sewing machine. I sewed up the bodice and sleeves and tried it on before unpicking the side seams. Then I overlocked the sleeves to the bodice, attached the skirt and overlocked up the side seams.

    I tried the dress on and was a bit disappointed by the neck band flipping out. So I trimmed a couple of the seams in the neckline and left one to get sewed down later.

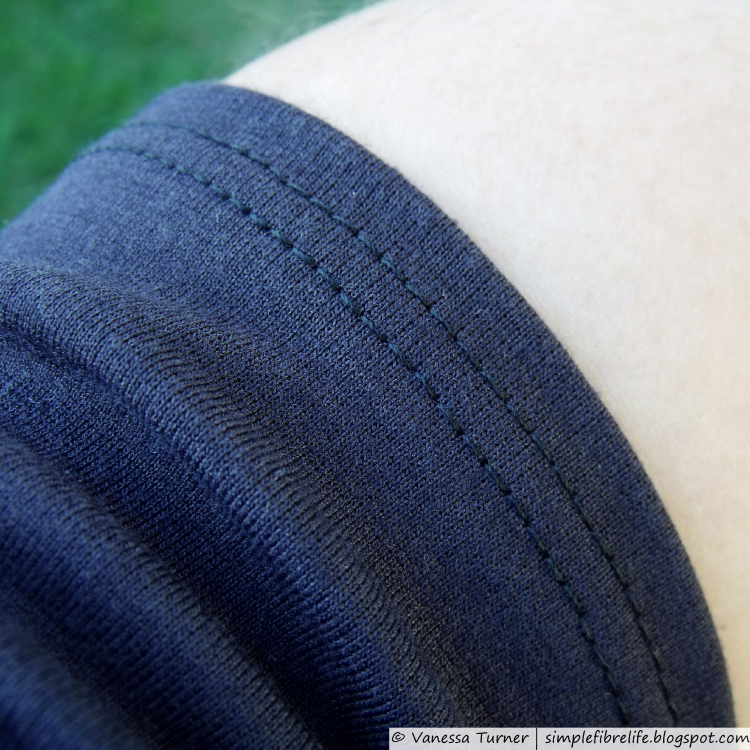
    If you follow me on Instagram you would have seen that I borrowed a coverstitch machine from my sister . I was going to use it to hem the sleeves and skirt but it was being a complete PITA so I just decided to use my twin needle.


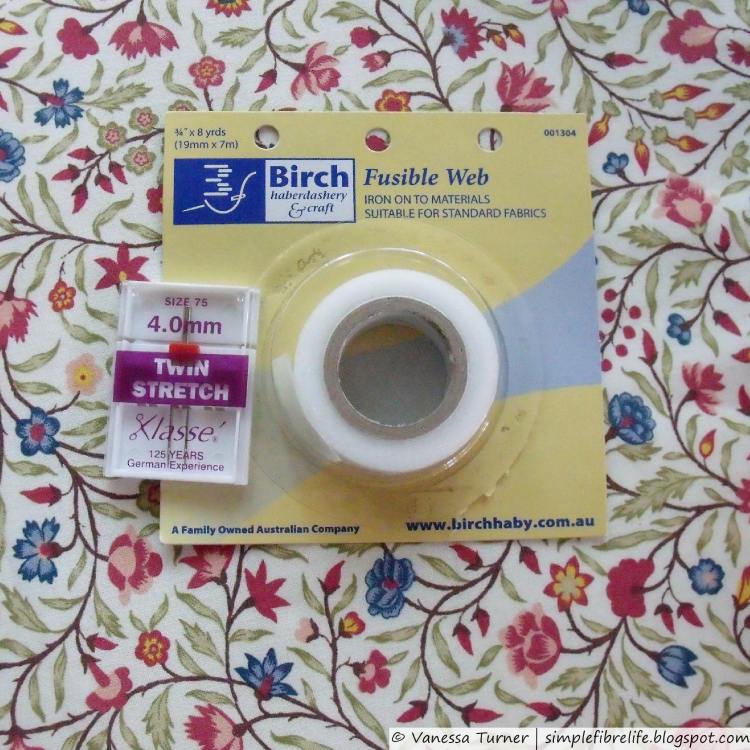
    The seams were misbehaving as I was trying to fold and press them for hemming, so I trimmed some fusible web and used it to fix the seams down in sections to stop it from flipping. It was much easier to use the twin needle to finish the hems because they weren't sliding all over the place and there wasn't any need for pins. Suweet!

    After practicing with the twin needles on the sleeve hems I stitched down the neckline seam allowance I had left . Before I sewed, I pressed the neckline with heaps of steam. I didn't bother with fusible web this time because it was topstitch. When sewing, I tried to align one needle in the seam and the other over where the seam was. The neckline lies nice and flat now so top stitching with the twin needle was a winner.


    I like the length of the skirt so I decided not to hem it (that and I just really wanted to wear it) I just popped some Fray Stoppa on the skirt side seams.

    ~Pattern~
    Kitschy Coo The Lady Skater - 3/4 sleeve

    ~Materials~
     I've had this fabric in my stash for nearly a year. I had intended on using it to make a stretch pencil skirt but I haven't gotten around to it . The fabric was lovely to handle and I would recommend it to anyone starting out in knits as it's a stable knit.
     I ran out of clear elastic while I was making this dress. I was going to resort to regular elastic, but I didn't think I be happy with that so I did end up ducking out and buying more.

    ~Changes I made this time~
    • Attached the neckband in a different way.
    • I twin needled the neckband down.
    • I omitted the sleeve bands.

    ~What I Like~
    • The shape of the dress is fantastic.
    • The neckline doesn't gape!
    • I think I'm in love with Ponte. I want to buy all of the Ponte. All of it!
    • Twin needles are fantastic!

    ~What I Don't Like~
    • The top of the sleeves don't fit so well
    • There's a bit of excess fabric in the lower back. I'm thinking I need to do the old Full Butt Adjustment because the hem is a bit higher at the back - a usual.
    • The waist seam is a bit weird


    ~Changes for Next Time~
    • Grade from a 7 to an 8 in the bodice and sleeves
    • Maybe do a swayback adjustment
    • Use the overlocker to sew all seam, which might fix the weird waist seam

    ~Numbers~
    PatternKitschy Coo - The Lady Skater - 3/4 sleeve$5.00
    Fabric
    Deluxe Ponte Double Knit  (Spotlight) $9.99/m * 2.5m
    ~$25.00
    Notions Thread - in stash
    Clear Elastic
    Fusible web - in stash
    $0.00
    ~$3.00
    $0.00
    Time 8 hours (* $16-ish Australian minimum wage) $128.00
    Total ~$161.00
    Even though it took me a while to make this dress it was worth it just for the lessons I learnt while making it.

    ~Final Comment~
    I'm loving the Ponte fabric in this shape of dress. It will be great to wear in the cooler months with tights/stockings, a scarf and belt.  There are a few tweaks that I'll have to make when I make another. I may even tweak the sleeve heads on this dress...maybe. But, overall I'm really digging this dress. It get's two thumbs up from me.

    Do you wear a lot of knits? Have you sewn with knits before? 
    Leave a comment below, I'd love to hear from you :)

    Until next time,


    P.s. I've read a couple of posts about taking photos for sewing blogs namely this one and this one, so I'm going to try improving pictures for this blog. Holla if you have any suggestions.

    Let's connect

    Friday, 16 May 2014

    ::Sewing::FO:: Spot the S2444 Dress

    Hey there!

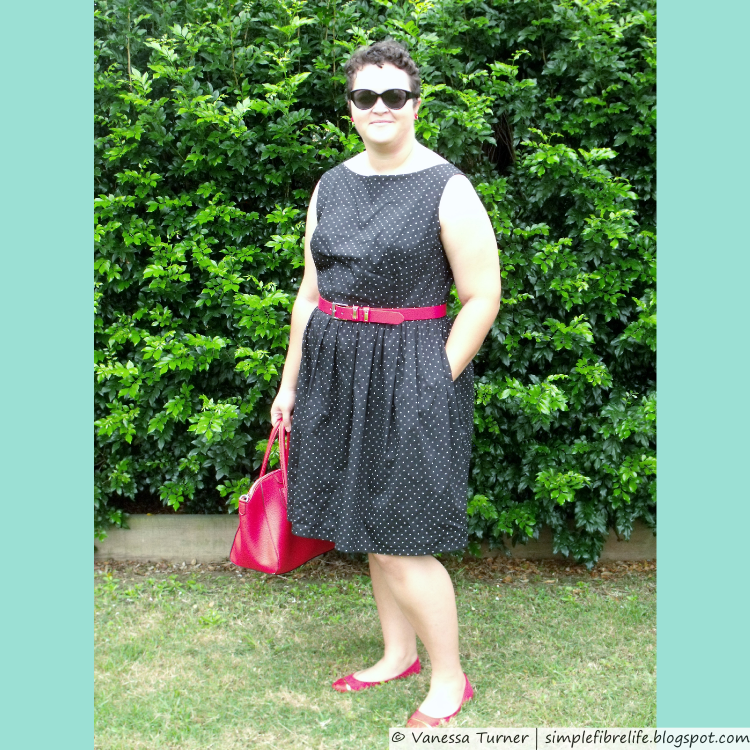
    I attended a wedding mid April (What do you mean it's mid May!) and I made a dress, as I mentioned in my ambitions post. In true procrastinator style I didn't start making this dress until a couple of weeks before the wedding.

    Of course on the day I forgot to take blog pictures of me in the dress but totally forgot so had to duck out into the garden the next day for a few quick pics.


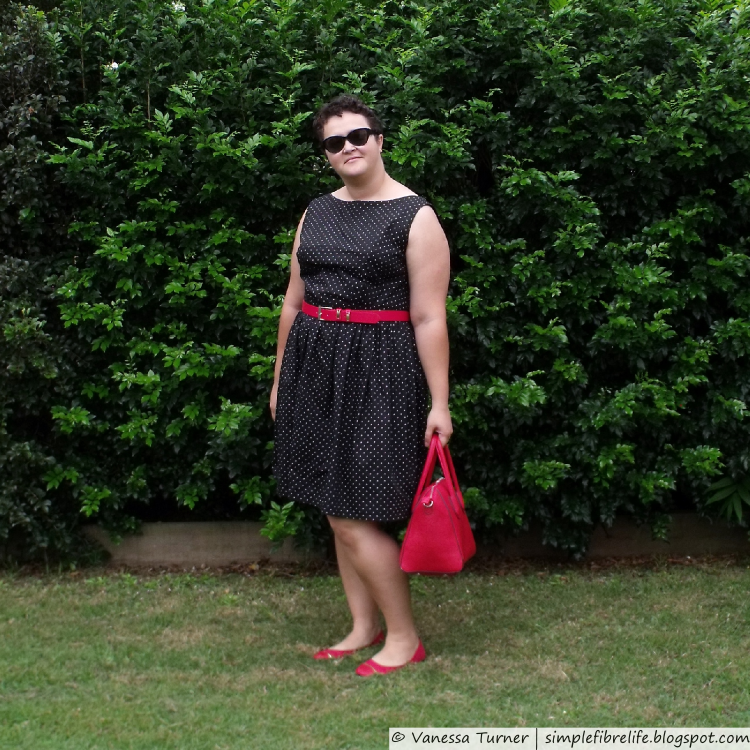
    This is another S2444, but instead of pleating the skirt (I just could not be bothered mucking around with it aaand I didn't have enough fabric anyway) I added a gathered skirt instead.

    I've been wanting to make a dress with spots on a black background for some time. I don't know where the idea came from, maybe it's all the spotty goodness that happens on the sewing blogasphere.

    The fabric is pretty great, it has a nice hand and I think the spots are a great way to break up the black. I think I could wear this dress to an event schmancy event. It's from the spots and stripes range from Spotlight. The lining fabric I used is some pure black cotton lawn also from spotlight. I bought 5 metres at $4.99 per metre but got a 20% discount by using a voucher (that they were handing out at the door :-O. So essentially I got a metre free. Woop woop!


    After having made this dress before I made the bodice up just as I did before, lining and all. I was going to add sleeves, but I haven't fitted that pattern piece yet. I cut the sleeves out anyway in hope that they would fit (I totes knew they wouldn't, but I thought I'd try my luck). I cut them so they  ended at the shorten/lengthen line instead of at the 3/4 quarter line. I eased in one sleeve and basted up the bodice side and sleeve, but the sleeves where just slim for my biceps :( , but I liked the length :)  So that was a no go on the sleeves… this time.

    Luckily though I was able to salvage the fabric but cutting out a pair of pocket pieces from the fabric. I was going to make the pocket linings out of the lining fabric, but when I went to sew them together I realised that the lining fabric would be too flimsy for pockets.

    Putting the pockets in with a gathered skirt posed a challenge and I had to have a bit of a think before I did it. The skirt was made up of 3 skirt panels, 1 front and 2 back to allow for a centre zip. I sewed the pockets to the skirt side seams, leaving a 1 inch gap at the top. Then I sewed the skirt side seams and pocket together. Sewing the top 1 inch of the skirt side seams together meant that I could sew the 3 lines of gathering stitches along the top of all 3 skirt panels. Gathering the skirt was a pain in the arse and my gathers weren't perfect, but I just had to sigh and say "progress, not perfection" and keep going.

    To finish off it was a matter of attaching the skirt to the bodice, inserting the zipper; hand stitching the bodice lining to the zipper and waist seam allowance; and hemming. The zipper puckered a bit, which probably could have been avoided if I had used some stabiliser. I would like to find some fusible web for puckering zips.


    Once I finished my dress I wasn't sure about how I was going to accessorise. I was totally going to default to my usual black, but then I thought red might be a nice change. So, the day before I went out and bought red shoes, belt and bag.
    I'm so glad that I went with red, they really pop against the black.

    The front neckline on this dress gapes, I'm able to pinch about 2 inches out of the front neckline; but the back seems fine. The bodice lining makes it a bit of bitch to iron. I probably didn't need to line the bodice on this dress because it is a cotton and breathes ok. So next time I'll have to think about fibre content of the fashion fabric before I add a lining. The pockets being attached at the waistline make it hard to iron the skirt properly at the side seams, but I can live with that.


    ~Pattern~
    Simplicity 2444 - Bodice
    Self drafted (kinda) gathered skirt

    ~Changes I made this time~
    • Lined bodice - like last dress
    • Pockets extended to waist seam - like last dress
    • Gathered skirt instead of pleated skirt
    ~What I Like~
    • Fabric
    • Gathered skirt
    • Pockets!!!
    ~What I Don't Like~
    • Neckline gapes a bit
    • Zipper wrinkled when it went in
    ~Changes for Next Time~
    • Pinch out about 2 inches from the neckline (1 inch on the pattern neckline and rotate it out to one of the bust darts) 
    • Try fitting the sleeves on this dress
    STATS
    PatternSimplicity 2444 - I've used it before - Free$0.00
    Fabric
    Spotlight Spots and Stripes100% cotton 2.5 m @ 9.99/m
    Black lawn 100% cotton 1.5 m @ about $4/m
    ~$25.00
    ~$6.00
    Notions Thread had it on hand - Free $0.00
    Time 8 hours (* $16-ish Australian minimum wage) $128.00
    Total ~$159.00

    ~Final Comment~
    I'm really happy with this dress. Even though gathering was a pain I really like the gathered skirt. I like how the red accessories I wore with this dress popped. This is a great dress that I can wear to any occasion. I've already worn it to a few other social gatherings and I'm really happy with it and want to make more. With a few tweaks this bodice would devinately be a great TNT (tried and true) pattern.

    Do you  make things based on ideas you have first or do you make something based on the materials you have?
    I'd really like to hear from you, leave a comment below :)


    Until next time,

    Let's connect

    Thursday, 24 April 2014

    ::Sewing::FO:: That 70's Hollyburn

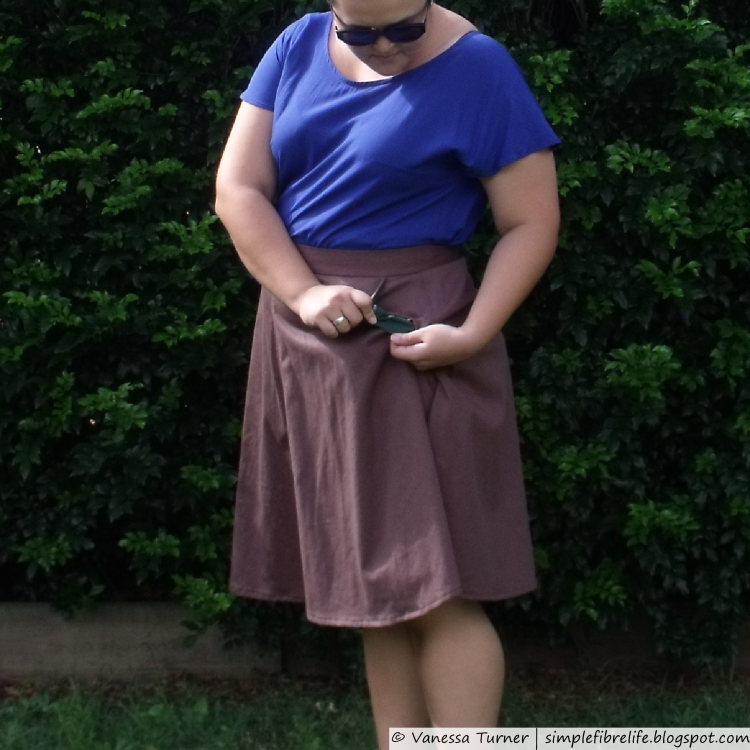
    Ever since I made my first Hollyburn skirt I've been meaning to make another.


    I couldn't for the life of me find the pattern pieces I'd traced and adjusted from last time. I can't remember which view I cut out last time (I checked the post and I didn't mention it. Gah!)
    I traced view B pattern and then put it aside as I made this dress. I finally cut out the fabric for this skirt the other day when I was cutting my rayon kimo-no top.

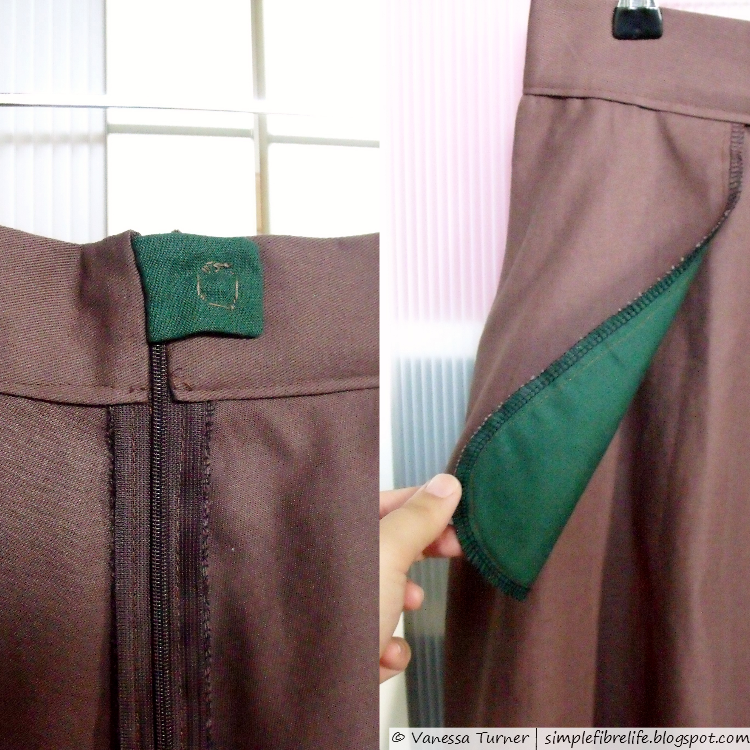
    I found that in the last skirt the pockets where a tad bulky so I thought I'd try to make the lining out of some quilting cotton I had in my stash. I drew a 5/8 inch seam allowance either side of the fold line. I folded the pattern at the appropriate SA line and cut out the pocket lining from the quilting cotton and the pocket from the main fabric. I could have done a pocket facing (when the pocket bag is made of a lining fabric, but the bit showing is a small section of fashion fabric), but I'm not that big a fan of them. Mine usually slip out so you can see the pocket facing edge from the outside.

    I folded the pattern at the appropriate SA line and cut out the pocket lining from the quilting cotton and the pocket from the main fabric. While I was faffing about with the pockets I got rid of the point in the bottom of the pocket bag by tracing around a container lid and snipping it off.

    This is my trying to show you the green pocket facing.
    I took my time with this make and added some details to mix it up. I top stitched around the pockets edges. I sewed, overlocked (serged) and top stitched the front and side seams. To top stitch the seams I used my stitch in the ditch foot and moved the needle to the side.


    As an experiment I used heavyweight interfacing on half the waistband. I finished the waistband by stitching in the ditch between the waistband and skirt.

    I sewed in snap tab at the top of the zipper to hold the skirt up as I zip up. I came across this idea in the Pants Construction Techniques Craftsy class with Sandra Betzina.


    Inspired by this post I trimmed and finished the invisible zipper by sewing pouch the width of the zipper, folding all the raw edges to the inside, slipping the trimmed zipper in the pouch and sewing across the top.

    To hem I sewed a line of basting at 1 inch. I then pressed the hem up at this line. To finish I turned raw edges into the crease of the fold.

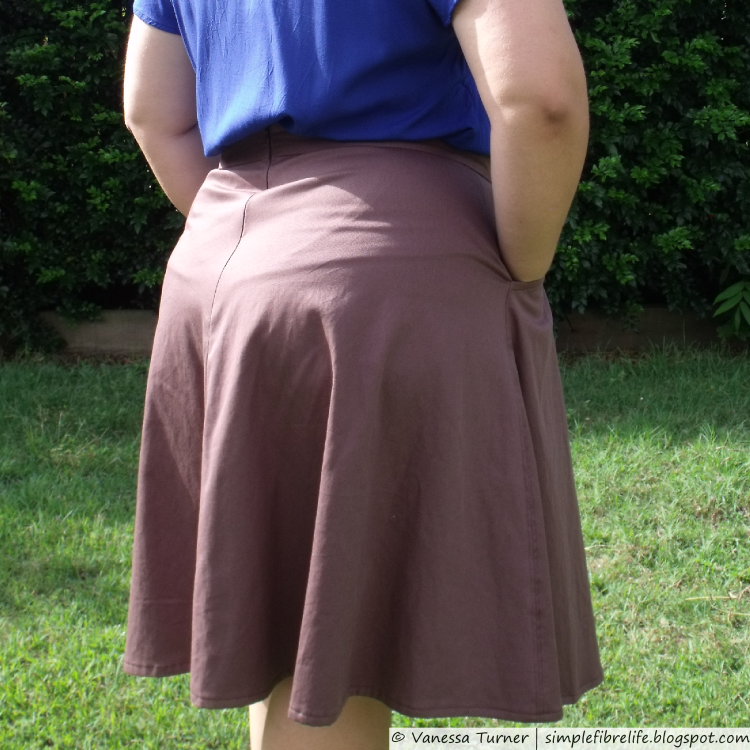
    I'm happy with the fit of this skirt. It is very different to the fit of the first Hollyburn I made. The waistband is snugger than I'm used to and sits at my waist, but that was what I was going for. The skirt fabric bunches and pulls a tad above my bum, which means I either need to do a sway back or a full butt adjustment - I'm leaning towards a full butt adjustment.


    ~Pattern~
    Sewaholic Hollyburn-View B

    ~Changes I made this time~
    • Changed the pockets - made it a 2 piece pocket and rounded the pointed bottom
    • Snap tab at top of zipper
    • Invisible zipper
    ~What I Like~
    • The snap tab is fantastic! Makes zipping up a breeze!
    • The colour is a great basic without being black.
    ~What I Don't Like~
    • The fabric is a bit rough. But I'll see how it goes after a few cycles through the wash.
    • The zipper gets a bit stuck at the waistband. I think it's a  combination of a bulky waistband and slightly over exuberant stitching at the zipper while finishing the waistband  are the culprits.
    • There is a bit of pulling in the back of the skirt when I put my hands in my pockets
    ~Changes for Next Time~
    • I might try a full butt adjustment to resolve some of the bunching at the back of the skirt.
    • I have sewn the Hollyburn a couple of times in fairly heavy fabric. I'll have to try it in a lighter fabric.

    STATS
    PatternSewaholic Hollyburn (view b) - used before - FREE$0.00
    Fabric3.0 m brown cotton canvas (can't remember how much it cost, it's pre-blog)$15.00 ish
    Notions
    • Thread
    • Snap
    • Interfacing
    $3.50
    $0.50
    $0.50
    Time8 hours (* $16-ish Australian minimum wage) $128.00
    Total
    $147.50

    ~Final Comment~
    I think that the skirt has a very 70's vibe. I think it's a combination of the shape, length and colour. Overall a pretty good make. It will make a great addition to my wardrobe rotation.


    So tell me, have you been meaning to make another of something you've made before? If so, what is it? Leave a comment below :)

    Until next time,

    Lets connect

    Wednesday, 16 April 2014

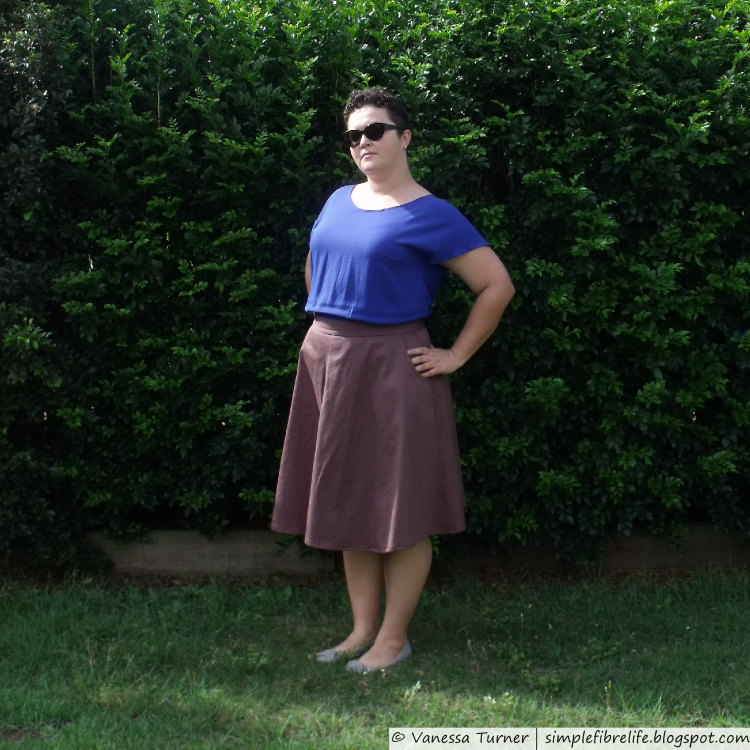
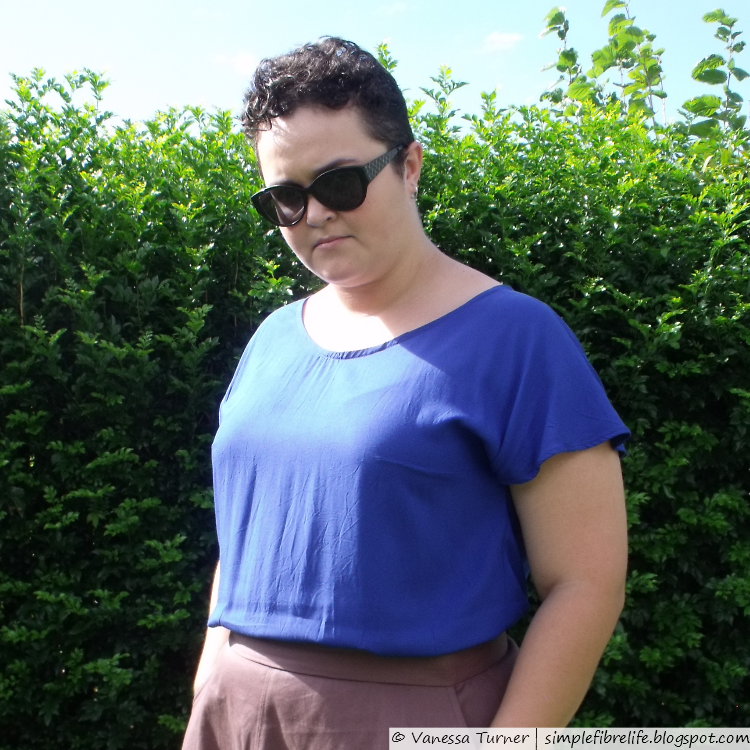
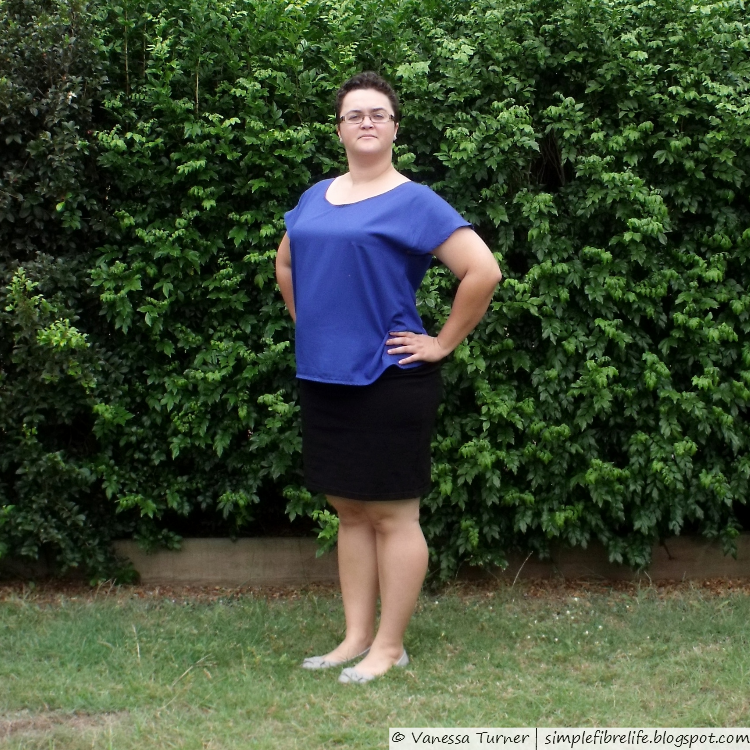
    ::Sewing::FO:: Kimo-No Sorbetto Cobalt Rayon Top


    I don't know what is happening with my face here.
    Please excuse the 'bitchy face'
    This blue rayon has been calling to me since I bought in September last year. I've been a little afraid to play with it because it felt slippery and slinky and I thought I would be a bugger to sew.
    Last week I was playing with my fabric (please tell me I'm not the only one who takes fabric out of my stash; pets it; admires it and folds it all back into the stash) and inspiration struck. I think this fabric would work fabulously in a kimono tee. I looked to Miss P's amazing pashmina refashions for inspiration.

    Took out my Colette Sorbetto pattern and traced out the size 18, added 2 inches in length, raised the back neckline by 2 inches and drafted on some kimono sleeves. I took photos of my process because I was going to share how I added my kimono sleeves with you, but I won't because I stuffed that up a bit.

    A little trick I thought up as I was added length was to trace the pattern, mark the added length at the bottom then slide the pattern down to the marking and trace the new hem. This trip probably wouldn't work in all cases (like adding length to a circle skirt) but it worked fine here.


    I cut out the fabric using a rotary cutter and cutting mat which I thought would be safer than scissors with this slinky slippery fabric. A few hours later I had a 'ding' moment and thought I may have drafted kimono too narrow. My suspicions were confirmed when I basted the top together. The sleeves where far too snug and distorted the neckline.

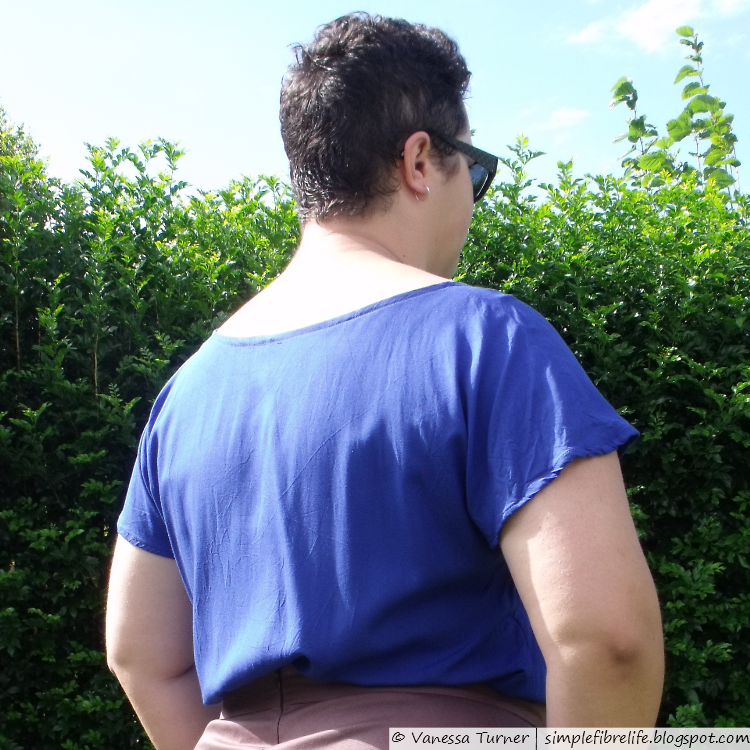
    I unpicked the side seams. I resigned to the fact that this wasn't going to be a kimono tee and made it a cap sleeve top by cutting from the outer edge of the shoulder seam to the underarm (just above the bust dart on the front) removing the lower portion of the sleeve. Thinking about it now I should have cut the sleeves with a curve so the cap sleeve was less pointy at the shoulder seam.

    Construction wise this top had a bit of back and forth about it.
    The first bit of sewing I did was to stay stich the neckline.
    I sewed the bust darts and then sewed and overlocked (serged) the shoulder seams.
    After baste fitting the side seams; ripping them out and removing the lower portion of the kimono sleeves I overlocked  all along the side and sleeve edges.
    The side seams where then sewn.
    I did a double turn hem for the sleeves.
    I overlocked the hem, then unpicked it because I didn't want bulk in the hem.
    The neckline and hem where faced with bias tape.


    I've avoided rayon because it's a bit slippery and I thought it was synthetic. But as it turns out it’s a natural fibre that has very intense processing (which I learnt from Steph C). In the end it wasn't that hard to tame the rayon.

    I'm surprised with how much I like the sleeves on this top. It's a happy accident. I like the fit although I could probably be a bit snugger. The neckline is wider than what I'm used to and find myself fussing with it to make sure I keep my modesty and my bra straps covered. Thinking about it now, maybe bra strap carriers are the answer.

    ~Pattern~
    Colette Patterns Sorbetto - Hacked

    ~Changes I made this time~
    • Back neckline raised
    • Added length
    • Added kimono sleeves, which I then had to adjust into a cap sleeve
    ~What I Like~
    • The fabric colour and drape
    • I like the length
    • The cap sleeves turned out better than I thought they would
    ~What I Don't Like~
    • The neckline is a bit wide and the front neckline sometimes droops a little too low for comfort
    • The sleeve hems are a bit bulky and alter the drape
    • The top has a lot of ease
    ~Changes for Next Time~
    • Try tracing a size 14 next time and from under the grading out to a size 18 from the waist to hip
    • Make the neckline narrower (although if I trace a size 14 at the top it might not need it)
    • Finish all openings with bias tape as facing
    • If I'm going to have another go at making a kimono top I must remember to shift the lower part of the sleeve down a 2 inches and rotate the bust dart into a French dart so it doesn't get messed up in the kimono sleeve.
    STATS
    PatternColette Patterns - Sorbetto (FREE)$0.00
    Fabric 1.5m cobalt blue rayon (spotlight) $6.29/m$9.45
    Notions
    • Thread
    • Bias Tape
    $2.00
    $1.50
    Time6 hours (* $16-ish Australian minimum wage) $96.00
    Total
    $108.95

    Kind of expensive for a basic top, however, the materials were cheap, considering the lessons I learnt and the fact there was a lot of unpicking I'm totally cool with that.

    ~Final Comment~
    I really like this top and I can see myself wearing it a lot. Like, A LOT.


    Have you been able to 'save' a project that was going a bit wrong? What was it?
    I'd live to hear about it, leave me a comment. :)


    Until next time,

    Lets connect