Showing posts with label Pattern Adjustment. Show all posts

Wednesday, 16 April 2014

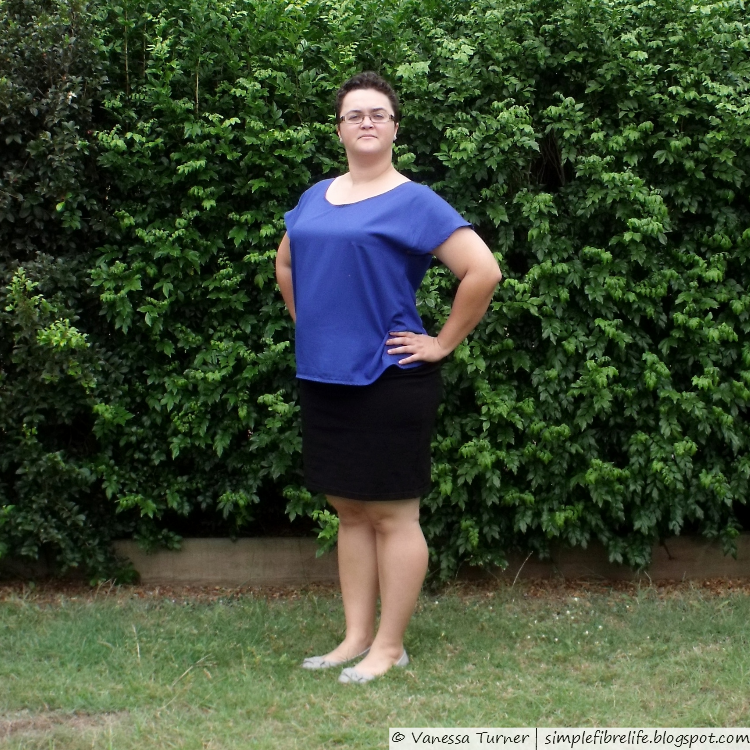
::Sewing::FO:: Kimo-No Sorbetto Cobalt Rayon Top


I don't know what is happening with my face here.
Please excuse the 'bitchy face'
This blue rayon has been calling to me since I bought in September last year. I've been a little afraid to play with it because it felt slippery and slinky and I thought I would be a bugger to sew.
Last week I was playing with my fabric (please tell me I'm not the only one who takes fabric out of my stash; pets it; admires it and folds it all back into the stash) and inspiration struck. I think this fabric would work fabulously in a kimono tee. I looked to Miss P's amazing pashmina refashions for inspiration.

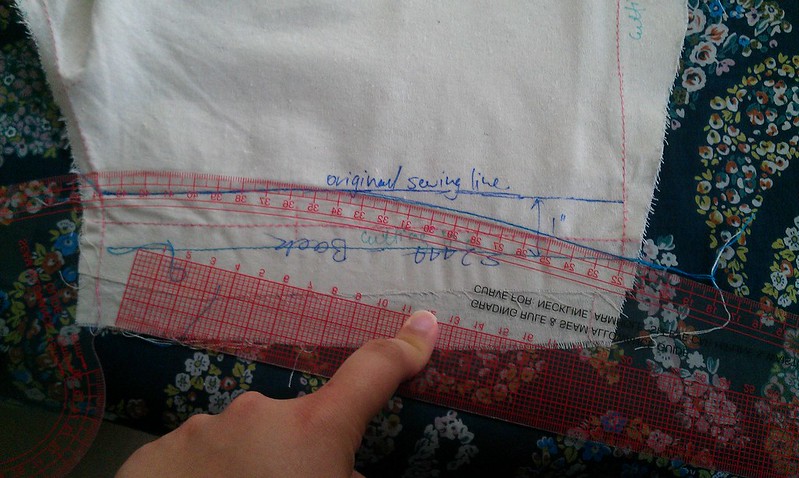
Took out my Colette Sorbetto pattern and traced out the size 18, added 2 inches in length, raised the back neckline by 2 inches and drafted on some kimono sleeves. I took photos of my process because I was going to share how I added my kimono sleeves with you, but I won't because I stuffed that up a bit.

A little trick I thought up as I was added length was to trace the pattern, mark the added length at the bottom then slide the pattern down to the marking and trace the new hem. This trip probably wouldn't work in all cases (like adding length to a circle skirt) but it worked fine here.
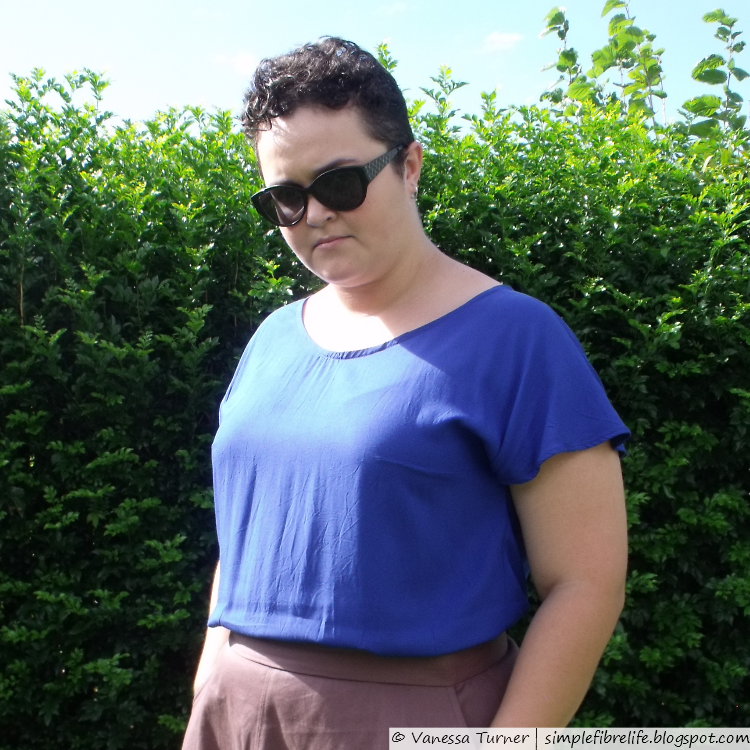

I cut out the fabric using a rotary cutter and cutting mat which I thought would be safer than scissors with this slinky slippery fabric. A few hours later I had a 'ding' moment and thought I may have drafted kimono too narrow. My suspicions were confirmed when I basted the top together. The sleeves where far too snug and distorted the neckline.

I unpicked the side seams. I resigned to the fact that this wasn't going to be a kimono tee and made it a cap sleeve top by cutting from the outer edge of the shoulder seam to the underarm (just above the bust dart on the front) removing the lower portion of the sleeve. Thinking about it now I should have cut the sleeves with a curve so the cap sleeve was less pointy at the shoulder seam.

Construction wise this top had a bit of back and forth about it.
The first bit of sewing I did was to stay stich the neckline.
I sewed the bust darts and then sewed and overlocked (serged) the shoulder seams.
After baste fitting the side seams; ripping them out and removing the lower portion of the kimono sleeves I overlocked  all along the side and sleeve edges.
The side seams where then sewn.
I did a double turn hem for the sleeves.
I overlocked the hem, then unpicked it because I didn't want bulk in the hem.
The neckline and hem where faced with bias tape.
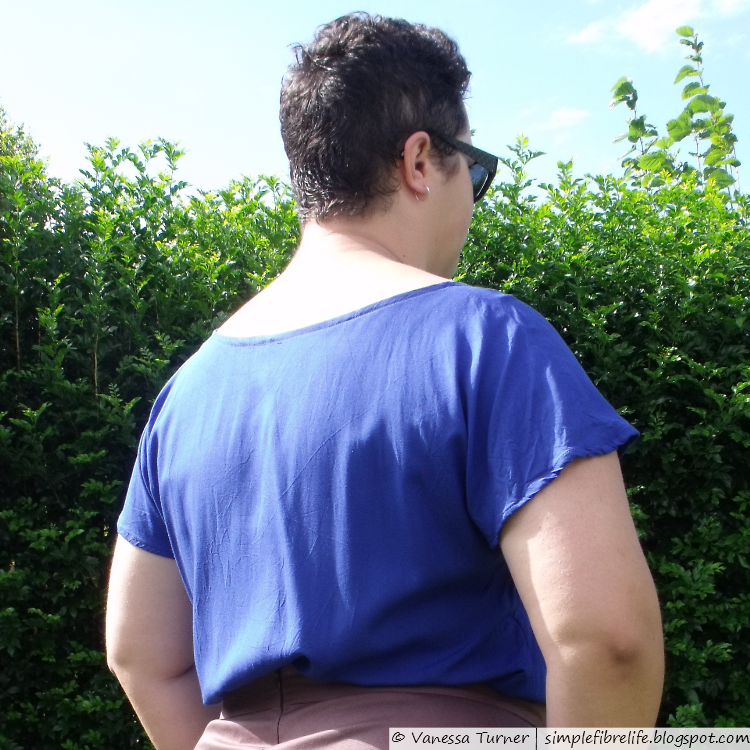

I've avoided rayon because it's a bit slippery and I thought it was synthetic. But as it turns out it’s a natural fibre that has very intense processing (which I learnt from Steph C). In the end it wasn't that hard to tame the rayon.

I'm surprised with how much I like the sleeves on this top. It's a happy accident. I like the fit although I could probably be a bit snugger. The neckline is wider than what I'm used to and find myself fussing with it to make sure I keep my modesty and my bra straps covered. Thinking about it now, maybe bra strap carriers are the answer.

~Pattern~
Colette Patterns Sorbetto - Hacked

~Changes I made this time~
  • Back neckline raised
  • Added length
  • Added kimono sleeves, which I then had to adjust into a cap sleeve
~What I Like~
  • The fabric colour and drape
  • I like the length
  • The cap sleeves turned out better than I thought they would
~What I Don't Like~
  • The neckline is a bit wide and the front neckline sometimes droops a little too low for comfort
  • The sleeve hems are a bit bulky and alter the drape
  • The top has a lot of ease
~Changes for Next Time~
  • Try tracing a size 14 next time and from under the grading out to a size 18 from the waist to hip
  • Make the neckline narrower (although if I trace a size 14 at the top it might not need it)
  • Finish all openings with bias tape as facing
  • If I'm going to have another go at making a kimono top I must remember to shift the lower part of the sleeve down a 2 inches and rotate the bust dart into a French dart so it doesn't get messed up in the kimono sleeve.
STATS
PatternColette Patterns - Sorbetto (FREE)$0.00
Fabric 1.5m cobalt blue rayon (spotlight) $6.29/m$9.45
Notions
  • Thread
  • Bias Tape
$2.00
$1.50
Time6 hours (* $16-ish Australian minimum wage) $96.00
Total
$108.95

Kind of expensive for a basic top, however, the materials were cheap, considering the lessons I learnt and the fact there was a lot of unpicking I'm totally cool with that.

~Final Comment~
I really like this top and I can see myself wearing it a lot. Like, A LOT.

Have you been able to 'save' a project that was going a bit wrong? What was it?
I'd live to hear about it, leave me a comment. :)


Until next time,


Lets connect

Saturday, 15 March 2014

::Sewing:: Navy S2444 - Behind the Seams Part 2 Pattern adjustments

In this behind the seams I'm going to go over the pattern adjustments I made to S2444.
Here is S2444 Behind the Seams Part 1.

BODICE ADJUSTMENT
I couldn't find anything on the interwebs about it so I thought I would write this post so hopefully someone will stumble up on it in their time of need.

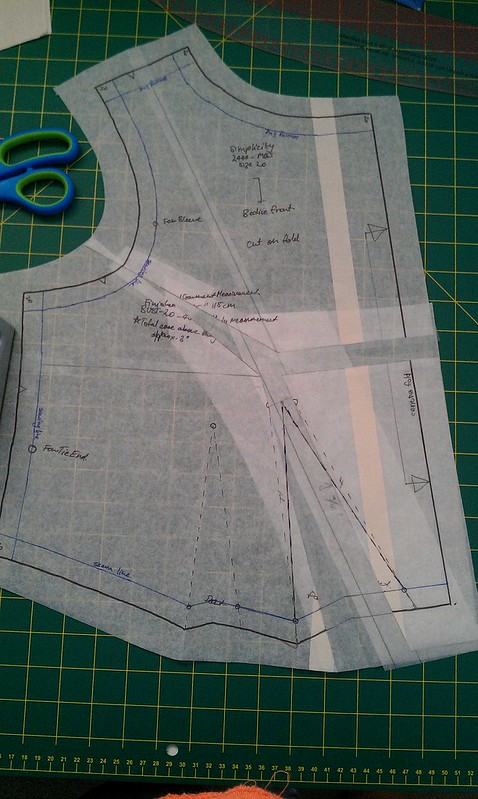
I traced the front bodice pattern on some paper (I use a giant roll of kitchen grease proof paper and tape strips together). I then marked in the seam allowances - the blue outline. I drew in the cutting lines for the adjustment in pencil.


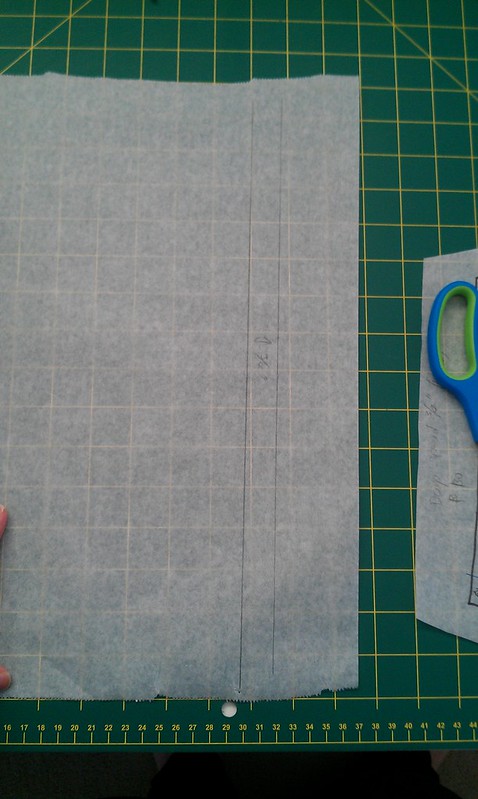
To make my life easier I drew the 3/4" guide the FBA on some spare paper.

Next it was cutting time!
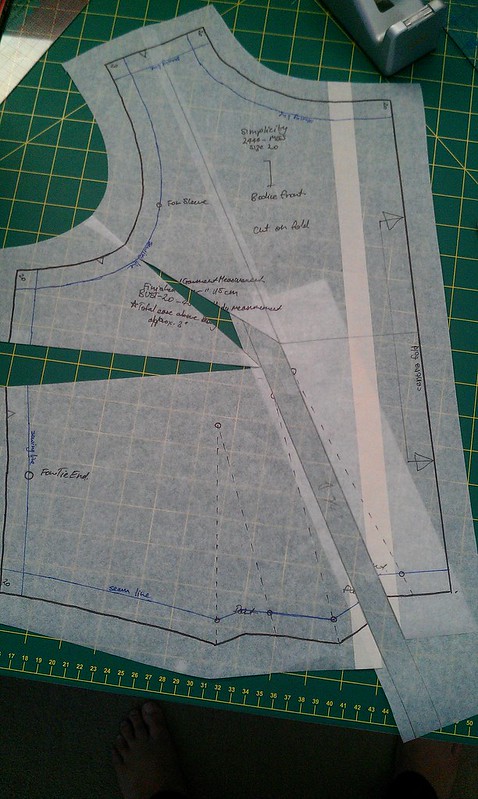
I slashed the pattern from the inner waist dart to the shoulder seam line.
Upon reflection I should have cut from the bust point to the armscye.

To fix that, I drew a line from the armscye to the bust point and tapped the top of the waist-shoulder slash.
Then I slashed from the side seam to the bust point. Remembering to make a little hinge.
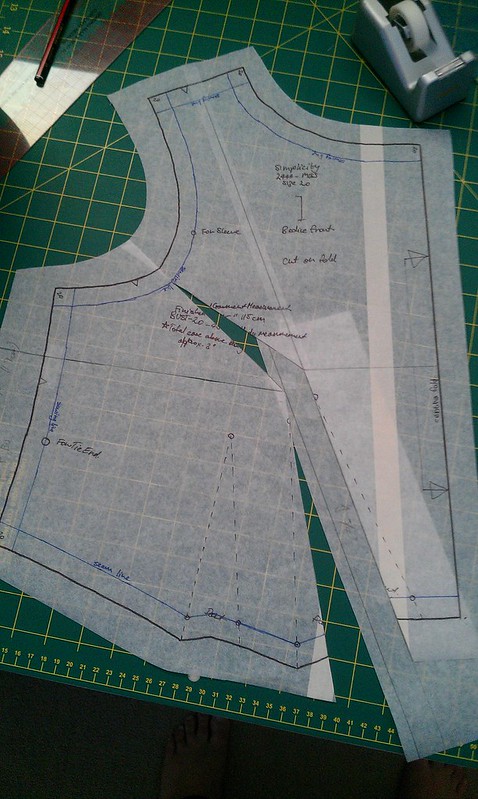
Using the 3/4" guide that drew I lined up the waist-bust point slash along the lines.

I scratched my head for awhile here because I thought I would have to make a side dart because of the adjustment. But then I had an 'Aha!' moment and just rotated the side dart closed.

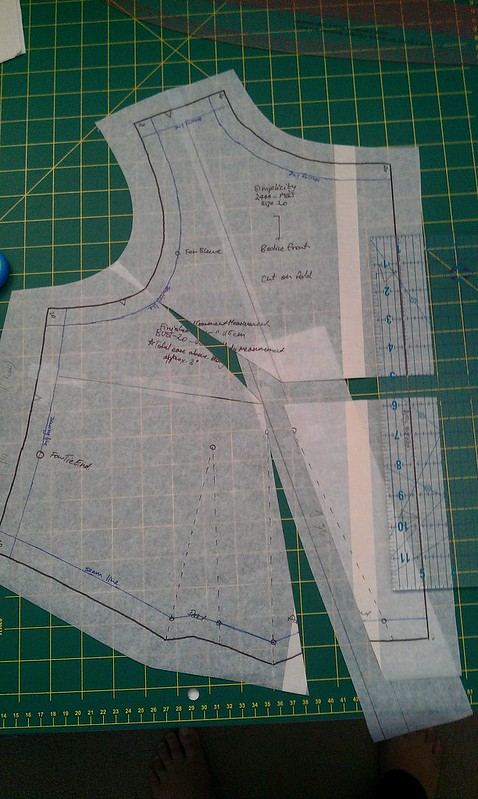
Now I slashed from bust point to centre front fold line and moved it down 3/4", using my cutting ruler as a guide.

I put some paper behind all the gaps and stuck it all together. I redrew the inner waist dart-in black.

I wasn't happy with the uneven waist darts so I redrew the darts-in red below (sorry about the bad photo).
To calculate how to change the darts I measured between the dart legs of both darts at the seam line.
Added them together and then divided by 2.
In the picture below I also have drawn in the change in the side seam/waist seam with the side seam pivoting out to add 1" to the waistline.

Then I retraced the whole pattern including the FBA and the side seam adjustment.
I drew the dart legs in light blue so I put a bit of paper behind so you could see them in the photo.

SKIRT ADJUSTMENT
I needed to adjust the skirt pieces so they would match up with the bodice, because I had adjusted the bodice side seam by moving it out 1" at the waistline.


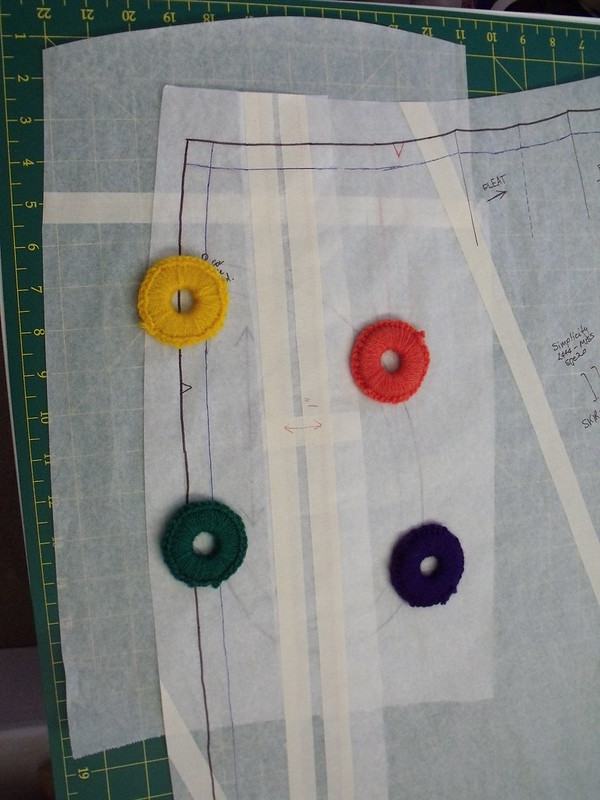
I kept this adjustment simple. I slashed both the front and back pattern pieces from the waist to the hem and added 1" stripes to match the 1" adjustment made on the bodice.

POCKET ADJUSTMENT
The pocket that is provided in S2444 is just a basic side seam pocket. I haven't much experience with them, but I just know that having a pocket flapping around in the skirt would annoy me.
So I decided to adjust the skirt so that It attached at the waist seam to stop 'pocket-flap'.

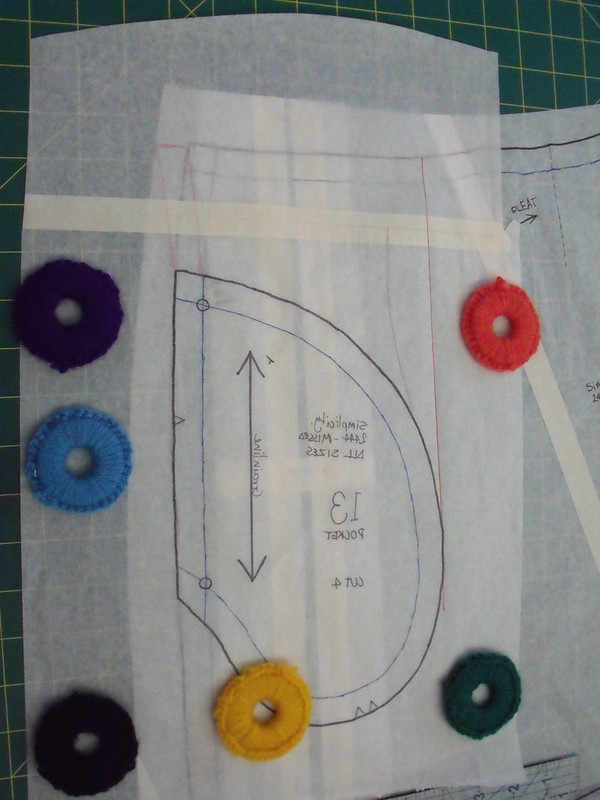
I laid the original pocket pattern on the front skirt, with the pocket facing inwards and the sides seam notches matching.
Initially I laid the pocket piece so that the pocket was facing out, but soon realised my mistake. You can see that I started to trace the side seam in faint red below. 

I drew a line from the 'outer-most' part of the pocket straight up to the waistband.

Then I laid the pocket pattern under the skirt pattern and drew a notch where the pocket cutting line would match up with the skirt waistline.

Then I drew in the seam lines and cutting lines on the right side of the pocket pattern.


I hope all of that made sense. Holla at me if you need some help - just pop a comment below.

Have you been puzzled about how to make a pattern adjustment? What did you do?
Leave a comment below, I'd love to hear from you :)

Until next time,


Lets connect

Tuesday, 25 February 2014

::Sewing:: Navy S2444 - Behind the Seams Part 1

I showed my Navy S2444, but I didn't tell you about the journey from pattern to a finished dress. I thought it would be interesting for people who don't sew much.

There was a lot involved in the making of this dress. I want to make some notes about the process mainly for my own reference, but if other people get some value out of it that's awesome!

I'm going to have to break this up into a few posts, because there is just so much involved. I'm not going to go over every step in detail, but there are some things I will expand on.

Simplicity 2444 Construction Steps
This is a quick and dirty list of steps I took to make S2444
  1. Traced size 20 to paper
  2. Transferred seam lines on toile using a tracing will and wax paper
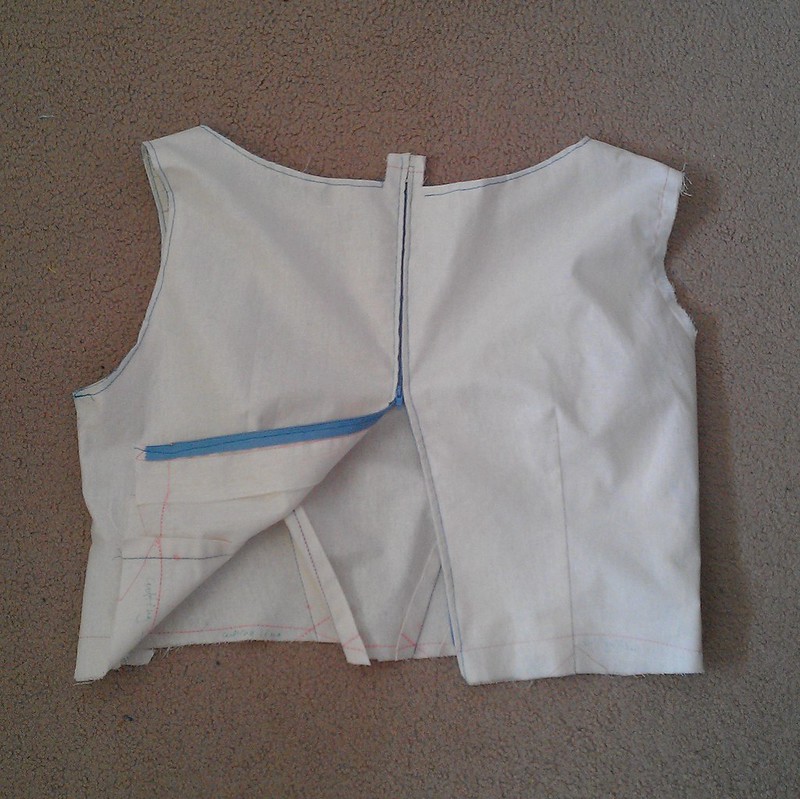
  3. Sewed toile; inserted a zipper in the centre back of the muslin with the stopper at the neck 
  4. Increased bottom of bodice side seam at waist by 1 inch on both front and back
  5. FBA - 3/4 inch increase adjustment for a D cup (as per The Complete Photo Guide to Perfect Fitting, p130). I was completely baffled by how to do this over 2 darts. Google searches came up with nothing.
  6. Rotated side waist seam increase from FBA to waist dart closer to the front
  7. Raised both dart apexes 1 inch.
  8. Split dart uptake between the two darts (both darts are now 2.5 inches) 
  9. Added 1 inch to side of skirt patterns
  10. Adjusted pocket pattern piece so they attached at the waist
  11. Wrote a quick construction checklist
  12. Cut dress fabric
  13. Cut bodice lining fabric
  14. Staystitched bodice necklines - outter and lining, front and back
  15. Sewed outter and lining bodices at shoulder seams, pressed, finished seams
  16. Sewed bodice to lining at neckline, pressed, clipped and finished seams
  17. Sewed bodice to lining at armholes, pressed, clipped and finished seams
  18. Turned the bodice right side out - had to pull the back pieces to the front through the shoulder channel
  19. Sewed the bodice side seams - 1 continuous seam for outter and lining
  20. Sewed skirt centre front seam, pressed and finished seams
  21. Basted front and back skirt pleats (the centre front pleats where a nightmare!)
  22. Basted pleats at the skirt waist seam
  23. Sewed pockets to skirt front and backs side seams, pressed, finished seams
  24. Sewed the skirt front and back together at side seams (going around pockets), pressed, finished seams
  25. Basted pocket tops to skirt waist seam
  26. Attached bodice outter to skirt waist, pressed, finished seams
  27. Basted the back seam where the zipper would go, sewed the lower seam
  28. Hand basted the zipper in place
  29. Machine sewed the zipper
  30. Hand sewed the bodice lining to the waist seam and zipper tape
  31. Finished the hem edges (or tried to before my overlocker tried to eat the fabric)
  32. Hemmed the dress

I used some of the techniques from The Couture Dress Craftsy class to make this dress.
I made a toile (a.k.a. Muslin - which is a test garment) using some muslin.
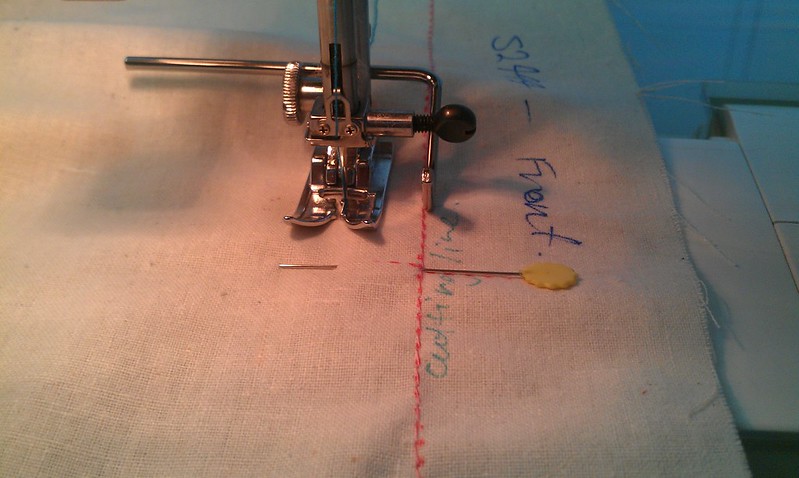
I traced the seam lines onto my toile.
I actually accidentally traced and thread traced the seam lines onto the toile.
To fix this I just used the quilting guide on my sewing machine set to 5/8" and traced the seam lines.


I started by fitting the bodice. I thought this would be the hardest part to fit, but once it was done the rest would go smoother. I picked a size 20 on the pattern and compared my measurements with the pattern. They were pretty close so I thought I'd sew the straight size to see how it was.

I inserted an upside down zipper to make trying it on easy. I nearly sewed it in with the stopper at the waist - lucky I dodged that bullet.


When I sewed it up the waist was too tight. So the first adjustment I made was to increase the waist seam.


From there I made an FBA (full bust adjustment)

The original front bodice pattern

The front bodice pattern with the FBA adjustments
I did a final muslin and was happy with the fit so I moved on to my fashion fabric and lining fabric.

That's enough for now I think.

Until next time,

Do you like to remember the nitty gritty of something you make? 
If so, How do you make notes about it?
Leave a comment below, I'd love to hear from you :)


Until next time,

Tuesday, 14 January 2014

::Sewing:: Pattern Bust Adjustment Measurements

On the interwebs there are LOTS of resources on HOW to make bust adjustments to patterns.
But something that I've struggled to find is information on (a) how to determine bust size and (b) how much to overlap/spread the pattern by when making an adjustment.

The other day I came across some really great information about this topic and I thought I'd share it here. Hopefully you'll find it helpful too.

Selecting a Pattern Size

When selecting a pattern size the idea is that you want to make as few adjustments as possible.
So ideally a pattern that closely matches your shape in most respects is the best way to go.

Bust Size


Take chest/high bust measurement (1)
Take full bust measurement (2)
(Great post on body measurements by Miss P)

Subtract the chest/high bust measurement from bust measurement
below is a table found on p15 of The Complete Photo Guide to Perfect Fitting by Sarah Veblen

A cup = 1" (2.5cm) or less
B cup = 1 1/4" to 2" (3.2 to 5.1 cm)
C cup = 2 1/4" to 2" (5.7 to 7.6 cm)
D cup = 3 1/4" to 2" (8.3 to 10.2 cm)
DD cup = 4 1/4" to 2" (10.8 to 12.7 cm)

SBA or FBA pattern Overlap or Spread

When making either small bust adjustments or full bust adjustments below are the amounts to close (remove) or spread (insert) when doing the bust adjustment.
Note: these are only for half a bodice pattern. So the total decrease or increase accross the whole bodice will be twice the amounts given below.

AA cup - close 3/8" (1cm)
A cup - close 1/4" (6mm)
B cup - no change
C cup - spread 3/8" (1 cm)
D cup - spread 3/4" (1.9 cm)
DD cup - spread 1 1/4" (3.2 cm)

Source - p130, The Complete Photo Guide to Perfect Fitting by Sarah Veblen

Is there a question that you haven't found an answer too? What was it? Have/how did you overcome not being able to find information about it on the interwebs?

Until next time, hope you're finding solutions too
V xo

p.s. when I was looking for images I came across this post. Gah! Where was this before!