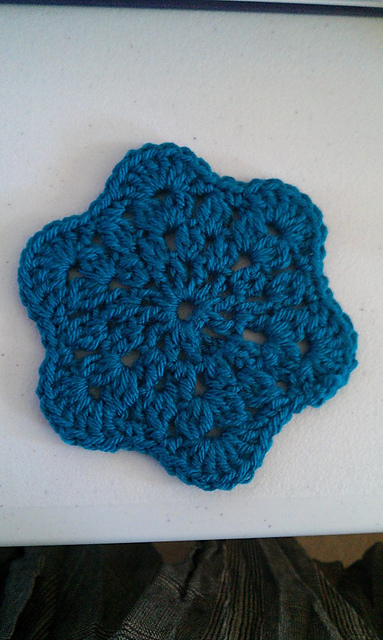
In my last post I showed some coasters that I gave to my sister. Here is the story of how they came to be.
I'm a member of a group called CWA. Now we're not a part of the Country Women's Association, but we are a Crafty Wonders Alliance (I just made that up). :)
The point of the group is that we get together and teach each other about our mad skillz. So an example of this is my friend Sarah of Stitching Lyrical did a session on crochet (she is a wizz with a hook and a ball of yarn) and a session on jam making (it was simpler to make than I thought.).
Anyway, anyway, anyway. I was due to have a session at my house in October and I decided that we would do crochet. I was going to do knitting, but I thought that it would be better to do crochet everyone seemed to enjoy the crochet session Sarah had and I thought it would be nice to continue with it. I pondered about what we could make for some time, I did some searching on Ravelry and then a plan starting forming in my brain. Veeerrryyy ssslllooowwwlllyyy. I found this pattern and then I found this tutorial.
I made this tester and I new this was going to be the pattern to use.
These star shaped coasters would make great Christmas presents. A great idea that Sarah came up with was to put them in watered down glue gently squeeze out the excess and then hang them on the Christmas tree as decorations. I guess you could do this with all sorts of crochet/knit items. The mind boggles at the possibilities. :)
I was telling my sister about me crochet coasters and I showed her one that I'd made. She requested some and I hauled out my yarn stash for her to select some yarn.
I made all 6 of her coasters in one evening. That's right. I am a machine. Check it!
So that is the story of how I made my sister some Starry Coasters for Christmas.
The End.
Until next time, I hope your making things to put drinks on too,
Vanessa xo
Sunday, 30 December 2012
::Sewing:: Christmas 2012 Giftings
Hey there!
I hope you had a great Christmas. This year I made most of my/our gifts. I did it because I am not a big fan of shopping and I'm even less of a fan of the crazy pre-Christmas shopping frenzy.
Using the free Craftsy course Bag-Making Basics: Reversible Tote & Zipper Pouchwith Kristin Link I made my sister, MIL and SILs a zipper pouch each.
Here are my fabrics all cut out and ready to go.
When I use interfacing I like to cut it slightly larger than intended to make a cleaner finish once I've trimmed it down. So an improvement on the process for future would be to cut out all the external pieces as one block of fabric. Fuse the interfacing and then cut the separate external pieces to size. This would mean that I could avoid this mess of interfacing scraps after trimming it down all the individual external pieces after fusing the interfacing to it.
Making four pouches at the one time meant that I was able to do some chain sewing.
Here are the finished pouches. The tabs are made of the same fabric in the lining.
The mushroom one went to my sister who picked out the fabric on a trip to the fabric store a few days before. The white and teal one went to my MIL; black one with doors and keys went to my younger SIL and the teal one went to my older SIL. For more pouch pictures check out my flickr.
For pouch fillers I gave my MIL and SILs a travel size bottle of The Body Shop body wash and either a loofah, face chamoise or shower cap. Here are the crocheted coasters I made for my sister and popped in her pouch. Ravelled here.
I gave my sister's BF and Mr S's nephew a Christmas stocking each. The plain calico one went to Mr D (my sister's BF) and the other other one went to LP (the Mr's nephew). Mr D got a gift card (the thingy sticking out in the picture) and I filled both of the stockings with lollies and baste stitched the tops closed for ease of transport.
After I took the picture I added a crochet chain loop to each of them so they could be hung for next year.
Here are all my pressies ready with gift tags ready for gifting.
I have a couple more gifts to give, but as they haven't yet been delivered to the recipients I best not disclose their details just yet.
Until next time, hope you making lovely things for the ones you love (especially yourself),
Vanessa xo
I hope you had a great Christmas. This year I made most of my/our gifts. I did it because I am not a big fan of shopping and I'm even less of a fan of the crazy pre-Christmas shopping frenzy.
Using the free Craftsy course Bag-Making Basics: Reversible Tote & Zipper Pouchwith Kristin Link I made my sister, MIL and SILs a zipper pouch each.
Here are my fabrics all cut out and ready to go.
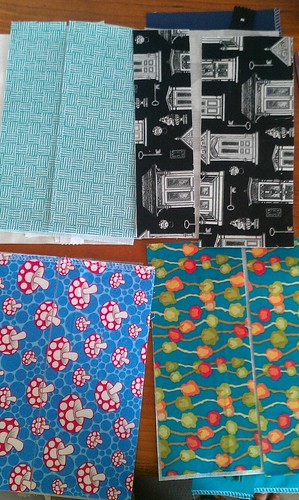 |
| Exterior, lining and zippers all ready to go! |
When I use interfacing I like to cut it slightly larger than intended to make a cleaner finish once I've trimmed it down. So an improvement on the process for future would be to cut out all the external pieces as one block of fabric. Fuse the interfacing and then cut the separate external pieces to size. This would mean that I could avoid this mess of interfacing scraps after trimming it down all the individual external pieces after fusing the interfacing to it.
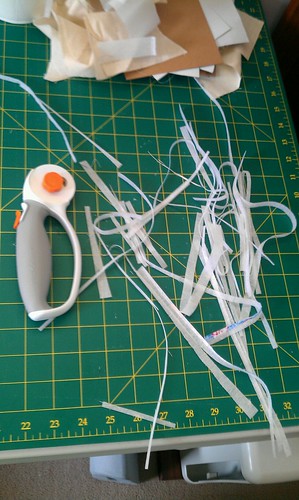 |
| All my interfacing scraps. And this wasn't even all of it! |
Making four pouches at the one time meant that I was able to do some chain sewing.
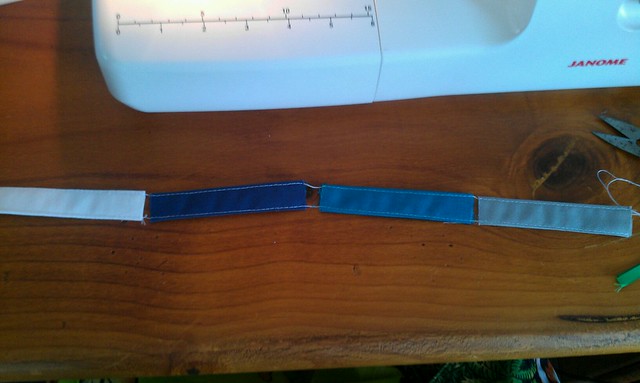 |
| Chain sewing pouch tabs top-stitching. |
Here are the finished pouches. The tabs are made of the same fabric in the lining.
 |
| Clockwise from top left: my sisters; MIL; younger SIL; older SIL |
For pouch fillers I gave my MIL and SILs a travel size bottle of The Body Shop body wash and either a loofah, face chamoise or shower cap. Here are the crocheted coasters I made for my sister and popped in her pouch. Ravelled here.
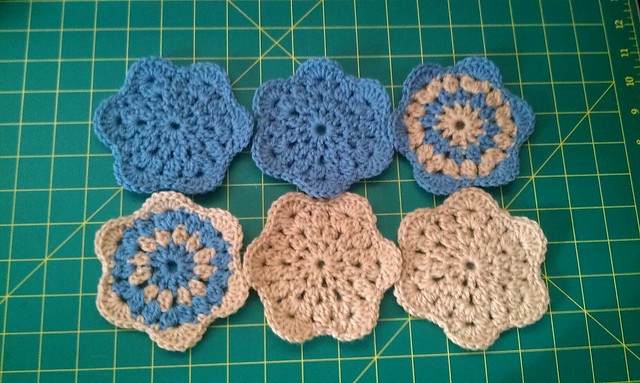 |
| Six crocheted coasters for my sis |
I gave my sister's BF and Mr S's nephew a Christmas stocking each. The plain calico one went to Mr D (my sister's BF) and the other other one went to LP (the Mr's nephew). Mr D got a gift card (the thingy sticking out in the picture) and I filled both of the stockings with lollies and baste stitched the tops closed for ease of transport.
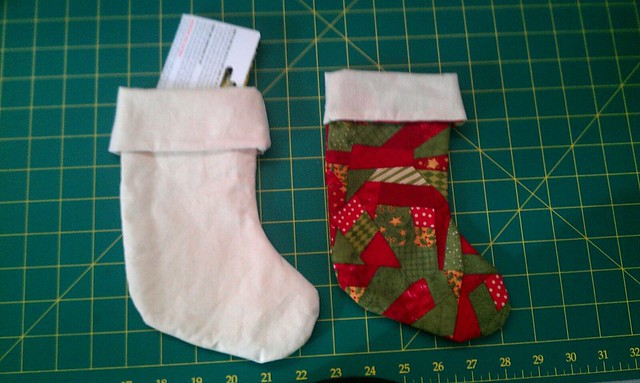 |
| Mini Christmas Stockings FTW! |
Here are all my pressies ready with gift tags ready for gifting.
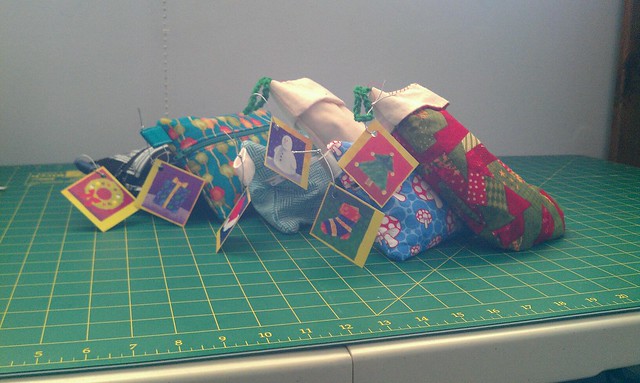 |
| Gifts made? Check! Gifts tagged? Check! Alright, let Christmas commence! |
I have a couple more gifts to give, but as they haven't yet been delivered to the recipients I best not disclose their details just yet.
Until next time, hope you making lovely things for the ones you love (especially yourself),
Vanessa xo
Monday, 10 December 2012
::Sewing:: Sturdy Striped Tote
The Mr's nephew is turning three last weekend and I gave him something that I've been working on for longer than he has been alive. If you follow me on Instagram (I'm @simplefibrelife) you'd have seen glimpses of it.
I gave him a rainbow granny square throw. I was thinking about how I was going to wrap his present. Then I remembered the Reversible Tote Course on Craftsy. I thought it would be a neat idea to give him his gift in another gift.
So on Friday evening I made a tote following the instructions from the free
Bag-Making Basics: Reversible Tote and Zipper Pouch Craftsy course.
Well, I did make a few changes. Seeing as I was just using what I had on hand I had to cut the the external pieces to different lengths, but I made sure (at least I thought I had) to match the 16 x 17.5 inches of the lining piece. As I was only working with fat quarters I cut the external pieces as 16 x 9.5 inches and 16 x 8.5 inches; I forgot the 1/2 inch seam when sewing the two pieces together. Making the final piece 16 inches. DOH! Oh well it wasn't too much of a bummer.
I also fused some iron-on interfacing to the exterior of the tote after I had sewn the seam for each of the exterior panels, but before I joined them. When I joined them I sewed up both sides, attached the straps, then I sewed the bottom. Speaking of the straps, I'm a perfectionist so I used my adjustable edger foot to do the top-stitching along the long edges of the handles.
When I sewed the lining together I left a whole at the bottom to turn the bag out the right way; that way I wouldn't need to leave a gap when I sewed the lining to the exterior. When I boxed the corners of the lining and exterior I made the base of the bag 5 inches wide as I really wanted a sturdy bottom on the bag. I also omitted the pocket.
I made something from a Craftsy course! Yay! It makes me feel a little better after my last post. Are you crafting gifts this season? If so, what are you making? Leave me a comment :)
Until next time, I hope you're improvising on your projects ;)
Vanessa xoxo
Monday, 3 December 2012
::Show & Tell:: I have an addiction...
Yep, it's out there. I'm a Craftsy addict. I have 16 classes. Sixteen!
Although I have to admit some of them are free classes.
These are the ones I've bought
Ahem, I may or may not have gone a little crazy when Craftsy had a recent sale. Most of their classes were about 20 bucks and I bought 4 classes in one go. Ahem :)
The free ones I've added to my account are:
A couple of these free classes are a bit left-of-centre for me. I'm not not that interested in cake decorating, but the Modern Buttercream course was on of the initial promotional free classes. I liked what I saw so I scoped out the rest of Craftsy for other courses. I just thought I'd have look at Microtorch basics to get an understanding of what is involved in jewellery making.
Other classes hit the mark. I'd started knitting the Purl Bee Bandana Cowl and thrown it aside when I realised I'd have to do short rows - which I don't know how to do and couldn't understand the instructions. Luckily for me the Short Rows class was free.
Some of the instructors on these courses are really great at grabbing your attention, some aren't so much. But that is super subjective. Regardless of the instructors I always really like the content of each course. I've been enjoying watching these courses, but watching Craftsy is a major suck on my monthly internet data plan.
How many courses have I watched all the way through? Shhh, Only one Bag-Making Basics: Drawstring Bag & Bucket Bag. And it was one of the free ones!!!
How many things I have I made you ask? Zip, nadda, nothing. I haven't even put my new short-rowing skillz to good use on that bandana cowl pattern. Although I'm hoping to rectify that in the near future - especially when making presents for the festive season.
Even though I haven't seen all the classes all the way through, I'm learning heaps of great tips and really enjoying it. So, I'm crushing pretty hard on Craftsy at the moment.
If you're interested to see what Craftsy is like I totally recommend that you try out the free classes they have online. I'd also recommend that you turn off the HD whenever you're watching the videos.
FYI I'm totally not getting kickbacks or freebies from Craftsy.
Until next time, I hope you're learning something new,
Vanessa xo
Although I have to admit some of them are free classes.
 |
| [source] |
These are the ones I've bought
- Beginner Serging
- The Couture Dress
- Sewing with Knits
- Pant Fitting Techniques
- Pant Construction Techniques
- The Classic Tailored Shirt
- Design Your Own Handbag
- Quilting Big Projects on a Small Machine
Ahem, I may or may not have gone a little crazy when Craftsy had a recent sale. Most of their classes were about 20 bucks and I bought 4 classes in one go. Ahem :)
The free ones I've added to my account are:
- Modern Buttercream
- Sewing Machine 911
- Short Rows
- Block of the Month
- Creative Quilt Backs
- Microtorch Basics
- Bag-Making Basics: Reversible Tote & Zipper Pouch
- Bag-Making Basics: Drawstring Bag & Bucket Bag
A couple of these free classes are a bit left-of-centre for me. I'm not not that interested in cake decorating, but the Modern Buttercream course was on of the initial promotional free classes. I liked what I saw so I scoped out the rest of Craftsy for other courses. I just thought I'd have look at Microtorch basics to get an understanding of what is involved in jewellery making.
Other classes hit the mark. I'd started knitting the Purl Bee Bandana Cowl and thrown it aside when I realised I'd have to do short rows - which I don't know how to do and couldn't understand the instructions. Luckily for me the Short Rows class was free.
Some of the instructors on these courses are really great at grabbing your attention, some aren't so much. But that is super subjective. Regardless of the instructors I always really like the content of each course. I've been enjoying watching these courses, but watching Craftsy is a major suck on my monthly internet data plan.
How many courses have I watched all the way through? Shhh, Only one Bag-Making Basics: Drawstring Bag & Bucket Bag. And it was one of the free ones!!!
How many things I have I made you ask? Zip, nadda, nothing. I haven't even put my new short-rowing skillz to good use on that bandana cowl pattern. Although I'm hoping to rectify that in the near future - especially when making presents for the festive season.
Even though I haven't seen all the classes all the way through, I'm learning heaps of great tips and really enjoying it. So, I'm crushing pretty hard on Craftsy at the moment.
If you're interested to see what Craftsy is like I totally recommend that you try out the free classes they have online. I'd also recommend that you turn off the HD whenever you're watching the videos.
FYI I'm totally not getting kickbacks or freebies from Craftsy.
Until next time, I hope you're learning something new,
Vanessa xo
Subscribe to:
Comments (Atom)

