Friday 28 November 2014

::Sewing:: Patternmaking Short Course


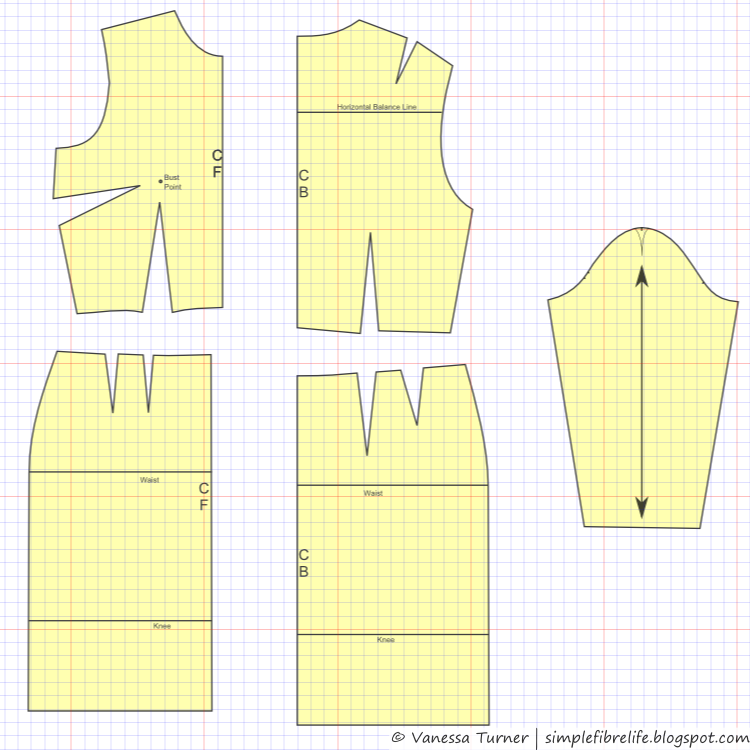
The mini patterns we got in class
[source]
I mentioned in this post that I had been to a patternmaking short course, but I haven't really written about it here. You may have seen a couple of Instagram posts. I spent the later part of last year and the early part of this year trying to figure out what I want to do with my life. I quit my job, before it ate me up, at the end of November last year and was lost. There were a lot of options but I didn't have a lot of direction.

Aaanyway, I got it in my head that I wanted to learn how to draft patterns, well really I'd been thinking about it for a long time. I read a lot about sewing and have a lot of sources of information for my obsession interest. I read blogs, sewing magazines, sewing books, fitting books, dressmaking books and patternmaking books. My sister did fashion at TAFE (the Australian equivalent of community college I guess) so I've learnt a bit about patternmaking from a few of her text books.

I could have learnt pattern drafting out of a book, or looked around on the web, but I'm the kind of person who needs to be face-to-face with someone showing me how to do something and the added accountability of having someone to answer to, homework and having paid for a class in order to push myself to do something. So finding a patternmaking class was the obvious option.

I knew that I didn't want to take an accredited course, because they are flipping expensive, and I don't intend on applying for fashion industry jobs, so I don't need a piece of paper saying that I know things.

Now something to mention here, Brisbane is divided by a big river that essentially divides it into North and South. I try to avoid crossing the river as much as possible because it's time consuming and if you're crossing at toll bridges it can get expensive. So I looked for courses in my area on the north side...there wasn't much happening. I did email a sewing school that was near my house, but I never heard back from them. Lame!

So I finally narrowed the search to a sewing school...on the south side. Sigh... I got over myself and sent an email asking for a course outline and got an email that afternoon. I looked over the course summary I got and after uhmming and ahhing I enrolled.

A frilled mini-skirt done for homework
[source]
The course was ten classes for 3 hours on Thursday mornings and went from mid-July to mid-September. One class had to be cancelled because the instructor was sick, but an extra class was added at the end to make up for it. There were a few materials we needed before class, most of which I already had. I did need to buy a tailors awl though.

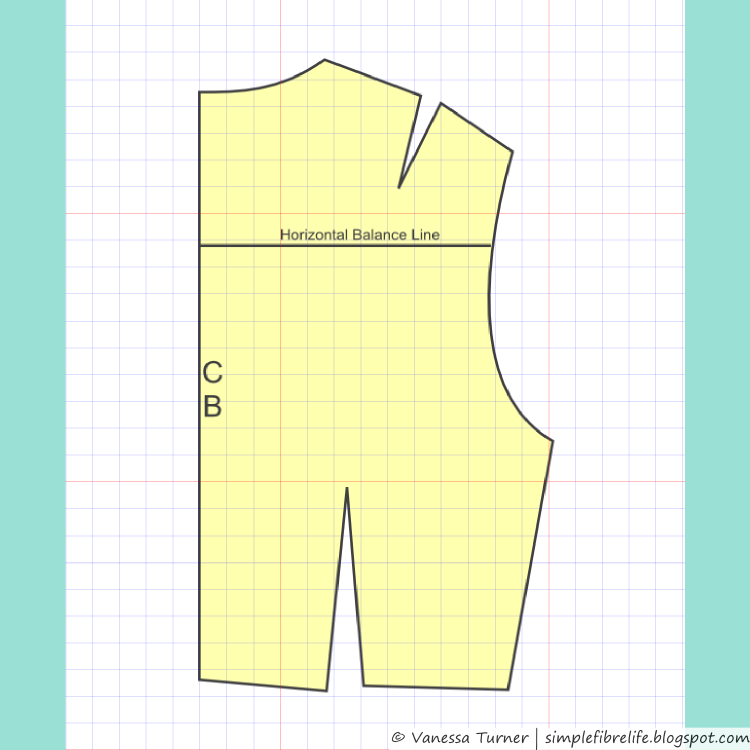
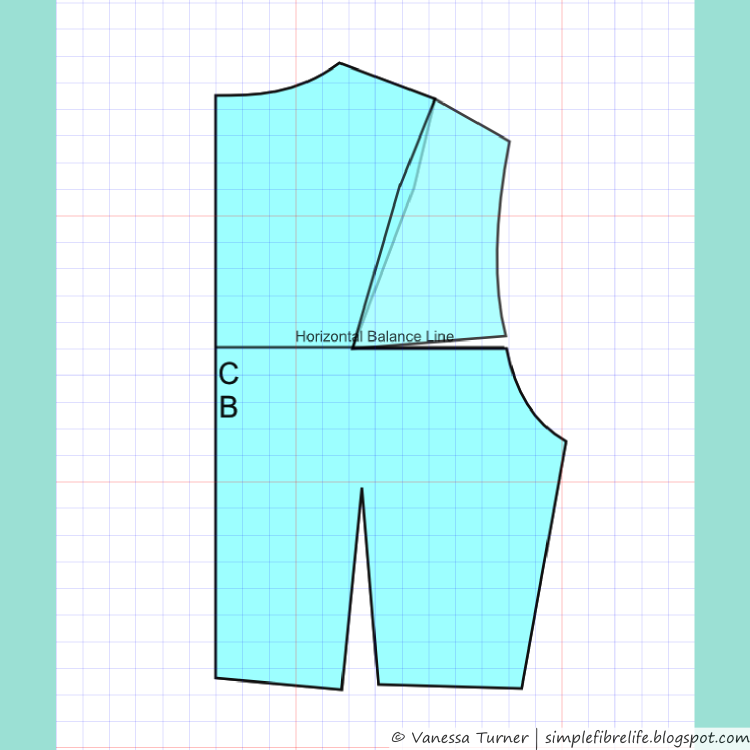
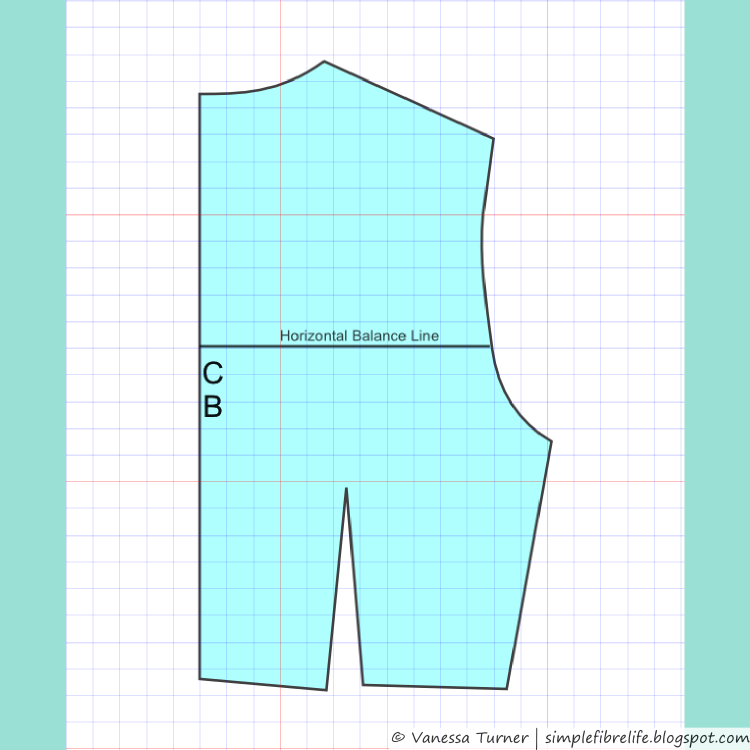
In the course we learnt the first 2 principals of patternmaking - dart manipulation & adding fullness. The third principal - contouring is covered in the next patternmaking course. We did our pattern drafting in class and sewed our toiles (muslins, test garments) at home. At the end of most classes we had to do some sort of homework whether it was work on our own blocks or making mini garments from half scale patterns (mini-patts) we were given or both.


On the first day after a brief introduction we dove straight into taking body measurements and  drafting a 2 dart skirt block. We were asked to bring pictures of skirts that we liked to the next class. We had to sew our skirt toiles for the teacher to check the fit at the next lesson. These pictures were used to teach us patternmaking techniques, which I thought was a great idea.


We covered how to do a design analysis, some of the key things to look for when picking apart a design to 'be inspired by' (*cough* copy *cough*). The teacher talked about dart manipulation and demonstrated on the mini-patts. The difference between pivot and slash & spread methods of manipulating darts was covered.

Here's a quick look at what was covered in class:
  • Taking body measurements for a skirt blocks
  • Drafting a 2 dart skirt block
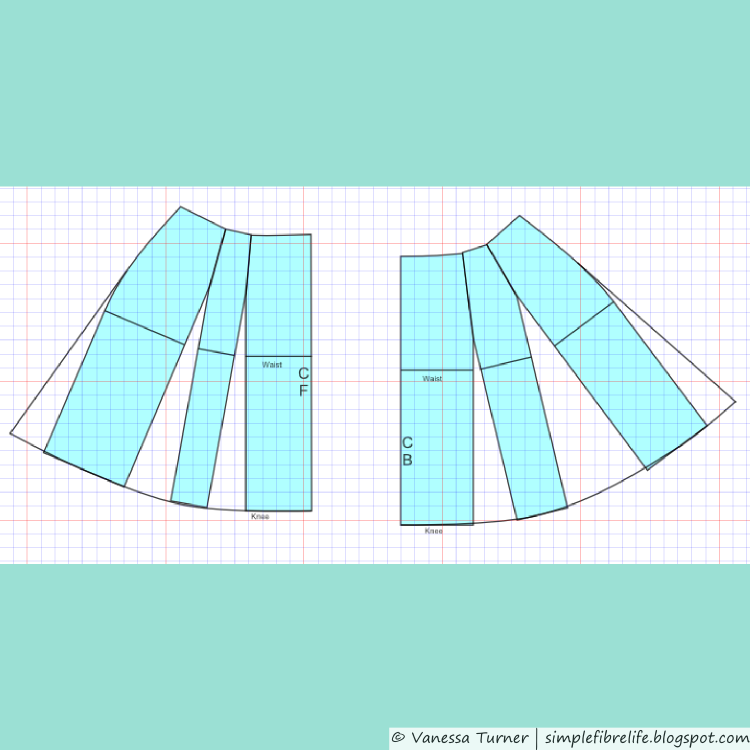
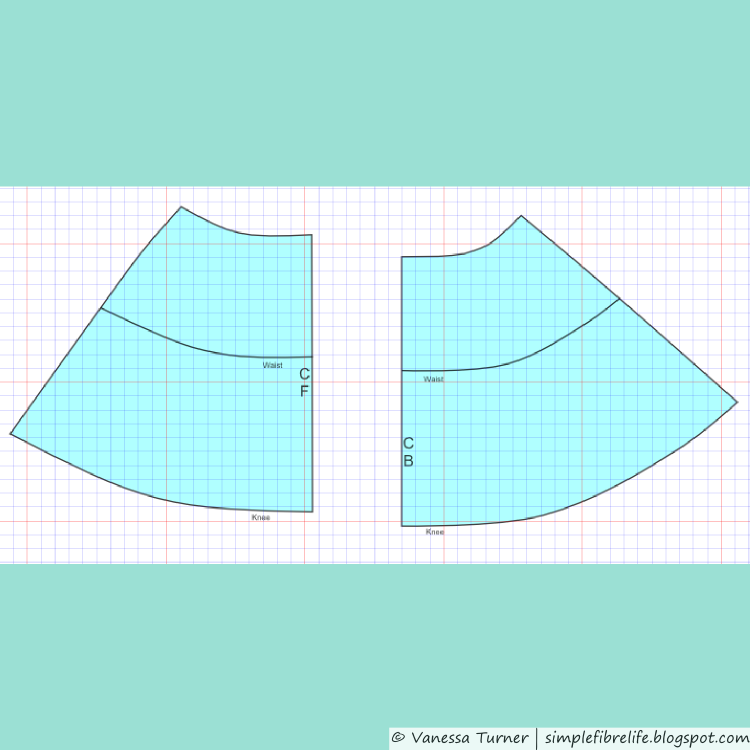
  • Adding flare by closing darts
  • The rules of  how to manipulate darts
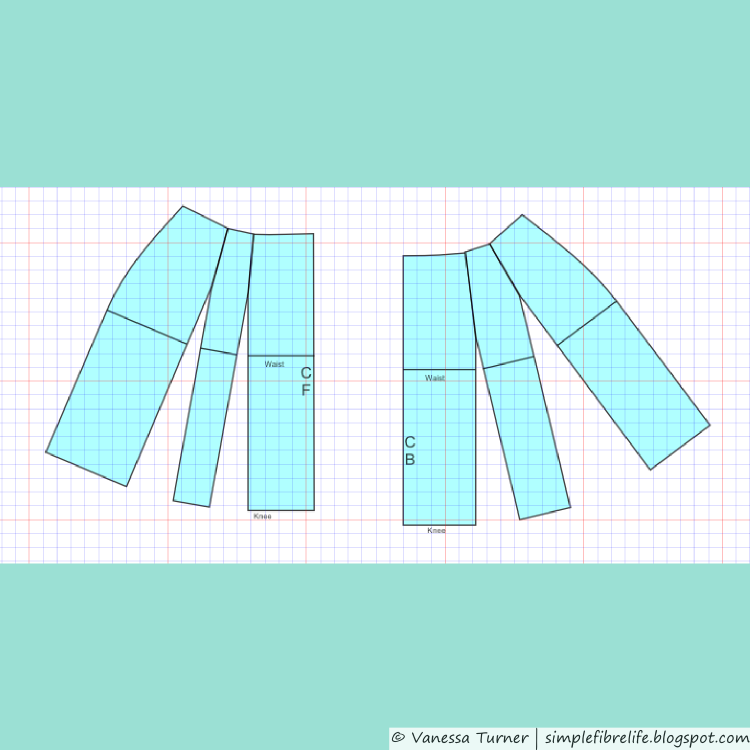
  • The effect grainline has on drape
  • Gored skirts
  • Making a 1 dart skirt block from a 2 dart skirt block
  • Ways of using the 2 dart vs 1 dart block for different styles by separating at the darts
  • Godets
  • Skirt yokes
  • Circular patterns - e.g. circle skirts, sleeve ruffles
  • Frills vs. ruffles
  • Peplums
  • Pleats
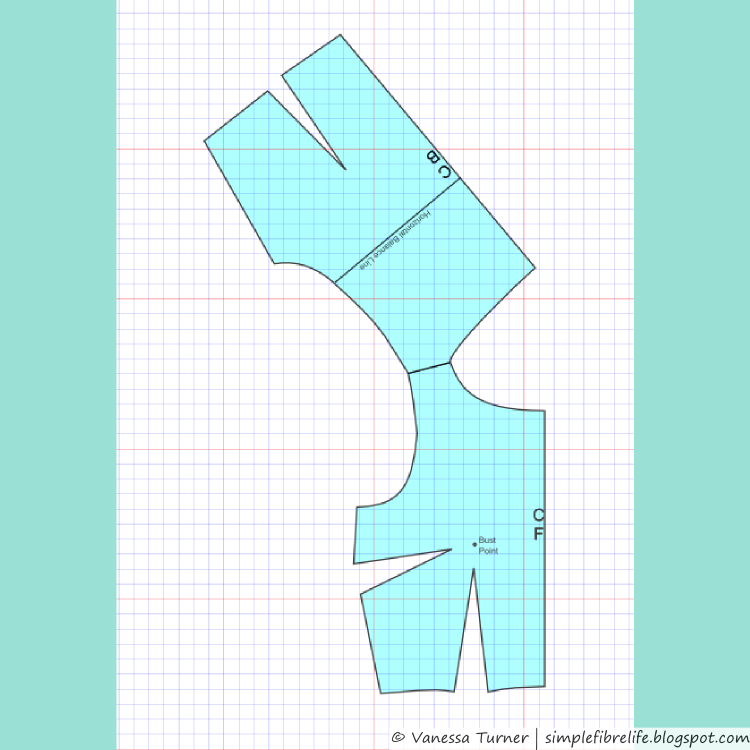
  • Taking measurements for bodice blocks
  • Determining bust cup size
  • Using body measurements to adjust a commercially drafted bodice blocks block 
  • Dart manipulation on a bodice
  • Cowl necklines
  • V necklines
  • Shaped necklines
  • Using body measurements to adjust a commercially drafted sleeve block
  • Changing sleeve styles using fullness
  • Facings
  • Collars
  • Button bands
  • Converting a pattern for wovens to be used for knits
  • And way more bits and pieces...

The main thing I learned out of the course was that I knew a lot more about patternmaking than I thought. I did learn some tips and tricks along the way, but for me the main thing was putting into practice a lot of what I already knew. So that has given me way more confidence with my patternmaking.

I'm not going to take the next patternmaking course, I'm pretty happy with the skills and confidence I got from this course. I want to practice using the skills I have before I continue if I want to.

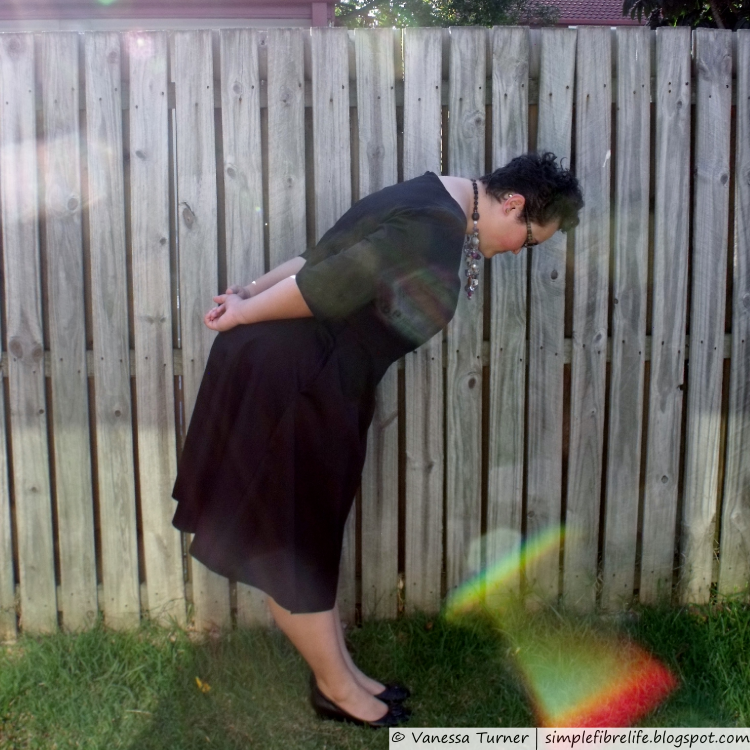
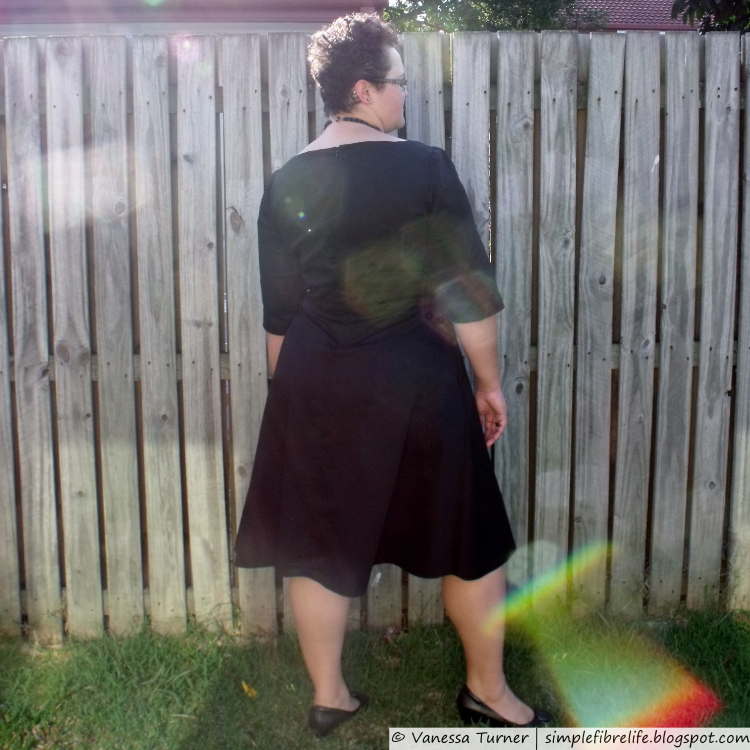
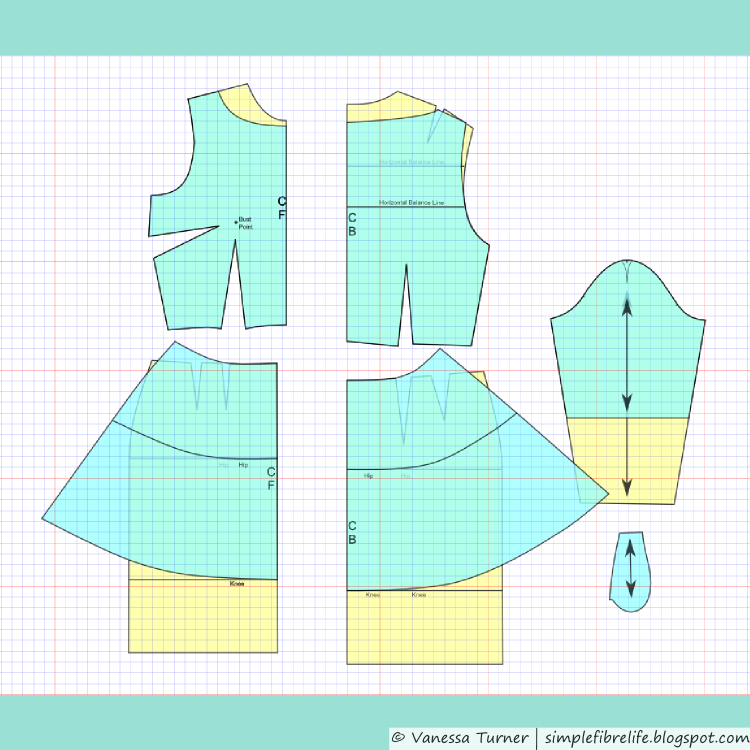
Working on my bodice toile
[source]

~What I Liked~
  • The instructor was lovely and approachable.
  • At the end of the course I had a 2 dart and 1 dart skirt block, a bodice block and a sleeve block.
  • I learnt that experimentation and toiles are very important when designing your own styles.
  • The teacher used some of the pictures of skirts that we had brought in to demonstrate patternmaking techniques. I thought that was a great way to make it a more personal learning experience.
  • One of the biggest take aways for me was how to adjust a woven pattern for stretch fabrics.
  • The small class size of 5 people meant there was a lot of one-on-one attention. Each person got, body measurements were taken by the teacher and the fit of our toiles was checked by her too.
  • We did a lot of exercises in our sketch books so that was a good way of practicing what we learnt and I use it as a mental prompt now that the class is over.
~What I Didn't Like~
  • The teacher also has an alterations, dressmaking and a patterndrafting business so this meant there were lots of interruptions and distractions during class. There was a lady doing digital patternmaking in the same room and whenever she started the plotting machine up it make a lot of noise. The teacher didn't always have someone to answer the phone for her so she had to answer it when it rang sometimes. So that was annoying, but a necessary evil.
  • I really wish we had learnt how to draft bodice and sleeve patterns from scratch. Instead we traced off our patterns from her set of blocks and made adjustments from there, but I guess it was a good lesson on how to adjust patterns to fit our measurements. However, it really would have taken a long time do that which would mean we wouldn't have covered as much content in the class.
  • I found the course was missing a little structure and I wished that there were more teaching resources like fabric samples/step outs to help explain things. I grasped the concepts eventually but there were a couple of times where it would have been handy for her to have a couple of samples or examples or pictures of what she was trying to say.
  • Most of the reading materials we were given were mainly photocopies of books the teacher had in her library. I wouldn't mind so much if photocopies were supplements, but most of the materials were photocopies. I just expected that there would be more original content.
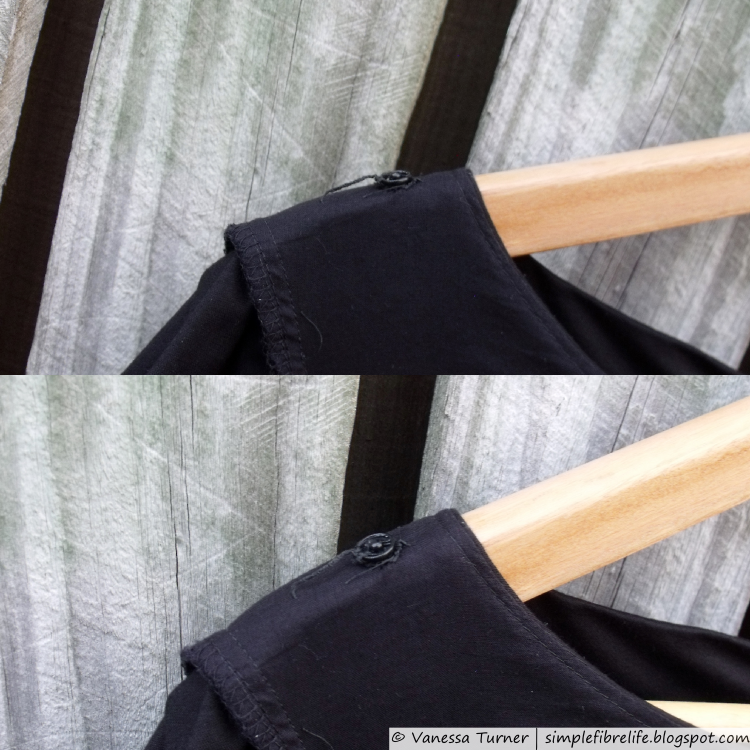
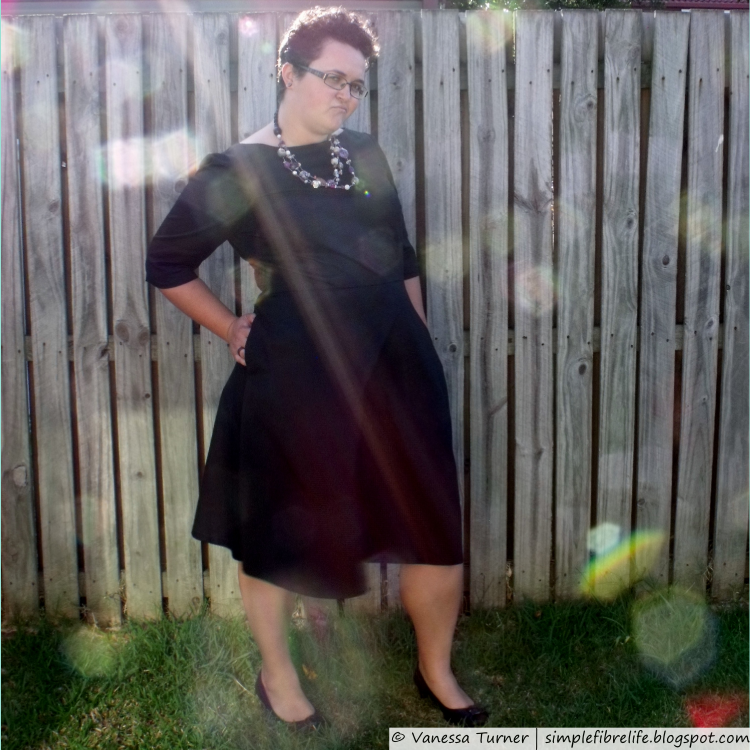
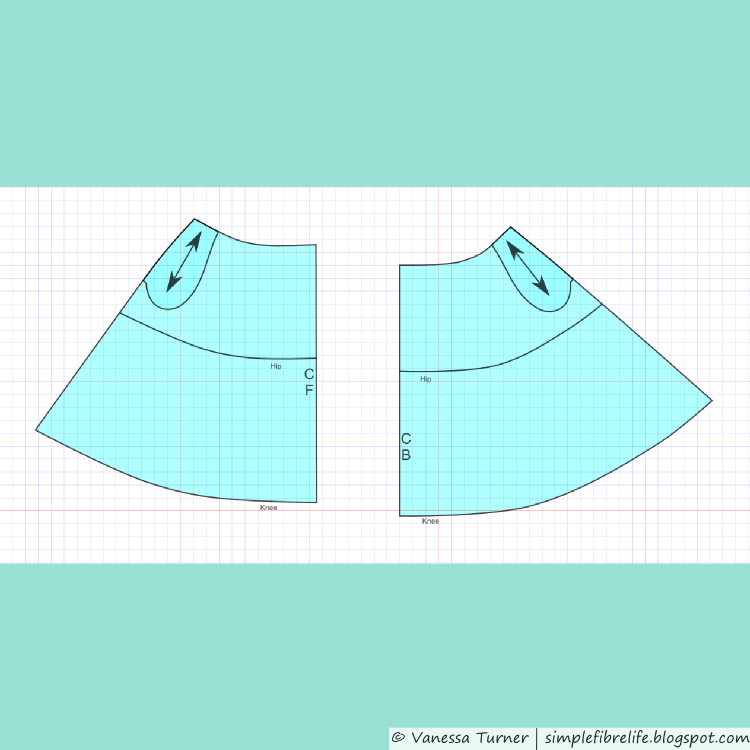
Drafting using a 1 dart skirt block to draft
[source]
~Numbers~
Other than the course expense itself, I didn't need to buy too much for the class. I already had a lot of the stationary and tools. However, I bought a sketch book and folder for all the printed materials we were given and after a few classes I also ended up buying a set of curves and a grading ruler. Even though I had sewing curve/ruler from way back here.


Course10 X 3 hours$745
Additional toolsTailors awl
Grading Ruler
Curved rulers
Sketch book
Folder
~$5.50
$25.00
$20.00
~$6.00
~$9.00
Travel Bridge Toll - 10 * 2 * $4.25
Car expenses - just throwing a number out there
$85.00
~$100.00
Total
~$995.50

That sounds like a lot, but really if you break it down that is about $34 per hour, so not too bad really. That's about the hourly rate for private sewing classes. When I think about the one-on-one attention each person got it is pretty good.


Do you make lots of pattern adjustments? Do you make your own patterns? Have you taken a sewing or patternmaking course? What was your favourite thing about it?
Let me know, I love reading your comments :)

Until next time,

Let's connect online :)
Instagram Icon Facebook Icon Pinterest Icon Twitter Icon

Friday 21 November 2014

::Sewing:: Special Dress for a Special Day - Behind the seams 2

Following on from my previous posts about this dress. I'm geekily recording the constructions steps of this dress. It can be a handy reference when I revisit in the future.

I actually ended up taking two lots of photos for the original post about this dress.
I used the second lot in the first post, but I wanted to include some from the first photo session because I really like the sun flare :)


~Construction~
When I'm sewing I usually try to sew as many seams as possible before I need to press or switch between machines. It means the project comes together quicker. And we all like getting a project finished :)

When I cut out the final garment I made sure that the seam allowances for the bodice, bodice lining and back skirt pieces liked up with the selvage edge so that I didn't need to finish these seams.

I started by assembling the bodice and sleeves and then inserted the sleeves. The skirt was made after which included sewing the inseam pockets. The zipper was put in after joining the bodice and skirt. I attached the zipper snap tab while I machine sewed the bodice lining centre back along the zipper. I was running out of time at this stage so I had to prioritise the next few steps, so I sewed the hem. To finish up I hand stitched the bodice lining waistline to the waistline seam allowance; sewed the snap to the zipper snap tab and finally the bra strap carriers.

Putting the bodice together
  • Stay stitched front and back bodice necklines, bodice lining necklines and waistline of skirt pieces.
  • Sewed front and back darts for bodice and bodice lining and darts at top of sleeve; pressed seams and pressed darts flat so they pointed to the centre of the body or down and pressed sleeve darts to the back.
  • Sewed 3 rows of gathering stitches at top of sleeves.
  • Overlocked the sleeve hem seam allowances without cutting any allowance off
  • Overlocked around the outside of pocket pieces.
  • Basted along the sleeve hemlines to make turning and pressing the hem easier; pressed hem up along the basted line
  • Sewed side and shoulder seams for bodice and bodice lining; sewed sleeve seam.
  • Pressed bodice and sleeve seams and flat, then open.
  • Overlocked sleeve seam allowance.
  • Pressed sleeve hem up along basting.
  • Sewed sleeve hems.
  • Basted the bodice and bodice lining around the armholes. Inserted sleeves into bodice.

Putting the skirt together
  • Sewed pocket pieces to side seam of skirt front and backs using a seam allowance slightly smaller than 5/8” (1.5cm). Pressed seam allowances flat and open.
  • Overlocked skirt side seams, including where the pocket joined the skirt piece, but not around the pocket (that was already done).
  • Sewed side seam of skirt at top, backstitched at top of pocket opening, basted along pocket opening, backstitched at bottom of pocket opening, sewed seams to bottom.
  • Sewed around pocket bag, backstitched at beginning and end. Pressed side seams and the pockets to the front.
  • Basted the top of the pockets bags to the skirt waistline

Finishing up
  • Sewed skirt to the bodice main fabric (thinking about it now I probably could have sewed the bodice lining in this seam too, but I’d probably have to finagle it at the zipper, hmmm, something to think about next time).
  • Overlocked the waistline seam.
  • I made the zipper snap tab by cutting a little rectangle of lining fabric and sewing along one long and short side, snipped the corner off, turned it the right way out and pressed it flat.
  • To insert the zipper I basted the centre back seam, pressed it open, and basted the tape of the invisible zipper to the seam allowance on either side. After unpicked the centre back basting I sewed the invisible zipper in properly.
  • I hand stitch the top of the zipper tape down, positioned and pinned the zipper snap tab where I wanted it, placed the bodice lining and bodice right sides together (remembering to fold under a little of the lining at the waistline) and sewed along the zipper tape to secure the lining down in the centre back.
  • Overlocked the hem of the skirt.
  • Hemmed the skirt by basting along the hemline to make turning the hem easier, pressed the hem up.
  • Hand sewed the waist of the bodice lining down.
  • Hand sewed the snap onto the zipper tab
  • Hand sewed the bra strap carriers to the bodice lining shoulder seams


Here are all the related posts :)
This Post
Sewing FO post
Behind the seams 1 - Pattern Adjustments
Behind the seams 2 - Construction


~Final Comment~
So this wasn't the quickest make in the world, but it was pretty straight forward to sew together the final dress after sewing so many toiles. I think that bra strap carriers are going to be a new staple in my garments. I've made a few more formal garments this year, and I've seen my sewing improve a lot over that time.

Do you have any tips or tricks for sewing your garments quicker? Are there any special techniques or features you like to put in your garments?
Leave a comment below, I'd love to hear from you :)


Until next time,


Let's connect

Friday 14 November 2014

::Sewing:: Special Dress for a Special Day - Behind the seams 1 (picture heavy)


This is a follow-up of this post. I really like geeking out and recording all the steps I’ve taken to make a more involved garment. It can be a handy reference when I revisit in the future.
In this case I was writing all about the pattern adjustment and construction notes for the bridesmaid dress I made and realised it was turning into another epic post so I’ve decided to split it up into 2 posts.

As I was drafting the patterns for the dress I decided that I wanted to add seam allowance to the pattern pieces instead of eyeballing it as I was cutting out fabric, so a lot of time was spent adding seam allowances to pattern pieces with a grading ruler.

Something else to note, as I was sewing each toile I traced all the pieces including markings onto the muslin fabric, so that was a bit time consuming, but I like doing it that way so I can also trace the markings onto the fabric too.

I decided to fool around with Inkscape to illustrate the changes I made to my pattern blocks. It took me a bit of time, but I found it really fun. The illustrations aren't to scale because I scanned in mini-patterns and used them to trace around in Inkscape and then chopped and changed them.

So here we go I’m diving straight into my pattern adjustments.

~Pattern Adjustments~

Pattern Blocks
Bodice and sleeves
To start I drafted the neckline shape that I wanted on the front and back bodice, making sure that they would meet in a smooth line at the shoulder seam. It had to be as deep at the centre front as the neckline on my bodice block; and wide at the shoulders, but not wide enough to show bra straps. That was going to be easy on the front bodice because there are side and waist darts on the pattern block. I traced the front bodice and then drew in a new neckline.
Front bodice adjustment
On the back bodice there is a waist and shoulder dart on the pattern block, so I had to move the shoulder dart to draw a new wide neckline. Otherwise, the new neckline would have crossed into the shoulder dart. After tracing the back bodice block I moved the shoulder dart to further along the shoulder so it would be out of the way of the new neckline. I did that by cutting just to the dart point and rotating it, but really I should have rotated it from the back horizontal balance line; which is kind of the part of the back that sticks out the most (I think).
Bodice Back Block
After drawing in the new neckline I decided I would rotate the back shoulder dart to the neckline, because that was what the peony has.
The sleeves were shortened for the first toile with no other adjustments.
Shortened sleeve

So after the first toile I decided I didn't like the back neck dart. I also needed to tweak the sleeve because there was too much fullness at the back of the sleeve.

So for my next toile I decided to make a couple of changes. I moved the back upper dart to the armhole, but rotated from the back horizontal balance line (so kind of where the shoulder blade sticks out). For the sleeves I removed 1 cm out of one sleeve head by moving the dart leg towards the back of sleeve over, but left the other one as was. When trying this toile on I didn’t like the back dart at all. Removing some of the sleeve ease helped reduce puckering when inserting the sleeve. But I didn’t like the way the back looked at all. It looked a bit too fitted (read tight).

I thought I would try to remove the upper back dart and keep the original sleeve to see how that would look. So I unpicked one side of the toile pressed out the darts in the bodice back and sleeve and resewed it up. I liked the way it looked way better.

Instead of illustrating each step of the changes I made to the back bodice I just illustrated what would have been the simplest way for me to make the changes I did.
Horizontal Balance Line (HBL) lowered down the back like it is on my actual block.
Slash through the middle of the dart to the HBL and from the armscye along the HBL to the first slash
Rotate to close the shoulder dart.
Smooth the shoulder and the gap in the armscye
Bodice pieces matched at shoulders at the outer shoulder.
Redraw the back neckline so there is a smooth join at shoulder

Bodice Back comparison. Yellow is the original and teal is the adjusted one.

The final bodice toile was made to make sure all style and fit adjustments worked and the bodice and sleeve pattern drafts were good to go.

Skirt and Pockets
Luckily drafting the skirt was relatively straight forward compared to the bodice. I only sewed one toile and made a couple of changes
I traced off the front and back of my 2 dart skirt block and rotated out the darts. I wanted a little bit of extra flare at the side so there wasn't a 'bump' in the side seam so I extended the side seam from just above the hip line. I quickly checked to make sure the side seams matched up but placing the pattern pieces on top of each other.

Skirt Blocks
Blocks shortened to desired length
Skirt darts closed
Flare added to the side seams of skirt blocks.


Hem drawn in so it hits the centre of each skirt panel hem

Finished skirt front and back patterns

I only made this first skirt pattern draft hip length, because I just wanted to see how it would fit in hip area and I could just extend the skirt sides by drawing a straight line as I was cutting out the toile.

The pocket was the final piece I needed to draft. I traced around the top of my front skirt block and rotated out the darts again. I took the pocket I had drafted for my S2444 and positioned it to where I wanted it on the skirt piece and traced around it. Voila pocket done!
Pocket drawn drawn onto the skirt front pattern piece and
then matched against the back skirt piece.

I toiled the skirt and pockets and sewed it all up.
The fit was a bit off at the hips where the pockets were. The pocket opening sort of stuck out. I figured it was because I had added flare to the skirt sides too far down the side seam. So I drew new front and back skirt pattern pieces, the whole piece this time, not just the top, and moved the starting point for the side flare up to where the side seam started to curve down. I had to adjust the side seam line on the pockets too.
Skirt pocket pattern piece

I didn’t bother making another skirt toile because the changes were pretty basic.
Here are the final skirt pattern pieces

Here are the adjusted pattern pieces laid over the original block patterns.

~Final Comment~
I’m really glad I sewed so many toiles. It gave me a chance to work out how I was going to sew the final garment and was good practicing techniques like inserting sleeves and how best to sew inseam pockets.

Do you have any special fitting needs that make it difficult to buy RTW? 
If you could design your ideal party dress what would it look like?
Leave a comment below, I'd love to hear from you :)


On the day I didn't get any photos of the dress and forgot to tell Mr S to get some for me.
So I 'borrowed' some from someone else so you could get a peak at the dress on the day.
  

Until next time,


Let's connect