Showing posts with label Homewares. Show all posts

Tuesday, 25 March 2014

::Sewing:: Stretchy Squishy Bean Cushion Cover


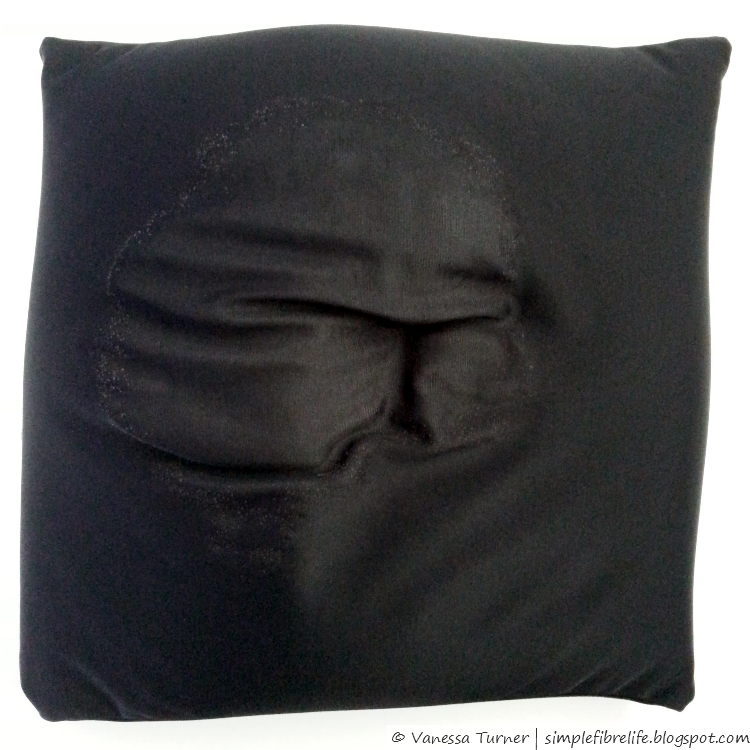
This squishy bean cushion came into my life about 10 years ago.
It was showing its age. The stretch fabric was getting all saggy from be squished too much.
I really should have thrown it out, but I still like it.
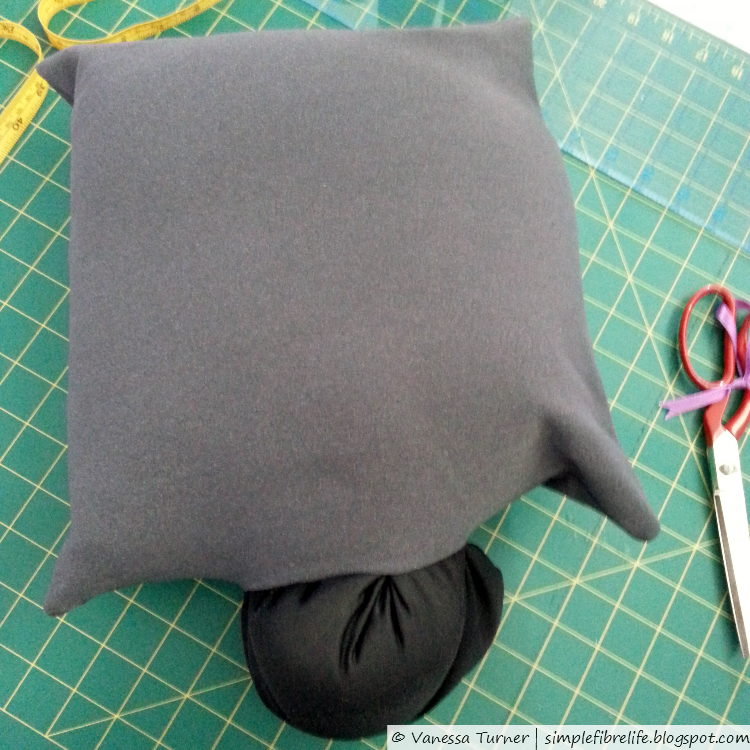
So I made a cushion cover.


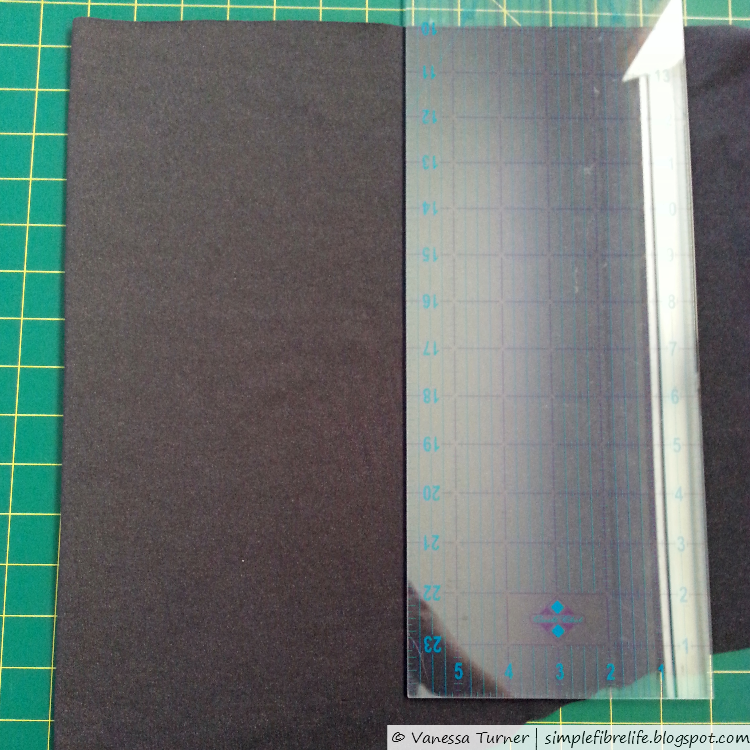
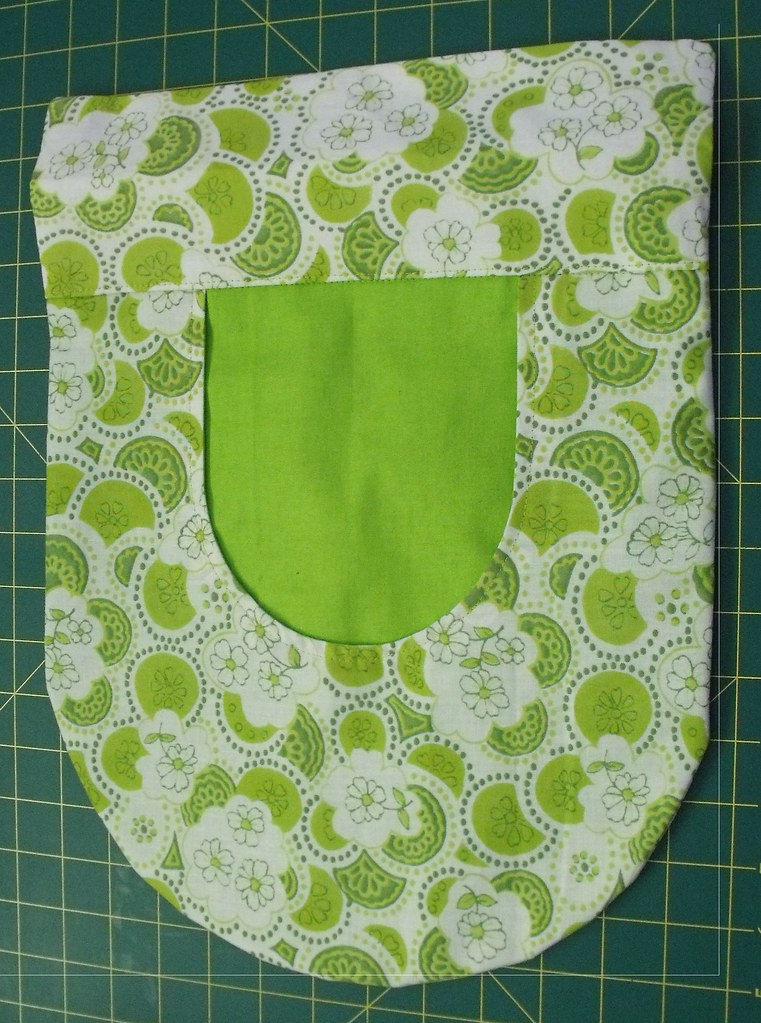
My sister has heaps of stretch fabric scraps so I had a look through her stash and found something I liked. To make the cover I folded the fabric in half and cut out a rectangle that allowed me to use as much of the fabric as possible. I overlocked (serged) all the edges and left a little opening along one side.

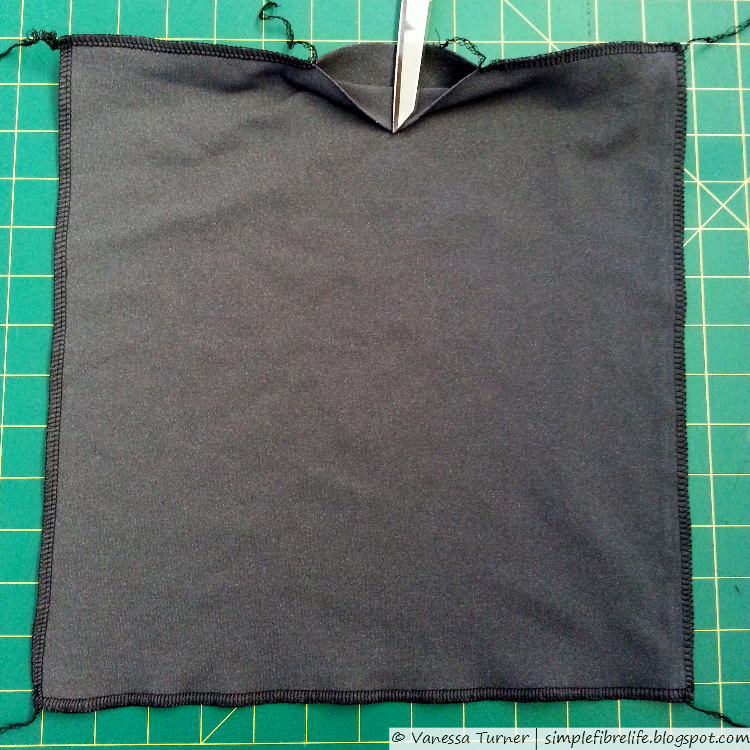
I was going to cut the original cushion open and try to pour the beans into the new cushion, but then decided against it after I imagined the beans going everywhere. I stuffed the original cushion into the new cover.

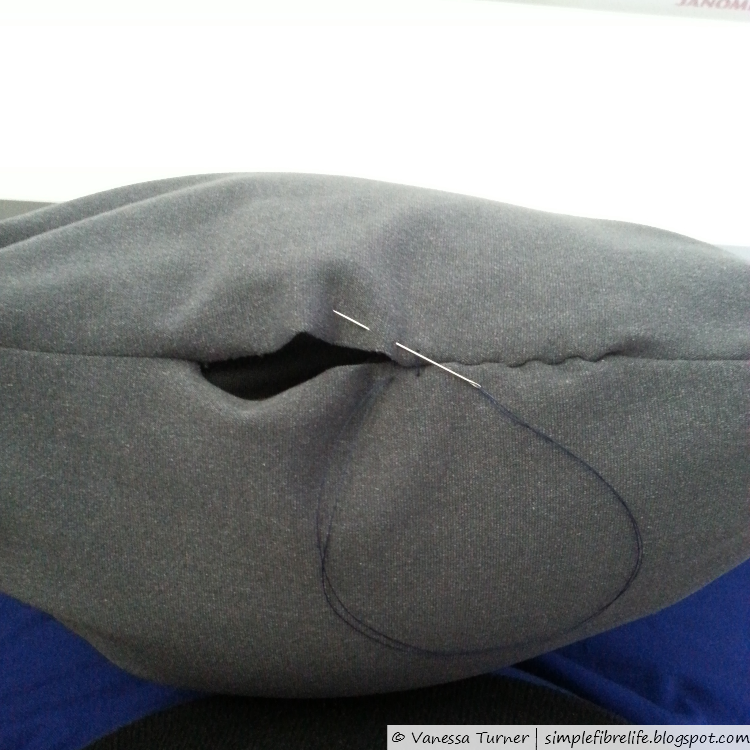
I didn't know how I would close up the opening. I was going to try wrangling it under the sewing machine, but then couldn't be bothered fighting that fight because the beans weren't going to go anywhere and just sewed it closed by hand using a ladder stitch. I might have to undo it and just use a whip stitch.

You could probably make squishy bean cushion just by making a stretch cushion cover and regular bean bag beans if you were super keen. But in that could you would definitely have to sew the opening closed by machine.

STATS
Fabric0.25 m from my sis' stashFREE
Notions
  • Thread
$1.00
Time0.5 hours (* $16-ish Australian minimum wage) $8.00
Total
$9.00

~Final Comment~
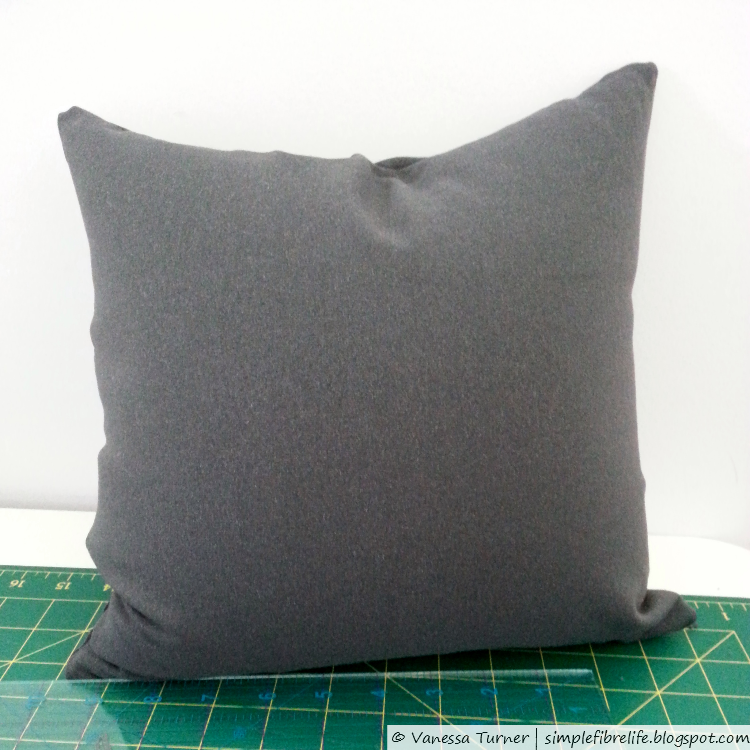
The new cover is a bit smaller than the original and the fabric is a bit firmer too, but that's ok. I still like my squishy cushion.


Have you had to make repairs to something you weren't ready to throw out? What was it?
Leave a comment below, I'd love to hear from you :)

Until next time,


Lets connect

Saturday, 22 March 2014

::DIY:: Fabric Covered Canvas

I bought a fat quarter of some fabulous fabric a few weeks back and I just adored it. I liked it so much that I decided that I didn't want to use it for a sewn project.
I've had this blank canvas for aaages. I've even toted it with me when I moved...twice.
So why not put them together. But how…. Hmmm. Mr S had a handy-dandy staple gun in his shed of treasures (and junk).

I thought it would look great to cover the canvas with the fabric, BUT it wasn't big enough. WHAT!!!
I wasn't going to go and buy another canvas, I want to use what I have. Damnit! Then I had a brain-wave. I'll use another bit of fabric to cover the rest of the canvas.

So for this project I used:
-a blank painters canvas
-a stable gun
-printed floral fat quarter
-contrast fabric


To start I pressed the fabric that was to be used on the canvas.

Next was playing with the placement of fabrics.
When I was happy with the placement I flipped the canvas over and started stapling.
I stapled along the top of the floral fabric and then the bottom. Then I did the side attached to the canvas and the corners. Keeping it juuust taught. I didn't want to stretch the fabric.


Next was attaching the contrast fabric. I wanted a nice edge so I folded the fabric and pressed it. Like the floral fabric, I attached the top, the bottom then the side and corners.
All done!


~What I Like~

  • Using supplies out of my stash
  • The fabrics getting used and being on display


~What I Don't Like~

  • The corners of the contrast fabric are a bit bulky
  • The overlocked (serged) edge of the floral fabric is a bit bulky under the contrast fabric
  • I cut the contrast fabric on the crosswise grain, so it stretched when I attached it.


~Changes for Next Time~

  • I'd try sewing the patterned fabric to the contrast band, but then I'd have to be careful not to stretch that seam too much.
  • I'd reduce the bulk at the corners of the contrast fabric by not folding the fabric in half, but make a small fold instead.
  • Making sure to cut the fabric on the straight grain to make sure it doesn't stretch when attaching it to the canvas.
So that's an easy way to make some artwork from pretty fabric you would like on display.


STATS
Fabric2 fat quarters$6.00ish
Notions
  • Canvas Frame - in stash for ages FREE
$0.00
Time0.5 hours (* $16-ish Australian minimum wage) $8.00
Total
$14.00

~Final Comment~
I'm really pleased with the end result. It's in my bedroom hanging above my bedside table.


Have you made something to decorate your home? What was it?
Tell me in the comments below :)

Until next time,


Lets connect

Friday, 7 March 2014

::Sewing:: Practical Present - Nifty Peg Bag

Wow, we're already in March. When the heck did that happen!
I'm still totes gonna tell you about a handmade gift I made for my Mum last Christmas :)

When I visited my mum late last year I notice that she was using an old shopping peg to store her pegs. So I decided I would make her a peg bag, but there were a few features that I wanted it to have to set it apart from the generic ones you can buy in the shops. After looking at the interwebs to see how other peops had made peg bags I decided to draft my own.

It needed to have a curved bottom. I hate it when you're down to the last few pegs in the bag and you can't find them because they're hiding in the corners. Ok hate is a strong word. It's a nuisance.

It needed to have a fold over tab at the top to hang it from either the clothes line or a clothes hanger. I could have sewn it to a clothes hanger, but what if the hanger needed to be replaced?

It had to be deep and have a large opening so that it could hold lots of pegs and be easy to use.

So with a basic shape in mind a drew up a small scale of the pattern and tried to figure out the best way to sew it all together. I wanted to find a way to sew it quickly but make sure that it was well finished and robust.

I took some fabric out of my stash (yeah stash-busting) and made up the final product.

Peg Bag on clothes hanger
The peg bag is fully lined with an interfaced fold-over tab at the top. That way it can be attached to a clothes hanger or the clothes line.

Peg Bag front
My mum is a big fan of lime green so I thought I'd personalise it with some interesting retro printed mystery fabric from my stash for the outside and a lime green lining. That's the whole point of handcrafted gifts is it; you can personalise it.

To make the bag I cut out 6 pieces - Opening outer & inner; Back outer & inner; Fold-over tab front & back. I interfaced the Fold-over tab back.
I sewed the hand opening by placing outer & inner RST and sewing around the curve.Then clipped the curve and turned RSO and pressed the opening. The back inner was attached to the opening inner at the bottom curve.

Peg Bag
I didn't want the snaps to be seen from the outside so I attached them to the Folder-over tab back. Then I sewed Folder-over tab front to the top of the Opening outer and lining pieces and the Folder-over tab back to the top of the  Back outer, making sure to leave a gap in the middle (you'll see why in a tick)

Fold-over tab
With RST I sewed the Front and the Backs together all the way around the outside. Then, with corners and curves clipped, I turned it the right way out through the opening left between the Back Outer and the Fold-over tab back. I closed the gap in the back by stitching in the ditch at the front, but it would have looked nicer if I had sewn it closed by hand using blind/ladder stitch.

Close up of the snaps on the Folder-over tab
If I were to do it again. I would try to make the bag a bit bigger and make hand opening a little wider and lower. It would also be a good idea to use plastic snaps instead of metal.

I was in a bit of a rush to make this puppy so I forgot to take a picture of it in use. Oh well. I'm sure I'll make another some day. Thinking about it this Nifty Peg Bag could be used in a bunch of other ways. I could hang it in my wardrobe to stow things away in. If you're someone who likes to plan what they wear the day before you could put the accessories you want to wear with an outfit in the bag then hang the outfit over it. Of it could be hung from the wall and stow goodies in it. Yeah, it IS a Nifty Peg Bag. I will have to make another.

Do you make presents? Would anyone be interested in a pattern and tutorial?
I'd love to hear from you, leave a comment below using Disqus :)

Until next time,


Lets connect