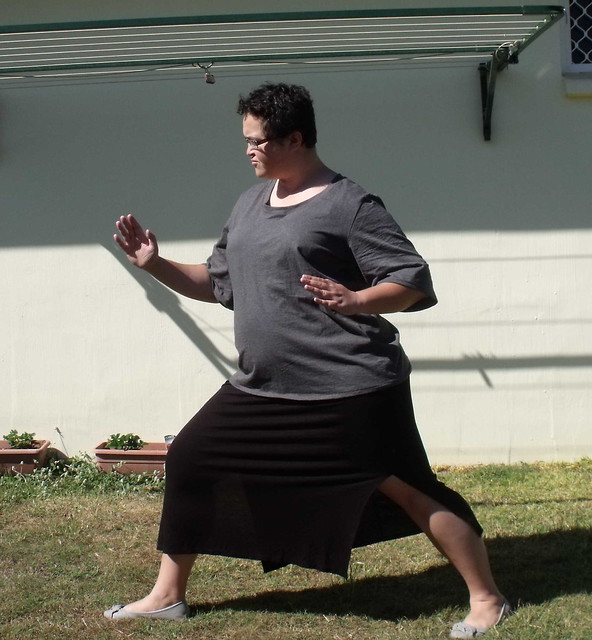
Showing posts with label Grainline Studios. Show all posts

Thursday, 5 June 2014

::Sewing::FO:: Two-Tone Colour Block Scout Woven Tee


~Inspiration~
During the Kollabora Scout Woven Tee sewalong I stumbled upon this fantastic tee. I'd been toying within this idea for awhile when the The Monthly Stitch Sew Double Challenge was announced. I wore my first Scout Tee at least once a week during the warmer  months and I wear my knit Scout Tee at home and to bed during the cooler months. I thought it would be a fitting  candidate for a sewing double challenge.

In the end I didn't get around to sewing it up in time to post to the monthly stitch. Although I did manage to slip in a sewing double post about my Hollyburn skirt. I actually made this before I made my Grey Skating Lady dress.

~Pattern Adjustments~
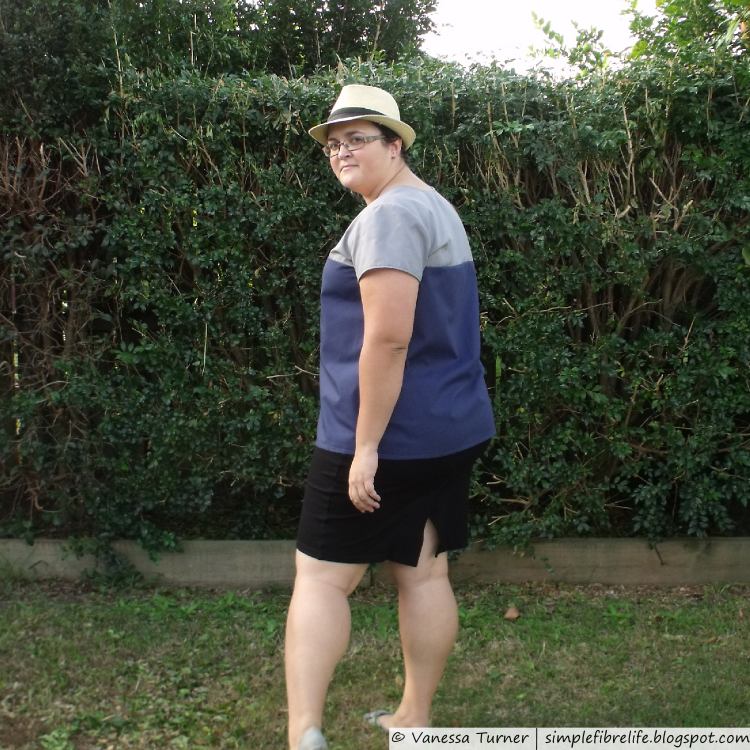
I traced off the pattern I had used in my previous scout tees (lengthened by 3 inches and size 16 on top and 18 on bottom) and modified the pattern buy cutting across the front and back pattern pieces about 1 inch below the armscye. I wanted to make this as simple as possible so I decided to avoid cutting through the armscye and sleeve so it was less work.

~Construction~
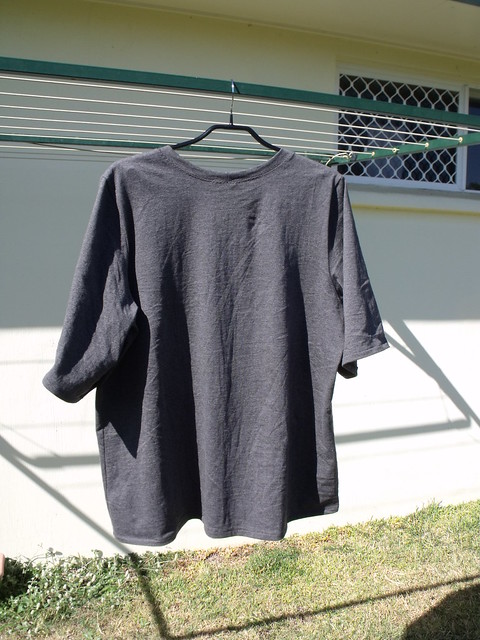
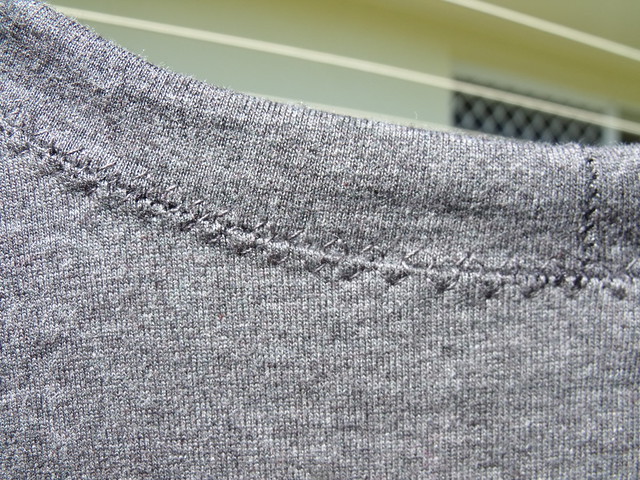
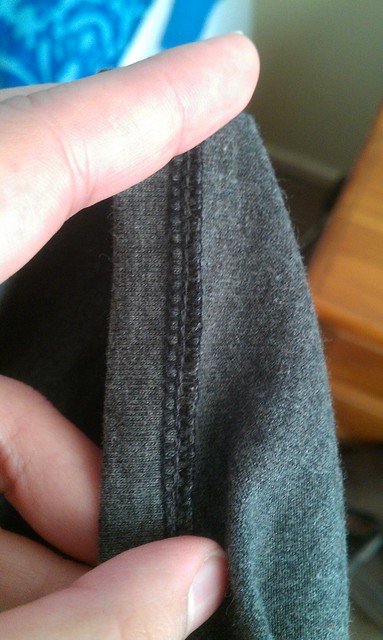
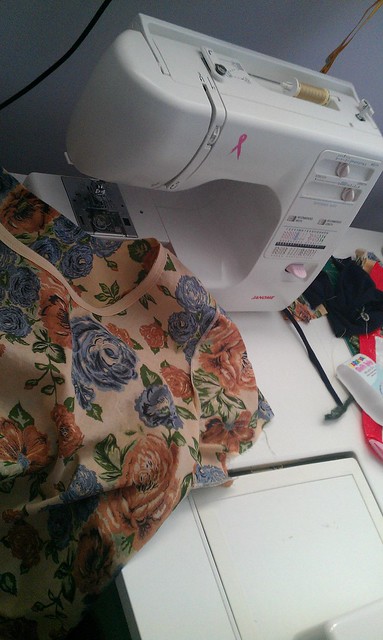
The top and bottom for the front and back were sewn together. Sleeves were sewn in flat after joining the shoulder seams. The sides and sleeves were sewn as one, trying to line up the seams crossing the body pieces. Neckline was finished with bias tape as facing and sleeves and waist were hemmed.

~Pattern~
Modified Grainline Studio Scout Woven Tee

~Materials~
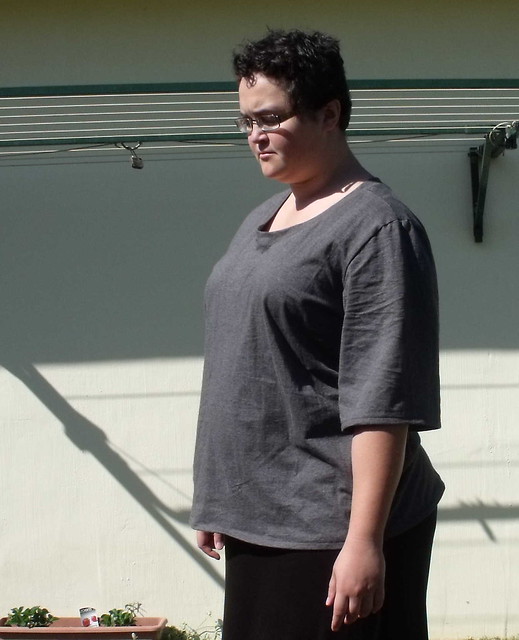
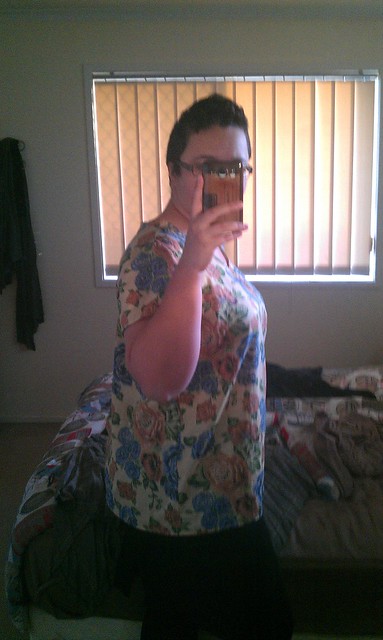
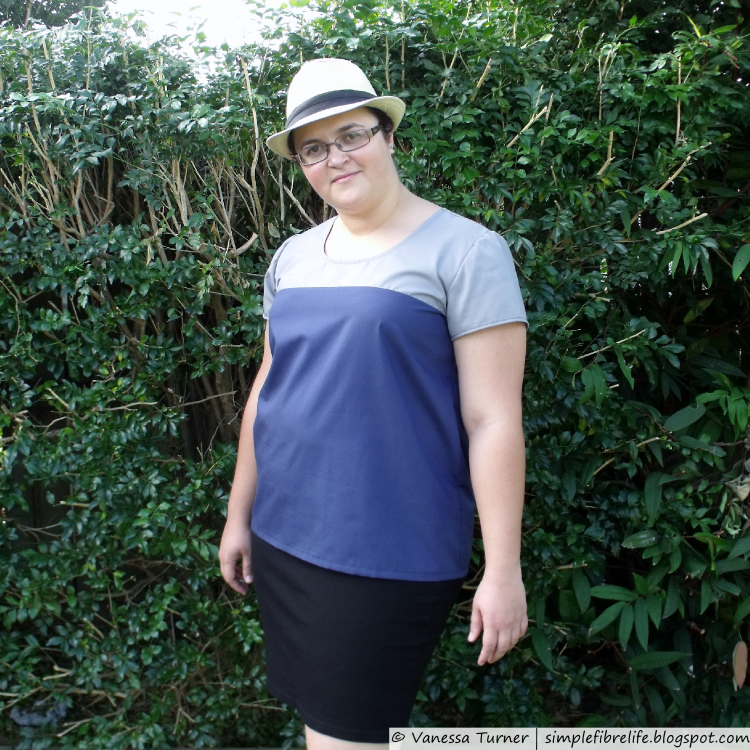
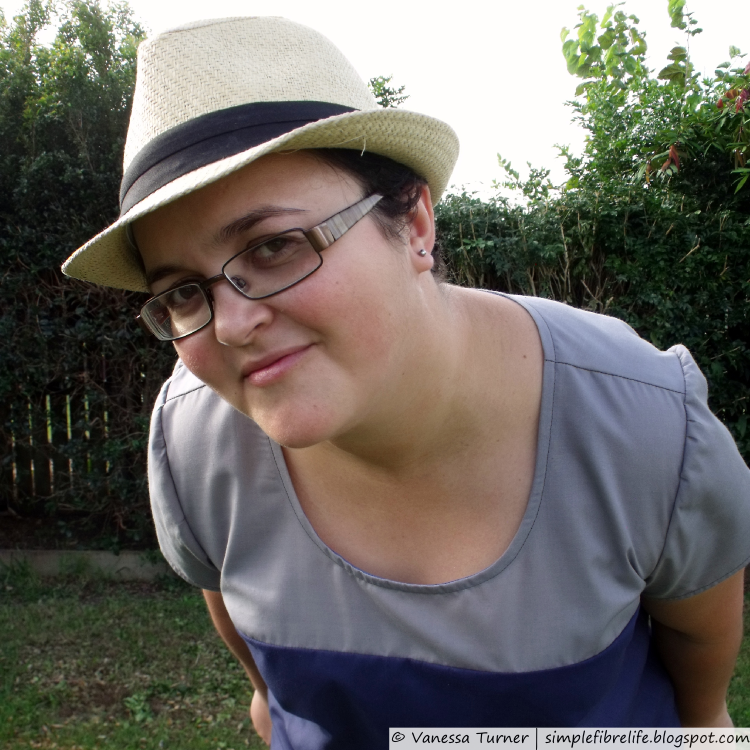
Left over poly cotton poplin fabric from my first S2444 dress and the M5591 skirt I made mum (the grey fabric wasn't pre-washed so we'll see what happens after a few washes). I chose a lighter colour for the top in an attempt to balance out my pear shape. I think it worked, but I think having it so close to my face washed me out. You'll have to tell me what you think.

~Changes I made this time~
• Traced a graded version of the pattern I have used in the past
• Modified pattern for colour blocking

~What I Like~
• It's a loose airy fit and will be good to wear next summer or with a long sleeved knit
• I like where the line between fabrics falls

~What I Don't Like~
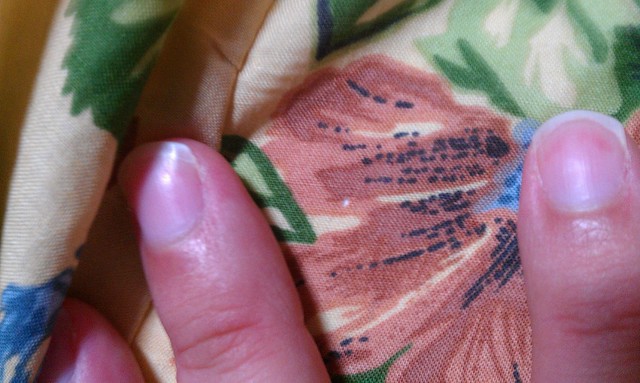
• The seams puckering
• I'm not sure about the colour choice


~Changes for Next Time~
• I think using a different fabric might help with the puckering problem - maybe a a smaller stitch length
• Perhaps use a patterned and solid fabric next time
• Perhaps try a back opening with buttons like the inspiration tee

~Numbers~
PatternScout Woven Teed - Used before$0.00
FabricIn stash - left overs from previous makes$0.00
Notions Thread - in stash
Bias Tape - in stash
$0.00
$0.00
TimeAbout 1 hour to trace and adjust pattern
About 1 hour to press and cut fabric
About 5 hours to sew
7 hours (* $16-ish Australian minimum wage)
$112.00
Total
$112.00

~Final Comment~
As soon as I finished this top I put it on. This was a great way to experiment with colour blocking and modifying a pattern. It will be interesting to see how the fabric changes with wear. This is going to be an 'everyday' wear top I think and I'm sure I'll get a heap of use out of it.

Have you been inspired to make something recently? Where do you get you're inspiration for your projects?
Leave a comment below, I'm interested to hear where others get inspiration.

Until next time,


Let's connect

Saturday, 12 October 2013

::Sewing:: Grey Jersey Sleep Shirt


I wanted to make a basic knit shirt to practice knit techniques so after seeing amazing knit versions of Grainline Studio's Scout Woven Tee about the place I thought that would be a great place to start.
While cutting out I lengthened the sleeves.

While Overlocking the shoulder seams and used some cotton tape to stabilise the shoulders. I experimented with clear elastic, but I think to make it work I would have had to baste it on my sewing machine first so it didn't slide and stick as I put it through the overlocker. My inner lazy dressmaker turned me off that option.
The only thing was when it came to sewing the sleeves on it was a bit bulky. That's ok though. I'm not wearing this to see the queen or anything (except maybe in my sleep) so no biggy.


Attaching the sleeves was a bit of a pain, but it usually is with set in sleeves. I overlocked the sleeves at the armhole, it was pretty simple just needed to make sure I matched the notches and pinned liberally.
The sides came together pretty easily, just a bit of pinning at the underarm seams and whizzed it through the overlocker.

The trickiest part was the neckband. I made it an inch shorter than the pattern piece for wovens, but I probably could have made it another 1/2 to 1 inch shorter again. Even if it's not perfect I'm still pretty pleased with the neck band, its not too flippy-outty (that's a technical term). Attached and then stitched from right side using a stitch in the ditch foot as guide to centre the stitching.
 

Hemming was done just by overlocking the edges, turning 5/8 inch then stitching down using 3 step straight stretch stitch on my sewing machine. In an attempt to get a straight I used the straight stretch with the needle aligned to the left and the hem fold aligned to the right side of my presser foot.
 

It's quite a warm tee. I'll probably get a little wear out of it before summer, but I don't think it will be my sleeping attire of choice in late spending and during summer.

So that is my first foiree into stretch tops. I was not too scary, and I've ended up with a nice big baggy sleeping shirt. That I can pose like a ninja in....

If I were to do it again, I'd make the sleeping shirt longer and probably use a different hem treatment because after a bit of wear the hems tend to flip out. The next time I go to my local sewing shop I'll pick up a ballpoint twin needle so I can attempt a twin needle finish on my next make.

Have you made something out of knit fabric recently? Where do you get your knit fabrics?

Until next time,
V xoxo

Thursday, 4 July 2013

::Sewing:: Scout Woven Tee with 1 sewalong for me please

This was a dream to sew up. I made it over a couple of weeks. I did a couple of a adjustments though. I lengthened the pattern by 3 inches and I cut a 16 at the top and graded to an 18 from under the armpits to the hips.

I sewed it up a bit differently to the pattern. I sewed and overlocked the shoulder seams. Then using a beige store bought bias binding I bound the neckline. If I had used bias tape from the pattern I would have used this method of attaching the neck binding.


I set the sleeves in in the flat and overlocked the seams. I made a little booboo though, while I was overlocking one of the sleeve seams I nicked a tiny hole into the back shoulder. It was only a tiny nick I put some fabric glue on it and I'll see how it holds up.


The only other time I've set in a sleeve was when I did a muslin for this top at the end of last year. I think I prefer setting in the sleeve flat. In this case it worked pretty great even though I got a couple of tiny pleats while easing them in.

I basted the side seams to check the fit and it was ok. If I had made the fit more snug it would have been hard to put on and take off. Once I decided it was going to fit alright I removed the basting I sewed and overlocked the side seams and and hemmed the sleeves and bottom.

To hem I folded and pressed the hems at the finished length then folded the raw edge into the fold, pressed and sewed.

The fit of the shirt is a bit loose, but I think that's just the style. It's not getting much use at the moment being winter and all, but I can see this getting a lot of wear in summer especially as it's loose, light and airy. A great addition to my casual summer clothes. Although, I could probably layer this top on top of a long sleeved knit top.

From the side
From the side
- pulled taught

The fabric is a little stiff still but hopefully it will become a bit softer and drapeyer with wash and wear.
I'm popping this into the Sewalong on Kollabora. Not long after I had gotten the pattern and fabric out to make it Nettie from Sown Brooklyn announced her Sewalong.

From the front
Fom the front - pulled taught

So that it that. I will probably make this again in the future. I might even change it up a bit at take some inspiration from this (I'd made the overlap at the back) and this version (Like the colour blocking and the button down back) as it would mean I might be able to get a snugger fit..

So there you go, another garment I can add to my Sewalutions tally and my S.W.A.P. wardrobe.

Until next time, I hope your making things that you want to and ticking off some to-do's,
Vanessa xoxo