|
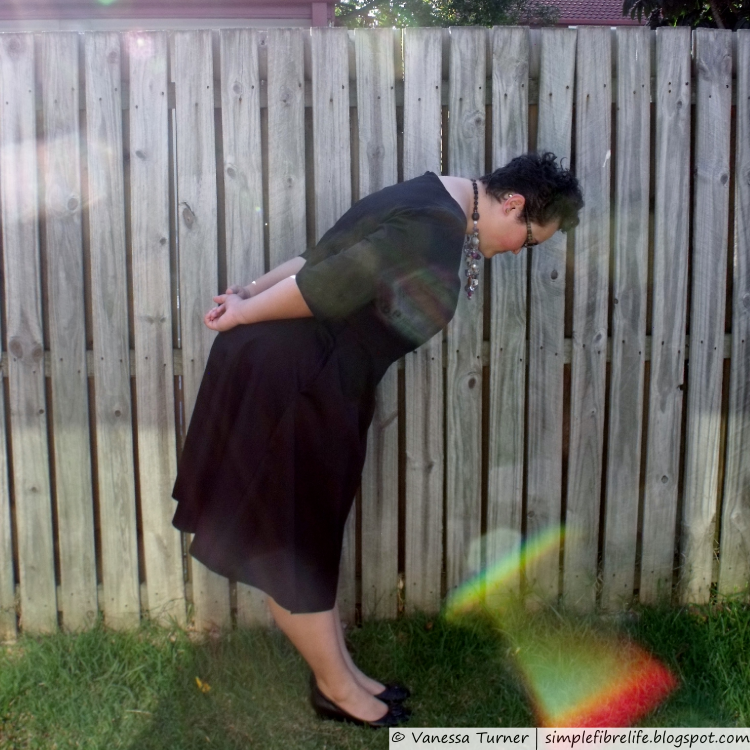
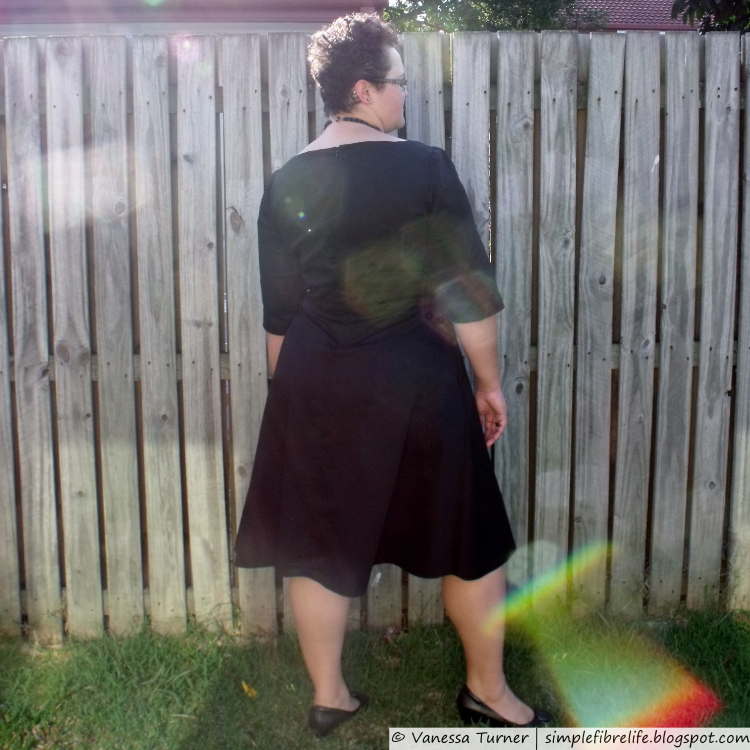
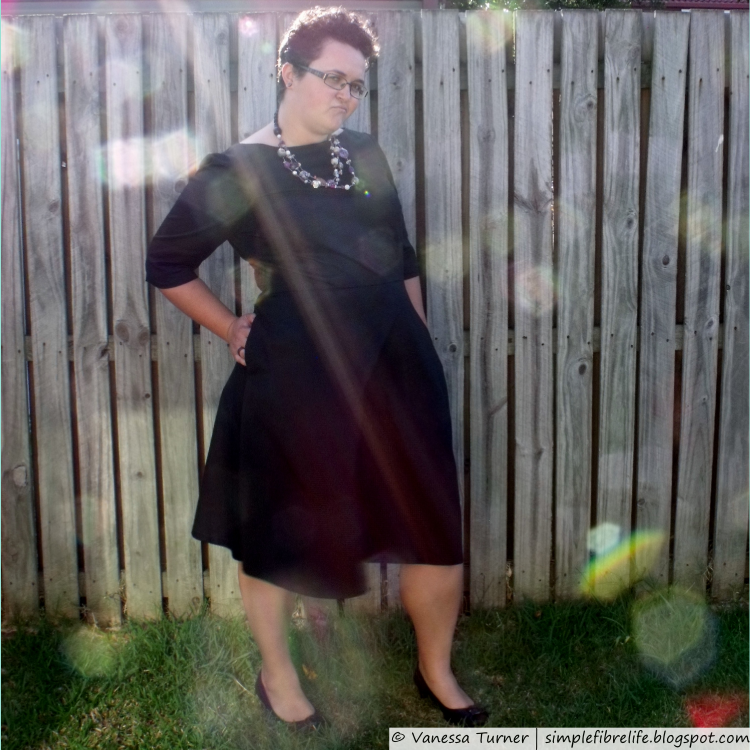
| A knits ensemble. Oooh yeah! |
Self-Drafted Leggings
Here is a peek into my internal monologue while I was making these... Be scared!I should really go exercise. But I don't have any comfortable pants/trousers to wear. I know, I'll make some leggings. Great idea.
...months pass...
I should really get some exercise. Oh. I haven't made those leggings yet. I don't want to buy a pattern, that costs money and it would need to be adjusted heaps anyway. I've got mad skillz; I'll draft a pattern... Ooo, I better go buy some fabric too. I think there's a sale on!
...months pass...
I should really go for a walk. That's right I'm going to make some leggings. I've still got to draft the pattern. I'll go draft it right now.
...weeks pass...
What a great day outside. I'm totally in the mood for a walk. Wait, I'm making some leggings to wear while I do that. I better go cut the fabric out.
Well I've cut them out now. I'll just sew them a little...
...days pass...
Well I've got no elastic for these. I better go buy some. (meanwhile I have perfectly good elastic that could be used to work with these *shakes head at self* silly!) Oh. I'll hem these first.
Right let's attach this elastic. Oops. I did that a bit wrong. It still looks alright and I'm not going to unpick overlocking stitches. All done! Let's see what these look like on... Um. They are little too short and the hems are uneven. Bah! I can't be bothered fixing the hem. But I'm going to take pictures of these before I use them.
...days pass...
Oh a cuff is a great way to to add length to leggings. I'll do that. I better go unpick the hems on my leggings.
...days pass...
Just get these damn leggings done will you! You're so flipping close! Go. And. Finish. Them!
Alright, alright, I'm going to go and do that.
Then I'm going to take some pictures.
Then I'm going for a walk :)
That was the story of these leggings. I drag my feet on a project that is very likely to be awesome.
It happens ALL. THE. TIME. What the heck?!?!?!?!
Aaaaanyway. Moving right along...

~Inspiration~
For ages I've been checking out the leggings that the ladies over at Fehr Trade and How Good Is That? and Suzy Bee Sews and thinking. I should make some leggings.
| Sidenote: Having been a teen during the 'lo-rise era' there weren't a lot of fashionable options for 'hi-rise' garments. As I've gotten older and started sewing for myself I realise I prefer 'hi-rise' pants/trousers/skirts. Good-bye muffin top, plumbers crack and camel-toe caused by the waistband trying to find room at my narrow waist away from my large hips and therefore raising the crotch seam. TMI? Although, it means I get rolled/crushed waistbands from slumping over while sitting with terrible posture. Hmmm. I'll just have to sit up straight I guess :) |
~Pattern~
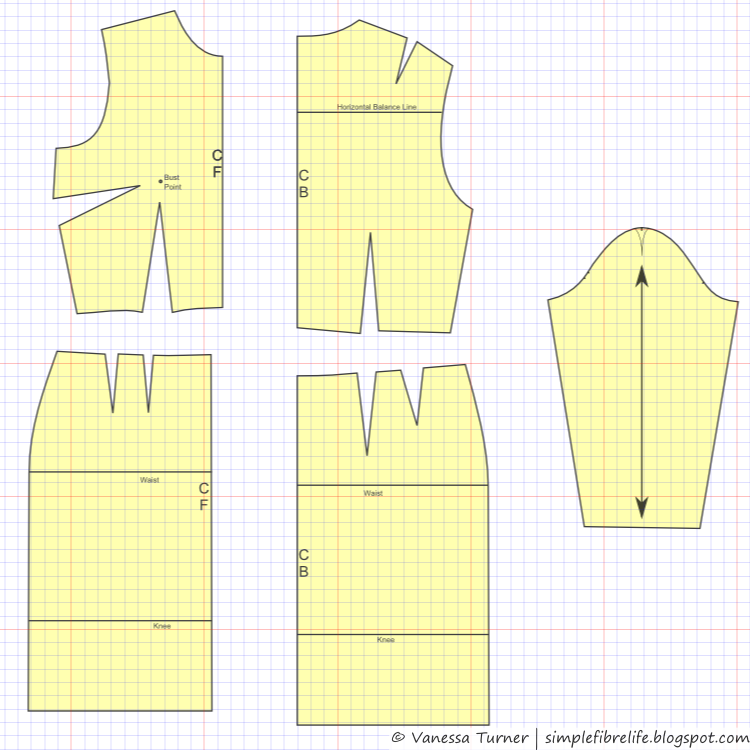
Self drafted based on this tutorial
~Pattern Adjustments~
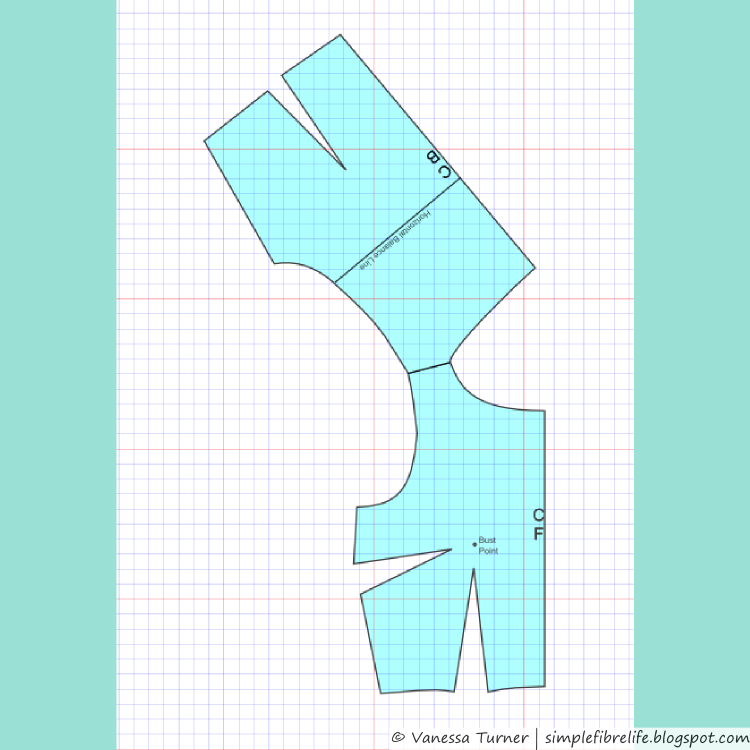
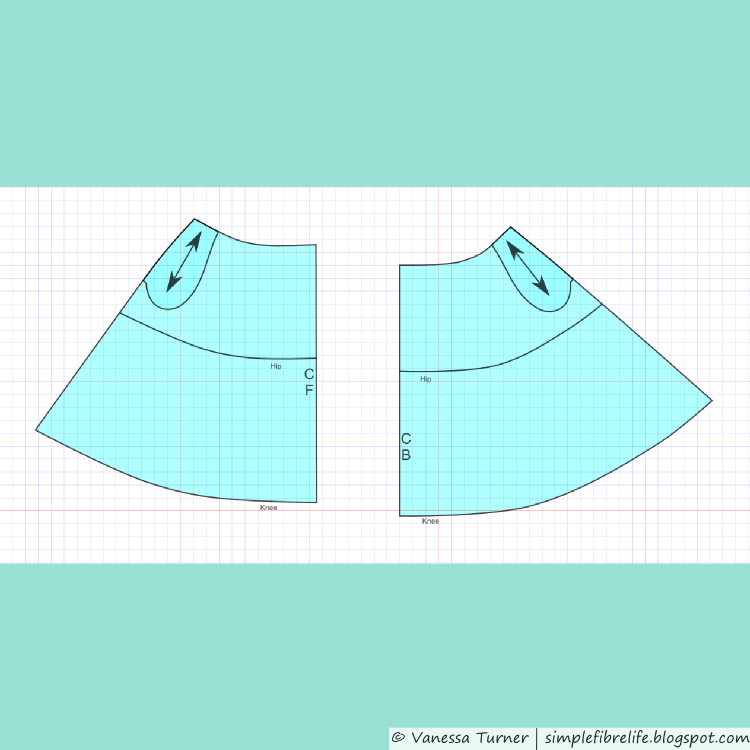
I wasn't happy with the measurements given in the tutorial for the crotch curve guides in steps 14 and 16. I thought the fixed distances to measure in from the thigh circumference length (drawn in step 6) were not very useful when drafting the pattern in my size. The measurements weren't scaled to accommodate a longer thigh circumference length, so when I was drafting my leggings pattern the crotch curve looked way too shallow.
Looking at the diagram in the tutorial, I noticed that the front curve guide hit the thigh circumference line about halfway along the front rise depth (measured in step 9) and the back curve guide hit about a third in of the back rise depth (measured in step 11).
So I calculated half of my front rise depth and a third of my back rise depth and used them instead of the 1" measurements given in steps 14 and 16. Both measurements I calculated were more than double the 1" given in the tutorial! Proportions people, it's all about the proportions.
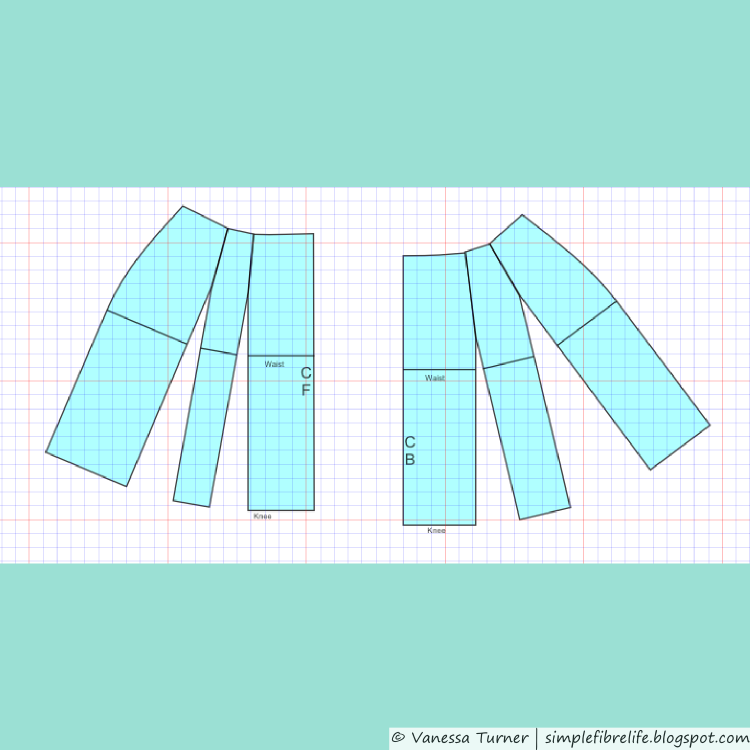
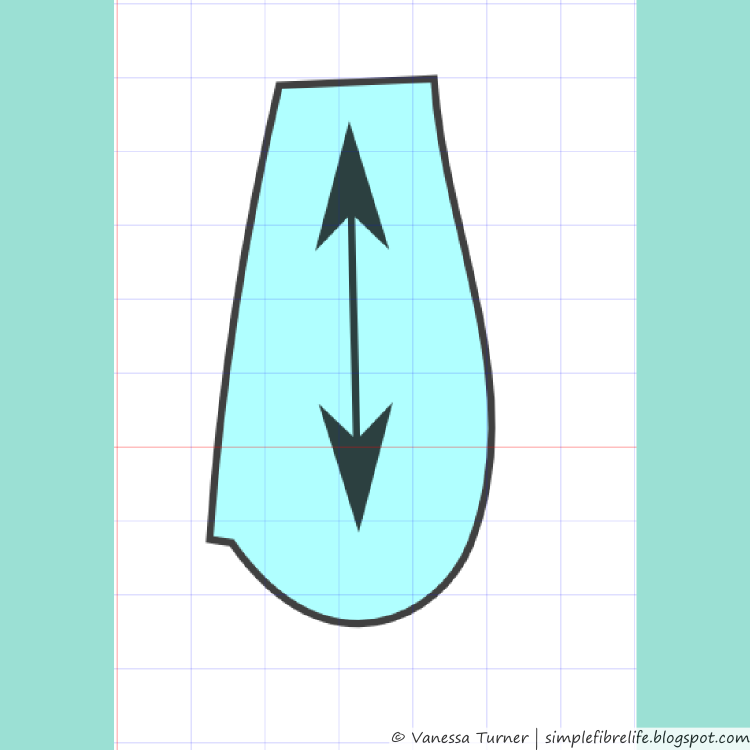
I made these leggings so they'd hit the knee for two reasons. It's too hot in Brisbane for full length leggings at the moment... and I didn't buy enough fabric :) The fabric is a 2-way stretch but I still wanted to cut these on grain. I'll use this fabric to make other things. Contrast panels anyone?
There was a noticeable difference of leg circumference at the thigh just above my knee and at my knee. So I made a note of that and included that in my drafting for the pattern.
I didn't add any seam allowance because I was following the tutorial. I didn't make any negative ease adjustments to account for stretch because I wanted to see how these would fit with minimal negative ease from the seam allowances.
~Materials~
- Black Performance Cotton Lycra 148 wide from Spotlight
- Elastic
- Black Thread
- Bias tape - for a tag

~Construction~
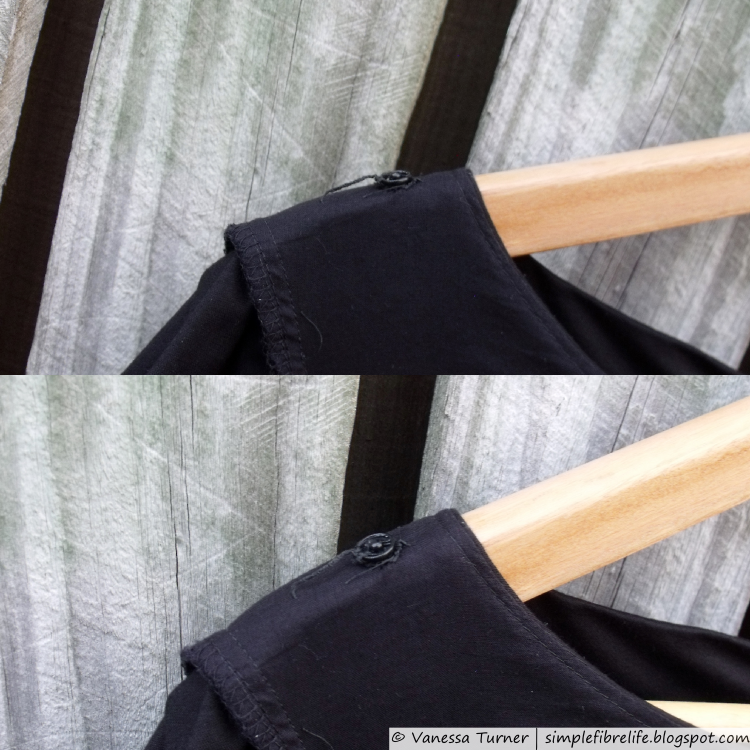
I did the leg seams and crotch seam on my overlocker/serger. Then I attached the elastic to the waistline using my overlocker/serger and top-stitched it down on my sewing machine. I thought I was doing this but I did
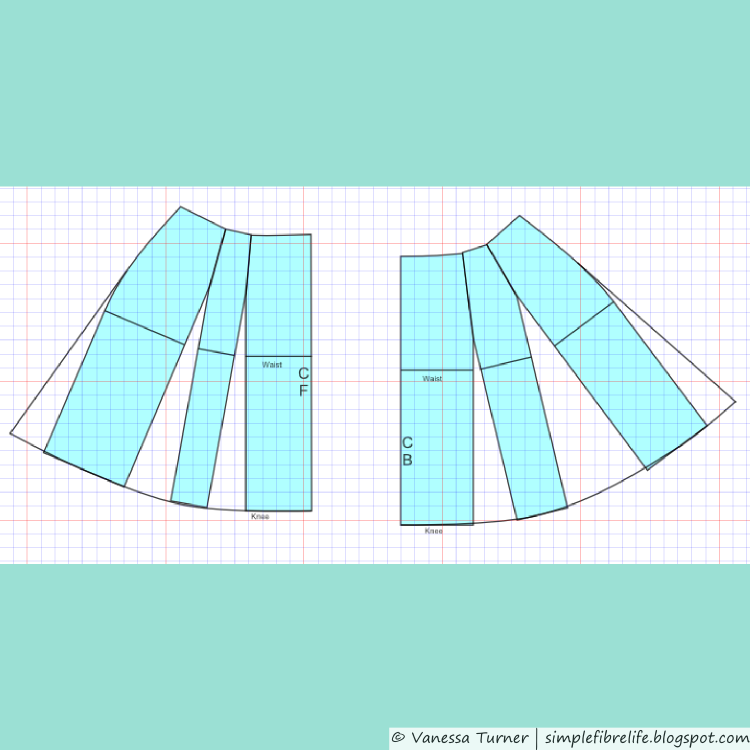
When I was drafting these I didn't put a curve on the hem which meant that when I hemmed the hems were longer at the sides and shorter at the inner leg seam. Doh! I was contemplating what to do when I read this post and did a face-palm. Of course! A hem bands will fix this! So I went back, unpicked the hem and re-cut the hem so that it was perpendicular to the inner leg seam.
I measured the hem and cut some bands. I joined the bands at the short edge on the overlocker/serger and pressed them RST matching the raw edges. Then I attached the bands to the leggings hem on the overlocker/serger making sure to match all the raw edges. Finally to finish them off I used a zig-zag stitch to top-stitch the seam allowance up towards the leggings.
~Changes I made this time~
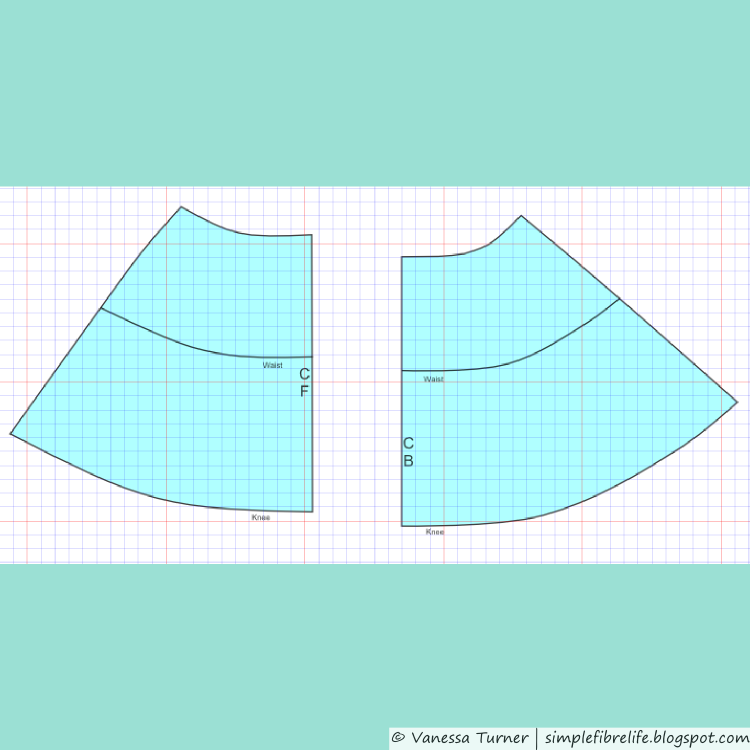
- Slimmed down the lower thigh area by taking some width out of the inner leg seams
- Added cuffs at hem to add length
- 70/10 ballpoint needle for seams
- Zig-zag stitch width: 3; length: 2.5
- 80/12 ballpoint needle for sewing waistband (the smaller one snapped)
- Overlocking/serging Stitch length: 4; Differential: 1.5; Thread tensions: ln:4; rn:3; ul:3; ll:3.5
~What I Like~
- I really like the fabric
- I actually like the hem bands in the end. They add interest and give a snug fit
- I'm so glad that these are high-waisted so hopefully they won't ride while I'm wearing them.
 |
| Self drafted leggings fist pump! |
~What I Don't Like~
- The added bulk at the waistband because of the way I attached the elastic
- The zig-zag top-stitching at the waistband is a bit dodgy in some places
- When I was taking in the inner leg seam I started midway through the seam, which means there is a slight angle in the stitching with sometimes shows, but it's not a show stopper
~Changes for Next Time~
- Attach the waistband by following Melissa's Tutorial
- Adjust the pattern to take into account some negative ease. It feels like the crotch sits a little too low at times.
~Numbers~
| Pattern | Free - Self Drafted (time accounted for below) | $0.00 |
| Fabric | Black Performance Cotton Lycra 148 wide $11.97/m (40% off) x 0.75 m | $8.98 |
| Notions |
|
$0.00 $4.99 $0.00 |
| Time | I forgot to record time for this make so I'm guestimating here 5 hours (* $17-ish Australian minimum wage) fabric prep - 15min patterndrafting - 30min cutting - 15min (including sewing - 4 hours (including unpicking and fixing cuff) |
$85.00 |
| Total | $98.97 |
This was a really nice quick make so that definitely kept the cost down. Although this make did some time to sew it was mainly because I was fixing the leg hems and tweaking the fit.
The Tee in a Racy Red

~Inspiration~
I've been meaning to make this top for years. Years! Back before Cake Patterns was born StephC published her free Blank Canvas Tee. I downloaded it with the intention of making it. She updated the pattern a while back and made it a Cake Patterns Freebie. So I downloaded the updated version got around to making this wearable muslin.
~Pattern~
Cake Patterns 2224 The Tee
I traced and cut a 40-45 neckline; a 40 sleeve; a 48 hem width; at a 25 hem depth. I made sure to mark my tracing with all this info :)
~Pattern Adjustments~
I was a bit nervous about making this top after my experience with the sizing with the Cocoa Shrug.
I was going to go all pattern hack and cut it so there was more waist definition, but then decided that I wanted a more loose fitting top.

~Materials~
- Red combed cotton jersey
- 90mm clear elastic
- Polyester thread
~Construction~
I sewed this make on my sewing machine using my walking foot. I wasn't sure how it would turn out and I wanted to avoid having to unpick overlocking/serging if I hit any snags.
I stabilised the shoulder seam with some clear elastic instead of interfacing because I had it on hand.
I attached the neckband using the traditional method outlined in the instructions (sew one shoulder, attach neckband, sew other shoulder) but as I've mentioned before I much prefer the finish that comes with attaching a neckband in the round.
At this point I popped the top onto my dressform to get an idea of how it would fit. I liked how it looked so I kept going. I didn't hem the sleeve opening at this point because I don't like how it meets under the arm when done before sewing the side seam. I finished the top by sewing the side seams and attaching the hem band. I was going to finish the sleeve hems at this stage, but then decided against it. Purely out of laziness, not wanting to deal with the rolling fabric edges and because it's not going to fray anyway.
The only complaint I have about this make is the fabric curled like no-one's business. It was a major PITA to attach the neck and hem bands so I ended up basting the raw edges of the bands together before attaching them to the body.
~Changes I made this time~
- Not hemming the sleeves
~What I Like~
- Great fabric - quality and colour
- Like the fit across the bust and arm opening size
- With a blousing around the waist I like the hem band.
~What I Don't Like~
- There is a bit of pooling at the back of the shirt, that that's only if I'm being picky

~Changes for Next Time~
- Make this on the overlocker/serger
- Try making a version that is a snugger fit through the waist
~Numbers~
| Pattern | Cake Patterns 2224 The Tee - Free | $0.00 |
| Fabric | Combed Cotton Jersey, Red, 112cm wide (40% off) $6.59/m * 1.6m | ~$10.55 |
| Notions |
|
~$2.40 $0.00 |
| Time | I didn't record time for this project because I sewed it in fits and starts so I'm guestimating 3.5 hours (* $17-ish Australian minimum wage) Considering fit - 20 min Tracing Pattern - 10 min Cutting Fabric - 30 min Sewing - 2.5 hr |
$59.50 |
| Total | $72.45 |
The mucking around with considering the fit etc. and trying to wrangle the rolling edges of the fabric are what added to this make. I think if I made it on my overlocker/serger it would far less time. But I'm very happy with this make considering it's a wearable muslin.
~Final Comment~
Phew! Another epic post!
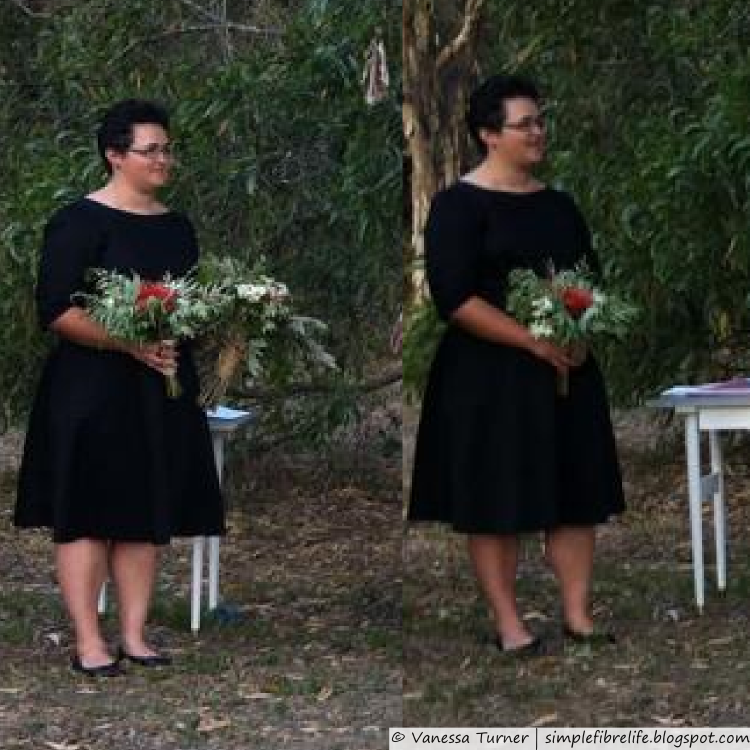
I couldn't wait until the 'golden hour' to take my pictures today so your getting 'in front of the shed door' pictures. It was only when I was editing the pictures that I notice the circle. It's the sun reflecting off the camera lens. LOL. I'll know not to do that again :)
These are both wearable toiles/muslins really. It was really good to practice using knits and get more familiar with working with them. These are going to be great to wear when I exercise and I'm going to have to make repeats. I much prefer the finish on the leggings because they mostly sewn on the overlocker/serger; so I'm looking forward to making a Tee on the overlocker/serger too.
I'm really glad I got this ensemble done before the end of this year. I really wanted to close this year off as best I could. I have one WIP, but I'm going to try to finish it so I can wear it tonight.
If you made it this far congratulations :)
 |
| Epic fist pump for an awesome knit outfit :) |
Is there something that you've been wanted to make for years?
Do you drag your feet about making projects sometimes?
What are your thoughts on self-stitched active wear?
Do you prefer lo-rise or hi-rise?
Lots of questions :) Leave your answers in the comments
Until next time,

Let's connect online :)


|