When sewing I didn't even look at the instruction sheet that came with the pattern I just looked at Rachel's fantastic instructions!
I was a little slow to get started. I didn't start until after the sewalong posts finished. I sewed most of the skirt last weekend and finished it up in the last few days. I wanted to wear it to a lunch I was having with friends yesterday for my birthday.
I did have a little hiccup. When I went to attach the waistband there was a difference in length between the waistband and the top of the skirt. Half the waistband measured 19 3/4 inches and half the top of the sewn up skirt was 20 3/4 inches.
 |
| Half the waistband measurement |
 |
| Half the top of the sewn skirt |
I did make a few changes though...
- When sewing the waistband down I overlocked the raw edge before sewing it down by topstitching around the bottom of the waistband.
- I used in invisible zipper instead of a dress zipper
- I made a very narrow hem by overlocking the raw edges and then simply turned the fabric up just enough to hide the overlocking and then stitched it down by machine.
 |
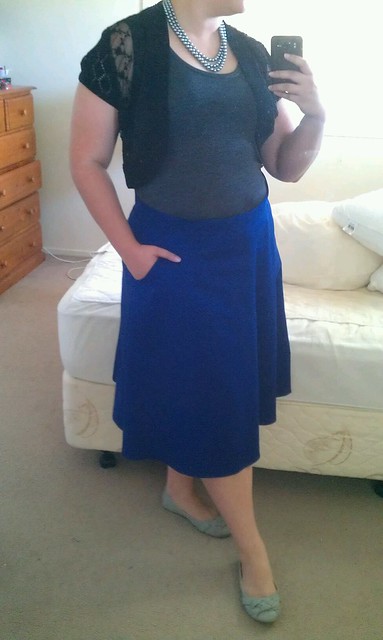
| Skirt Front |
 |
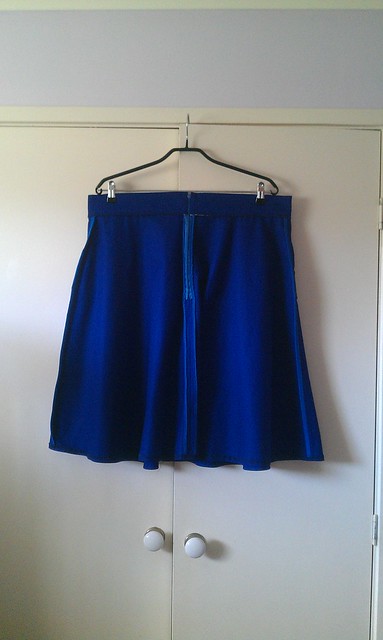
| Skirt Back |
 |
| Inside skirt front |
 |
| Inside skirt back |
 |
| Close up of the inside skirt front and the different kind of seam finishings. |
Things I would change.
- I'd staystitch the top of the skirt pieces as soon as I cut them. This might stop the top of the skirt from stretching out, which is why I suspect there was a difference in measurement between the waistband and the skirt top. The skirt is a little loose. I should have shortened the top of the skirt top instead of lengthening the waistband.
- I'd overlock all the raw seams instead of using a bound seam finish. It would be a lot quicker than bound seams and I want garments that I can throw in the washing machine (on a gentle cycle of course)
- My mother and I measured the hem to it would sit parallel to the floor, but it looked a little like a mullet hem when it was hanging up because the skirt sits lower at the front when I'm wearing it, but I ended up just hemming it as is. I think next time I'll cut the hem so that it sits parrallel to the floor instead of what I did this time.
Final word...
I love the skirt design. POCKETS! (need I say more) It's a very flattering cut and I love the colour. I'm not entirely sold on the length, I may shorten it in future. But all in all I'm very pleased this skirt fits in with my S.W.A.P. and is a garment that counts towards my Sewlution pledge.
Until next time I hope you are making headway with your goals too,
Vanessa xo


Looks even better in real life! You are so inspiring x
ReplyDeleteThanks Sarah. I think you're pretty fly too. I like that you do a lot of crafty doing. I do a lot of crafty thinking :)
DeleteVery nice! That's one pattern I'd love to get this summer (when I'm no longer pregnant). It looks so versatile. Your skirt is fantastic!
ReplyDeleteThank you Liza Jane. I thoroughly recommend this pattern. Tasia did a great job!
Delete