
This is a follow-up of this post. I really like geeking out and recording all the steps I’ve taken to make a more involved garment. It can be a handy reference when I revisit in the future.
In this case I was writing all about the pattern adjustment and construction notes for the bridesmaid dress I made and realised it was turning into another epic post so I’ve decided to split it up into 2 posts.
As I was drafting the patterns for the dress I decided that I wanted to add seam allowance to the pattern pieces instead of eyeballing it as I was cutting out fabric, so a lot of time was spent adding seam allowances to pattern pieces with a grading ruler.
Something else to note, as I was sewing each toile I traced all the pieces including markings onto the muslin fabric, so that was a bit time consuming, but I like doing it that way so I can also trace the markings onto the fabric too.
I decided to fool around with Inkscape to illustrate the changes I made to my pattern blocks. It took me a bit of time, but I found it really fun. The illustrations aren't to scale because I scanned in mini-patterns and used them to trace around in Inkscape and then chopped and changed them.
So here we go I’m diving straight into my pattern adjustments.
~Pattern Adjustments~
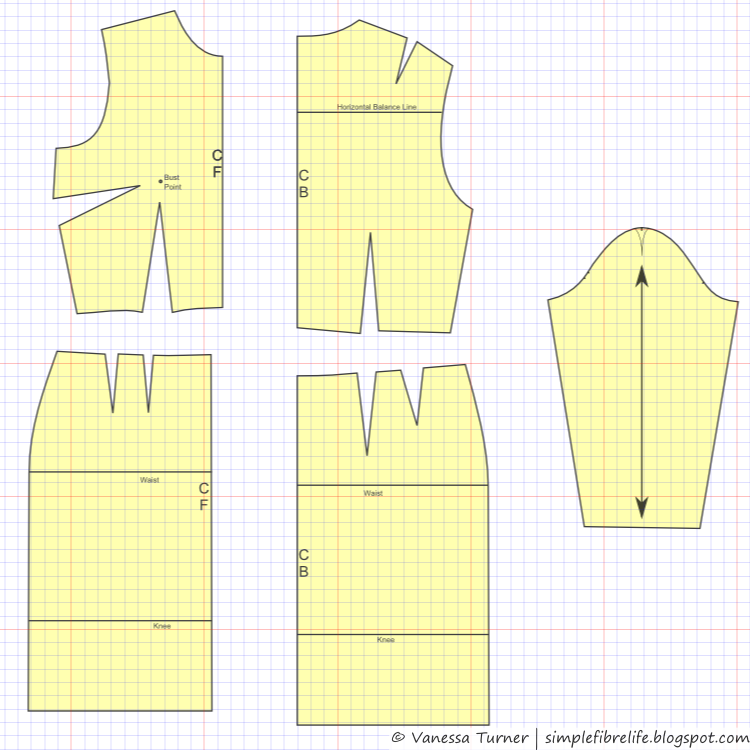 |
| Pattern Blocks |
To start I drafted the neckline shape that I wanted on the front and back bodice, making sure that they would meet in a smooth line at the shoulder seam. It had to be as deep at the centre front as the neckline on my bodice block; and wide at the shoulders, but not wide enough to show bra straps. That was going to be easy on the front bodice because there are side and waist darts on the pattern block. I traced the front bodice and then drew in a new neckline.
 |
| Front bodice adjustment |
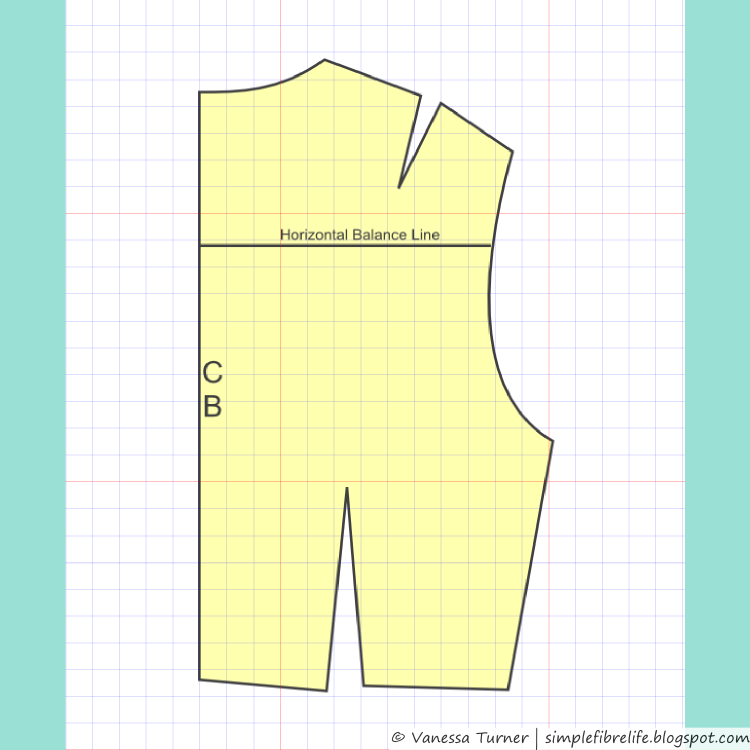 |
| Bodice Back Block |
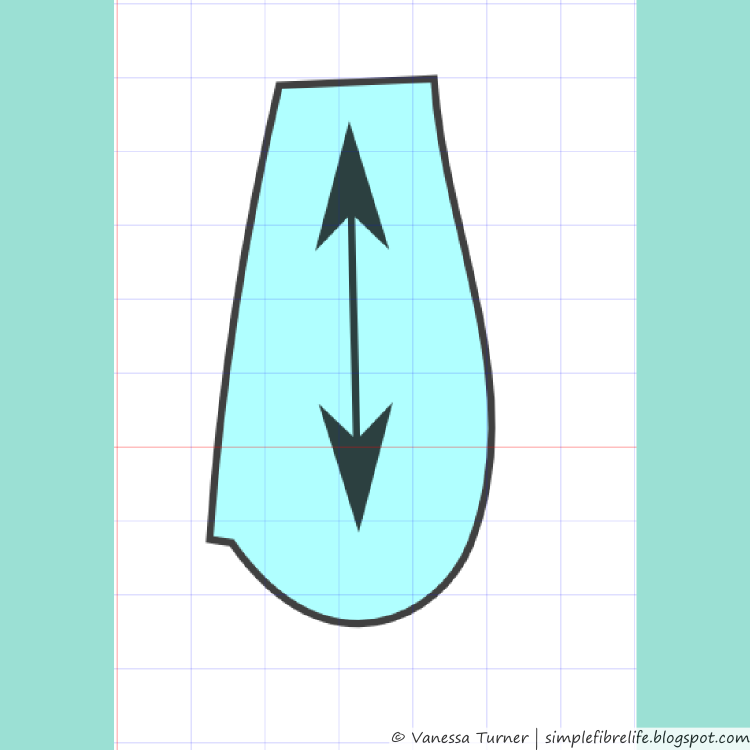
The sleeves were shortened for the first toile with no other adjustments.
 |
| Shortened sleeve |
So after the first toile I decided I didn't like the back neck dart. I also needed to tweak the sleeve because there was too much fullness at the back of the sleeve.
So for my next toile I decided to make a couple of changes. I moved the back upper dart to the armhole, but rotated from the back horizontal balance line (so kind of where the shoulder blade sticks out). For the sleeves I removed 1 cm out of one sleeve head by moving the dart leg towards the back of sleeve over, but left the other one as was. When trying this toile on I didn’t like the back dart at all. Removing some of the sleeve ease helped reduce puckering when inserting the sleeve. But I didn’t like the way the back looked at all. It looked a bit too fitted (read tight).
I thought I would try to remove the upper back dart and keep the original sleeve to see how that would look. So I unpicked one side of the toile pressed out the darts in the bodice back and sleeve and resewed it up. I liked the way it looked way better.
Instead of illustrating each step of the changes I made to the back bodice I just illustrated what would have been the simplest way for me to make the changes I did.
 |
| Horizontal Balance Line (HBL) lowered down the back like it is on my actual block. Slash through the middle of the dart to the HBL and from the armscye along the HBL to the first slash |
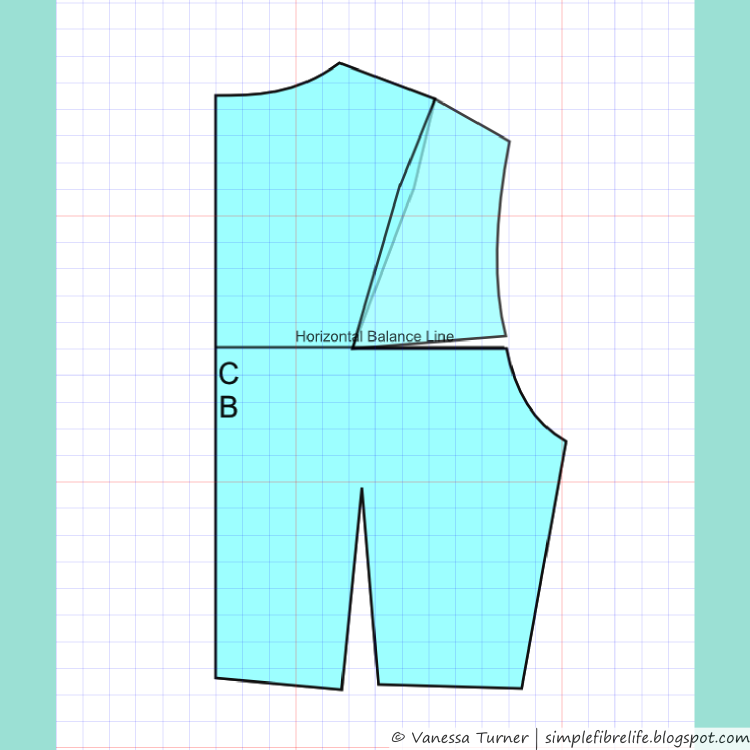 |
| Rotate to close the shoulder dart. |
 |
| Smooth the shoulder and the gap in the armscye |
 |
| Bodice pieces matched at shoulders at the outer shoulder. |
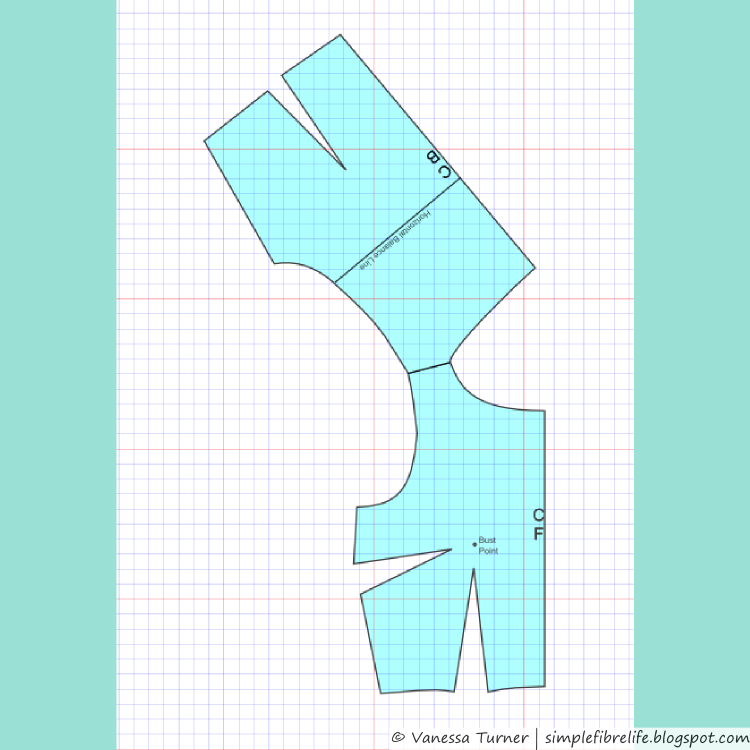 |
| Redraw the back neckline so there is a smooth join at shoulder |
 |
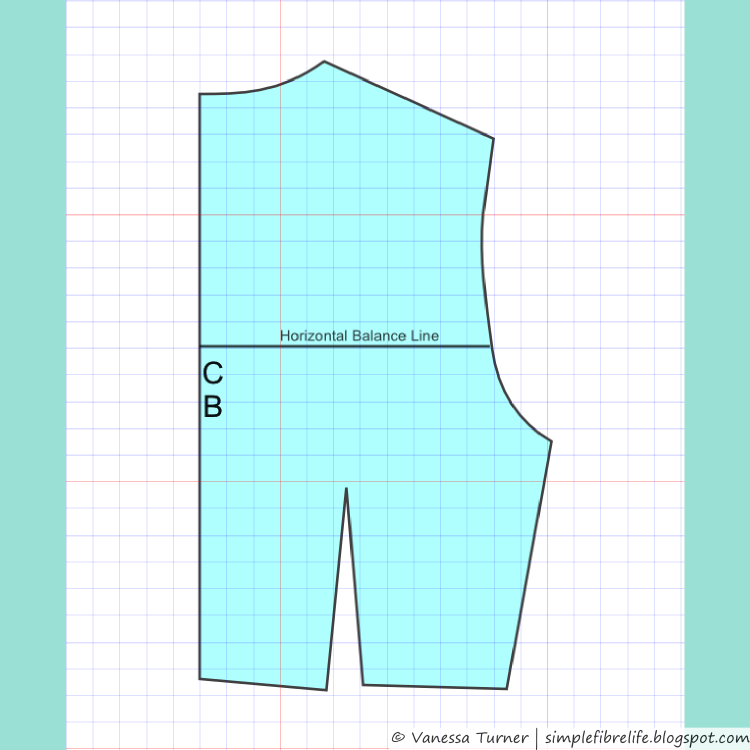
| Bodice Back comparison. Yellow is the original and teal is the adjusted one. |
The final bodice toile was made to make sure all style and fit adjustments worked and the bodice and sleeve pattern drafts were good to go.
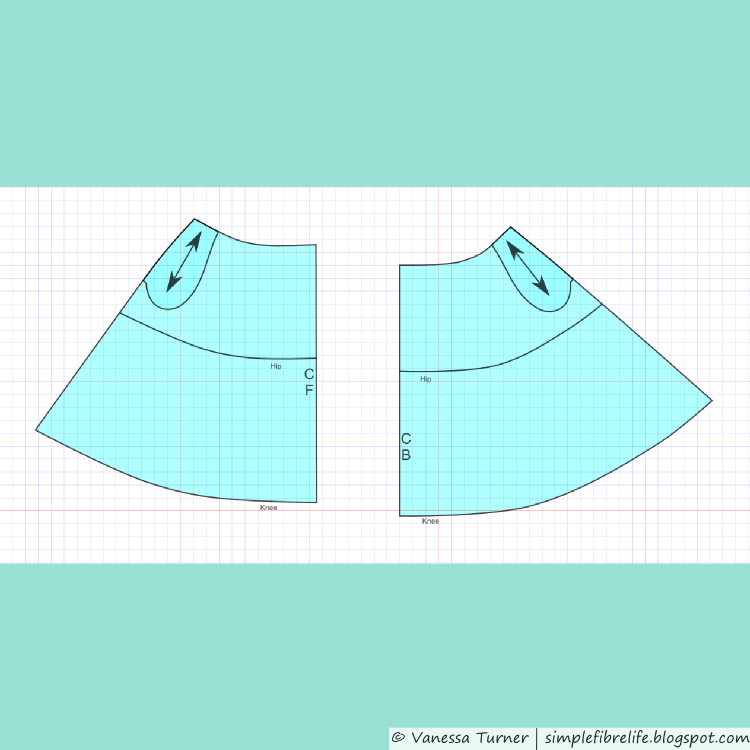
Skirt and Pockets
Luckily drafting the skirt was relatively straight forward compared to the bodice. I only sewed one toile and made a couple of changes
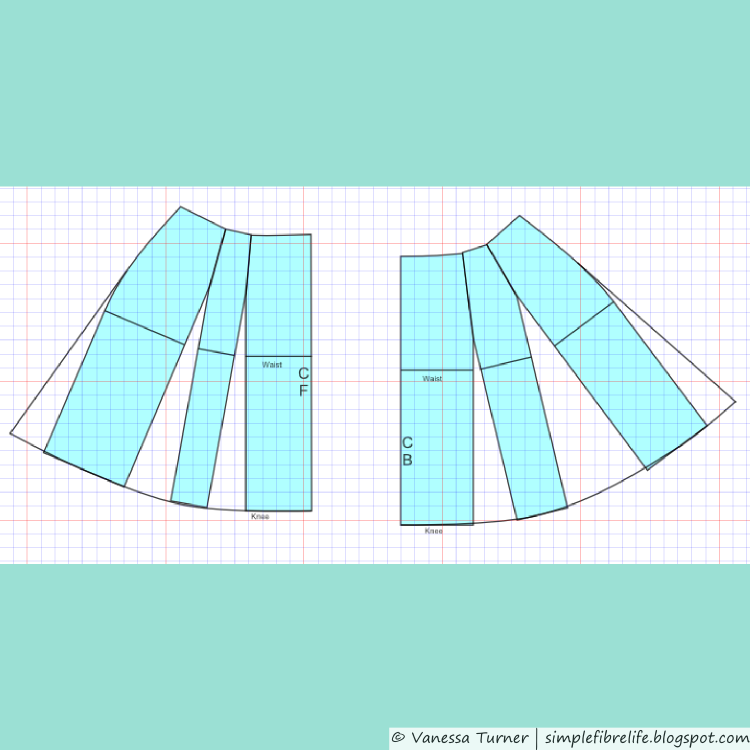
I traced off the front and back of my 2 dart skirt block and rotated out the darts. I wanted a little bit of extra flare at the side so there wasn't a 'bump' in the side seam so I extended the side seam from just above the hip line. I quickly checked to make sure the side seams matched up but placing the pattern pieces on top of each other.
 |
| Skirt Blocks |
 |
| Blocks shortened to desired length |
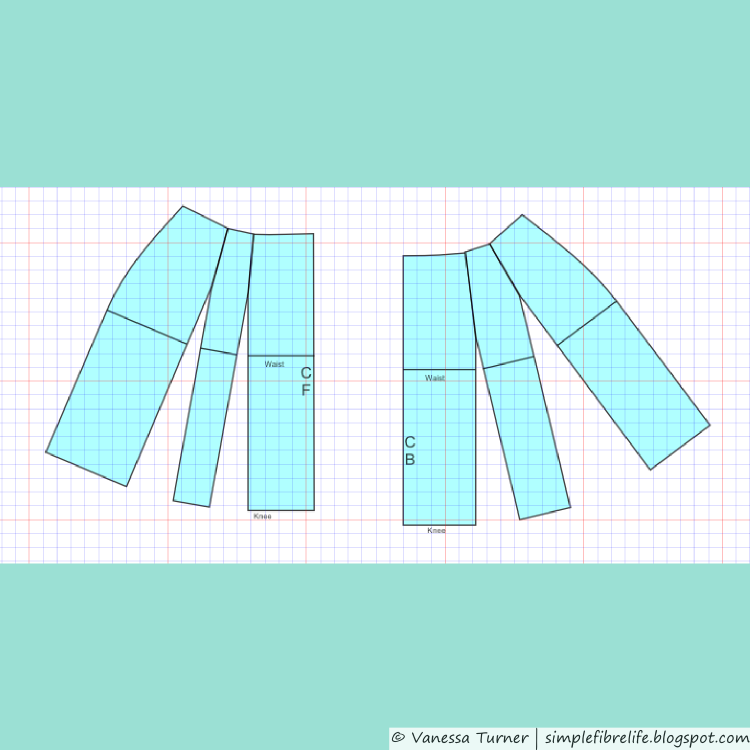 |
| Skirt darts closed |
 |
| Flare added to the side seams of skirt blocks. |
 |
| Hem drawn in so it hits the centre of each skirt panel hem |
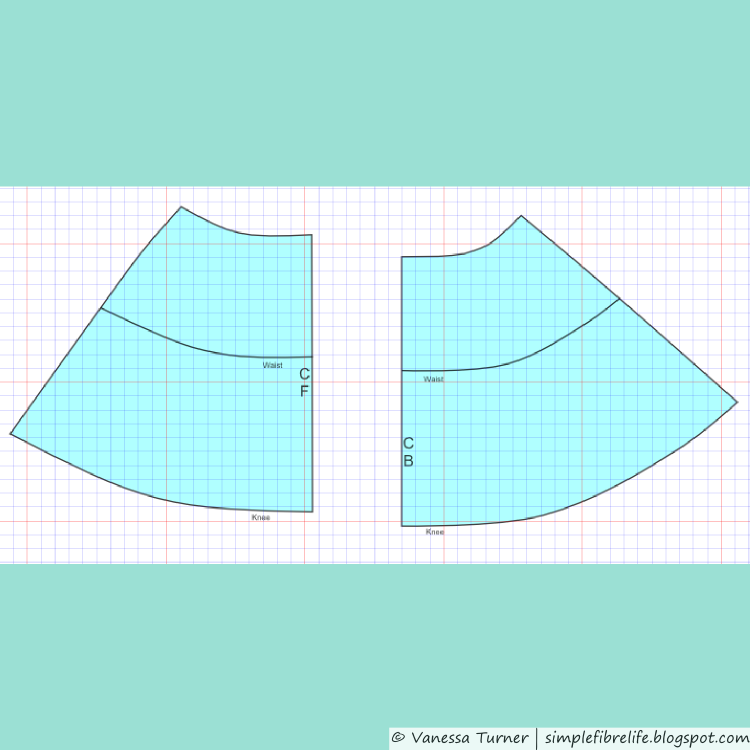 |
| Finished skirt front and back patterns |
I only made this first skirt pattern draft hip length, because I just wanted to see how it would fit in hip area and I could just extend the skirt sides by drawing a straight line as I was cutting out the toile.
The pocket was the final piece I needed to draft. I traced around the top of my front skirt block and rotated out the darts again. I took the pocket I had drafted for my S2444 and positioned it to where I wanted it on the skirt piece and traced around it. Voila pocket done!
 |
| Pocket drawn drawn onto the skirt front pattern piece and then matched against the back skirt piece. |
I toiled the skirt and pockets and sewed it all up.
The fit was a bit off at the hips where the pockets were. The pocket opening sort of stuck out. I figured it was because I had added flare to the skirt sides too far down the side seam. So I drew new front and back skirt pattern pieces, the whole piece this time, not just the top, and moved the starting point for the side flare up to where the side seam started to curve down. I had to adjust the side seam line on the pockets too.
 |
| Skirt pocket pattern piece |
I didn’t bother making another skirt toile because the changes were pretty basic.
 |
| Here are the final skirt pattern pieces |
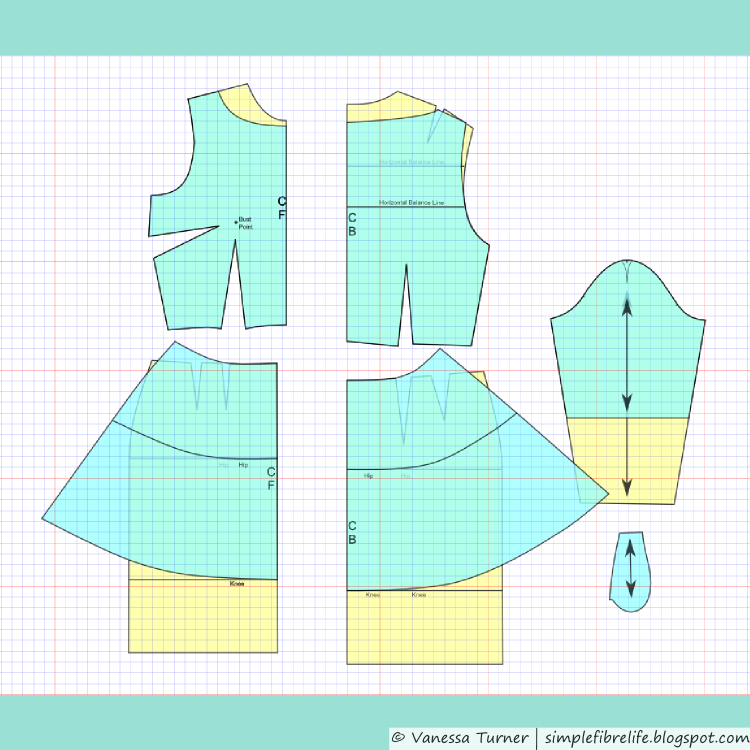 |
| Here are the adjusted pattern pieces laid over the original block patterns. |
~Final Comment~
I’m really glad I sewed so many toiles. It gave me a chance to work out how I was going to sew the final garment and was good practicing techniques like inserting sleeves and how best to sew inseam pockets.
Do you have any special fitting needs that make it difficult to buy RTW?
If you could design your ideal party dress what would it look like?
Leave a comment below, I'd love to hear from you :)
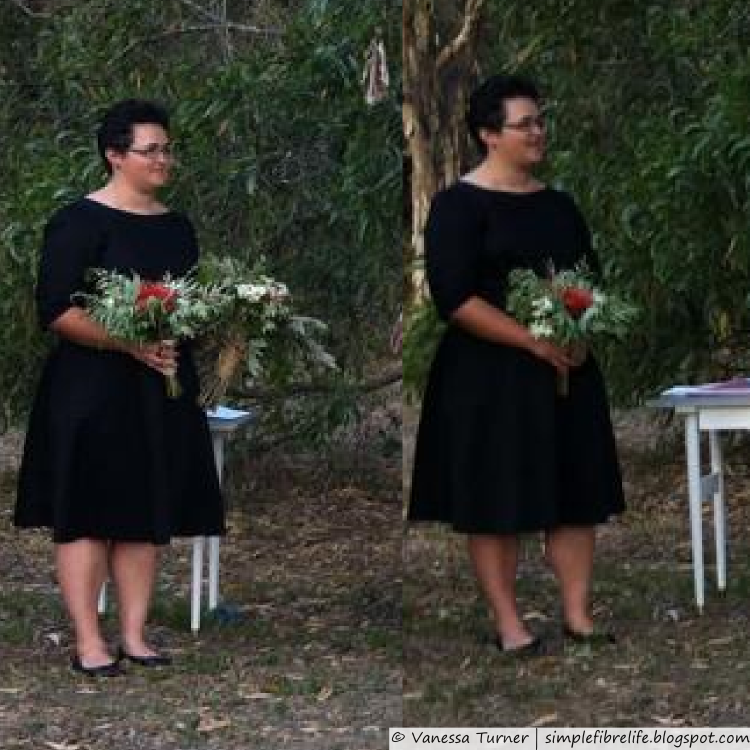
On the day I didn't get any photos of the dress and forgot to tell Mr S to get some for me.
So I 'borrowed' some from someone else so you could get a peak at the dress on the day.
Until next time,

Fascinating to see all of your changes in illustrated form. I tend to make changes on the fly and then can't remember what I did the next time around. Your finished dress looks great! There is something so flattering about a bateau neckline.
ReplyDeleteThanks Liza Jane,
DeleteDepending on the mood I'm in, I'll take notes about the changes I have or need to make as I'm sewing something. If it's something like a new fabric I'll make notes about the needle, thread tension, stitch type, stitch length/width. Sometimes, I just want something DONE and note-taking goes out the window! :)
I'm a big fan for bateau necklines too, I need more in my life, as long as I have bra strap carriers to stop the dreaded bra strap peak show:)
I love that you've gone over all of your changes! I always mean to, but I occasionally forget, which makes it hard to remember when I come back to it. Maybe I'll start logging them on the blog too.
ReplyDeleteThe dress is amazing and I love hearing about your pattern manipulations, especially what works and what doesn't, like with the pockets. By sharing we can learn from each over as we go, which hopefully might translate into less toils down the line....... maybe :)
I have funny forward rotated shoulders, which I thought might be bad posture but I now think is just the way I'm built. It means my back darts re quite big and my armholes are a funny shape :)
Hi Jo,
DeleteThanks for stopping by and commenting. I'm glad you enjoy reading about all the changes. I really like sharing my sewing geekiness with other people who get it :)
I'm fooling around with pattern drafting at the moment and it's interesting to see the differences between a pattern that fits my body and the standard block.