
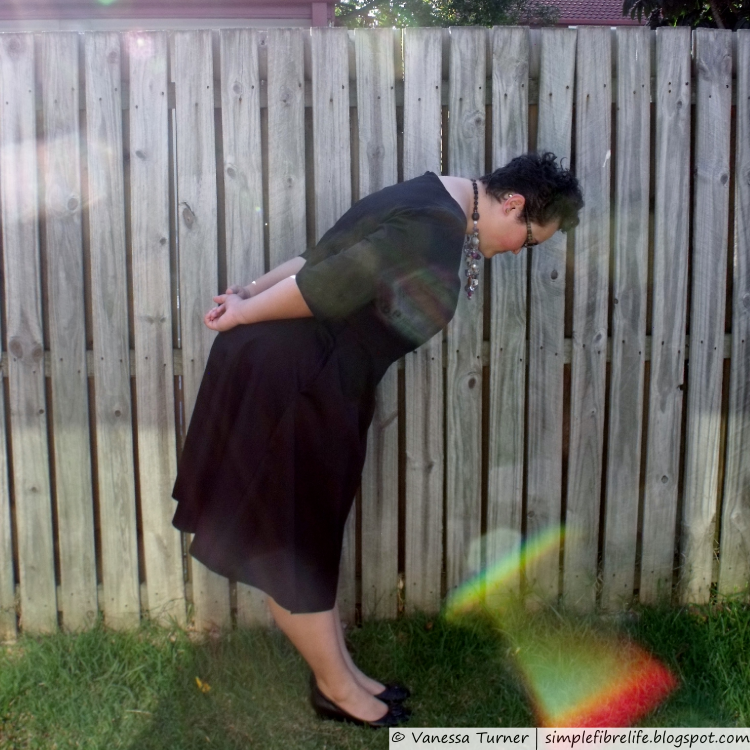
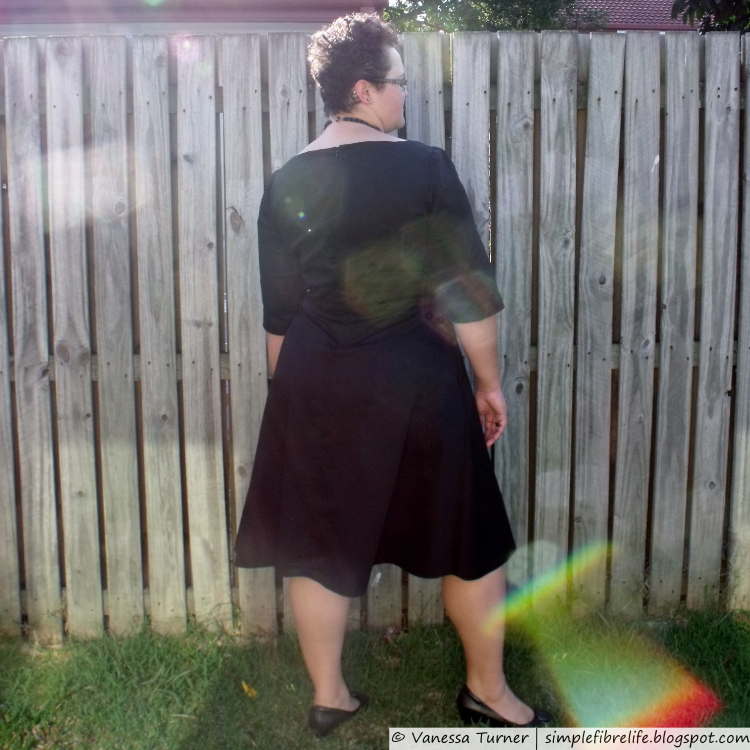
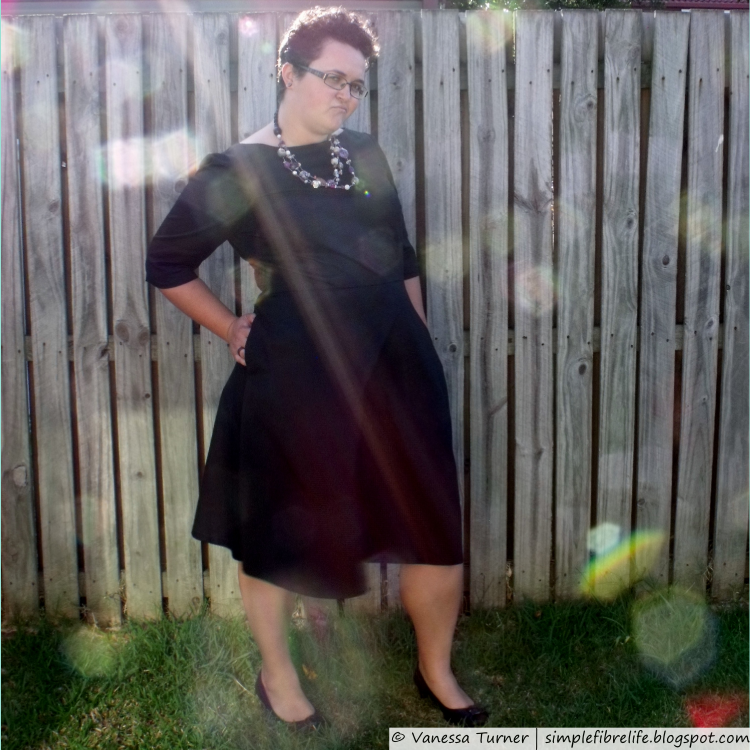
I actually ended up taking two lots of photos for the original post about this dress.
I used the second lot in the first post, but I wanted to include some from the first photo session because I really like the sun flare :)

~Construction~
When I'm sewing I usually try to sew as many seams as possible before I need to press or switch between machines. It means the project comes together quicker. And we all like getting a project finished :)
When I cut out the final garment I made sure that the seam allowances for the bodice, bodice lining and back skirt pieces liked up with the selvage edge so that I didn't need to finish these seams.
I started by assembling the bodice and sleeves and then inserted the sleeves. The skirt was made after which included sewing the inseam pockets. The zipper was put in after joining the bodice and skirt. I attached the zipper snap tab while I machine sewed the bodice lining centre back along the zipper. I was running out of time at this stage so I had to prioritise the next few steps, so I sewed the hem. To finish up I hand stitched the bodice lining waistline to the waistline seam allowance; sewed the snap to the zipper snap tab and finally the bra strap carriers.
- Stay stitched front and back bodice necklines, bodice lining necklines and waistline of skirt pieces.
- Sewed front and back darts for bodice and bodice lining and darts at top of sleeve; pressed seams and pressed darts flat so they pointed to the centre of the body or down and pressed sleeve darts to the back.
- Sewed 3 rows of gathering stitches at top of sleeves.
- Overlocked the sleeve hem seam allowances without cutting any allowance off
- Overlocked around the outside of pocket pieces.
- Basted along the sleeve hemlines to make turning and pressing the hem easier; pressed hem up along the basted line
- Sewed side and shoulder seams for bodice and bodice lining; sewed sleeve seam.
- Pressed bodice and sleeve seams and flat, then open.
- Overlocked sleeve seam allowance.
- Pressed sleeve hem up along basting.
- Sewed sleeve hems.
- Basted the bodice and bodice lining around the armholes. Inserted sleeves into bodice.
Putting the skirt together
- Sewed pocket pieces to side seam of skirt front and backs using a seam allowance slightly smaller than 5/8” (1.5cm). Pressed seam allowances flat and open.
- Overlocked skirt side seams, including where the pocket joined the skirt piece, but not around the pocket (that was already done).
- Sewed side seam of skirt at top, backstitched at top of pocket opening, basted along pocket opening, backstitched at bottom of pocket opening, sewed seams to bottom.
- Sewed around pocket bag, backstitched at beginning and end. Pressed side seams and the pockets to the front.
- Basted the top of the pockets bags to the skirt waistline
Finishing up
- Sewed skirt to the bodice main fabric (thinking about it now I probably could have sewed the bodice lining in this seam too, but I’d probably have to finagle it at the zipper, hmmm, something to think about next time).
- Overlocked the waistline seam.
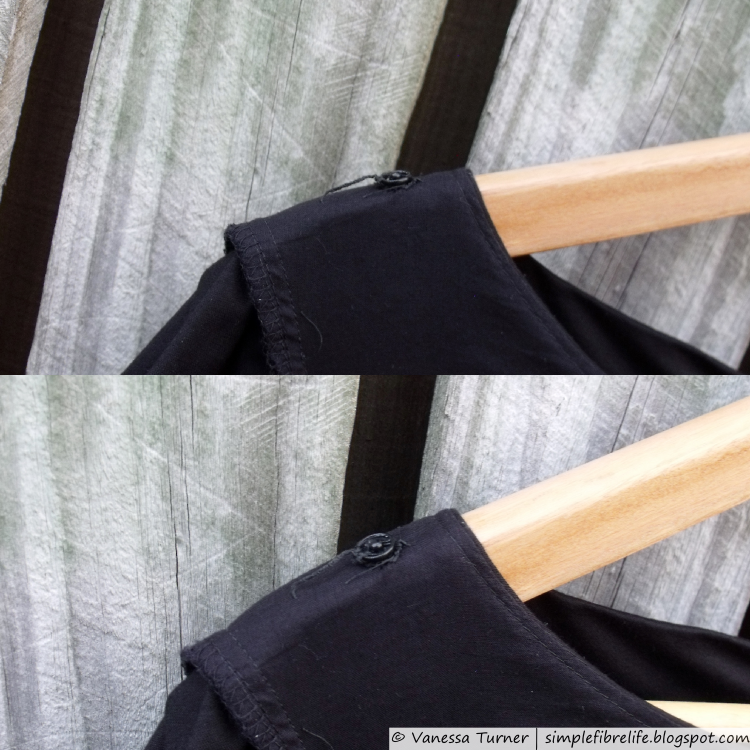
- I made the zipper snap tab by cutting a little rectangle of lining fabric and sewing along one long and short side, snipped the corner off, turned it the right way out and pressed it flat.
- To insert the zipper I basted the centre back seam, pressed it open, and basted the tape of the invisible zipper to the seam allowance on either side. After unpicked the centre back basting I sewed the invisible zipper in properly.
- I hand stitch the top of the zipper tape down, positioned and pinned the zipper snap tab where I wanted it, placed the bodice lining and bodice right sides together (remembering to fold under a little of the lining at the waistline) and sewed along the zipper tape to secure the lining down in the centre back.
- Overlocked the hem of the skirt.
- Hemmed the skirt by basting along the hemline to make turning the hem easier, pressed the hem up.
- Hand sewed the waist of the bodice lining down.
- Hand sewed the snap onto the zipper tab
- Hand sewed the bra strap carriers to the bodice lining shoulder seams

| Here are all the related posts :) This Post Sewing FO post Behind the seams 1 - Pattern Adjustments Behind the seams 2 - Construction |
~Final Comment~
So this wasn't the quickest make in the world, but it was pretty straight forward to sew together the final dress after sewing so many toiles. I think that bra strap carriers are going to be a new staple in my garments. I've made a few more formal garments this year, and I've seen my sewing improve a lot over that time.
Do you have any tips or tricks for sewing your garments quicker? Are there any special techniques or features you like to put in your garments?
Leave a comment below, I'd love to hear from you :)
Until next time,

Vanessa, these "behind the seams" posts are great! I love reading about all the nitty-gritty construction details, especially on a formal dress like yours. A lot of people skip the details, but I think they're the best part. :)
ReplyDeleteAs for catching the bodice lining in the seam when you attach the bodice to the skirt: I've done this a few times, and I just leave the lining free for the last ~2 inches before the zipper (i.e. sew the waist seam with just 2 layers instead of 3 for the first and last few inches). I'll hand sew the lining down in this area at the end.
I'm the last person to ask about tips for quicker sewing, so I'll just leave it at that!
Oh Thank you Carolyn. I like the nitty-gritty too. I like learning the techniques and little trick that others use when making their garments.
DeleteGreat tip about catching the bodice lining in the waist seam!
I really like your sewing style/pace :)
Zipper tabs are great, the amount of times I've been irritated by scratchy zips!! So many great little details in this dress, you can tell that so much thought has gone into it.
ReplyDeleteHey Jo,
DeleteI totally recommend zipper tabs if that's something you have trouble with. I like zipper tabs because I find inserting a hook and loop so fiddly. Interestingly I thought all the little details would add way too much time it would take to make the dress when really they didn't take that long at all and they really make the dress so special. :)