Here is S2444 Behind the Seams Part 1.
BODICE ADJUSTMENT
I couldn't find anything on the interwebs about it so I thought I would write this post so hopefully someone will stumble up on it in their time of need.
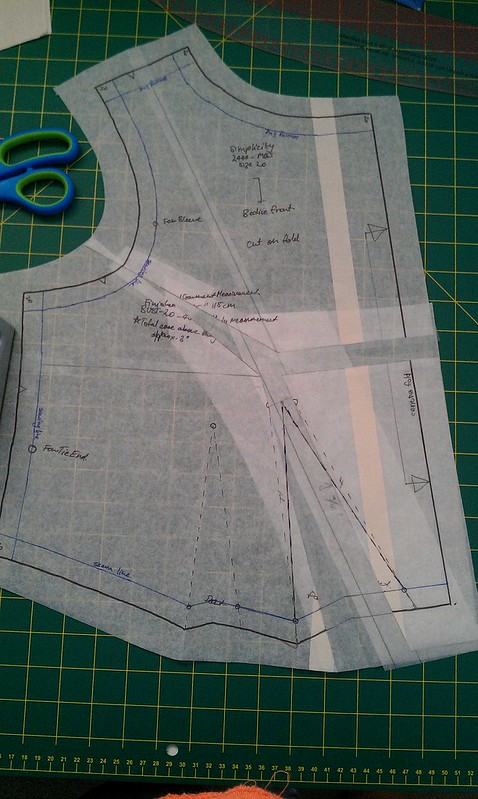
I traced the front bodice pattern on some paper (I use a giant roll of kitchen grease proof paper and tape strips together). I then marked in the seam allowances - the blue outline. I drew in the cutting lines for the adjustment in pencil.
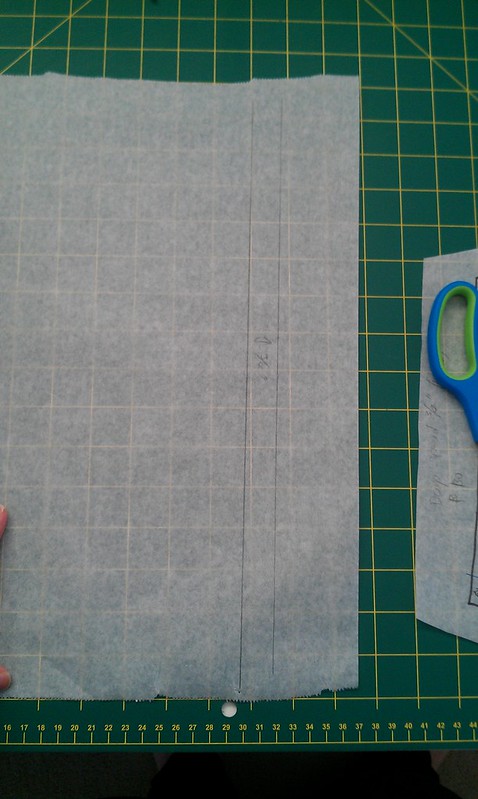
To make my life easier I drew the 3/4" guide the FBA on some spare paper.
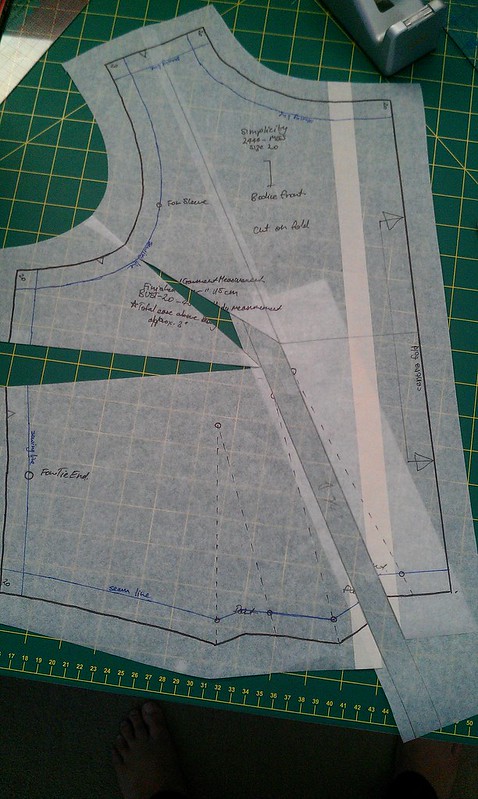
I slashed the pattern from the inner waist dart to the shoulder seam line.
Upon reflection I should have cut from the bust point to the armscye.
To fix that, I drew a line from the armscye to the bust point and tapped the top of the waist-shoulder slash.
Then I slashed from the side seam to the bust point. Remembering to make a little hinge.
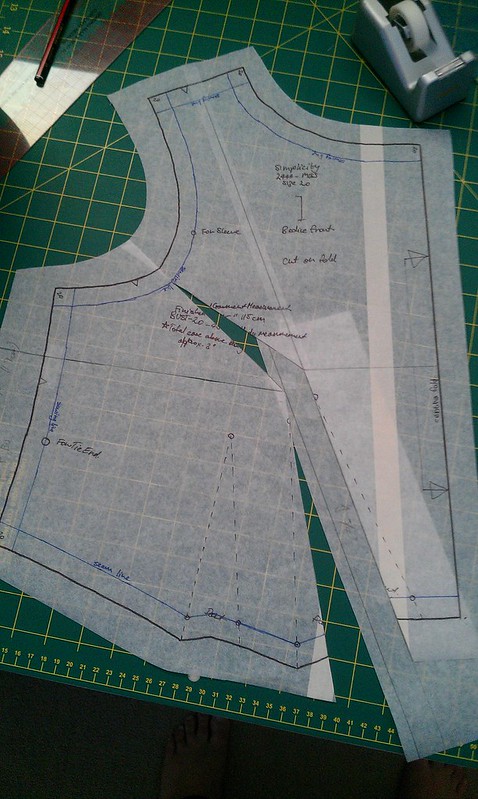
Using the 3/4" guide that drew I lined up the waist-bust point slash along the lines.
I scratched my head for awhile here because I thought I would have to make a side dart because of the adjustment. But then I had an 'Aha!' moment and just rotated the side dart closed.
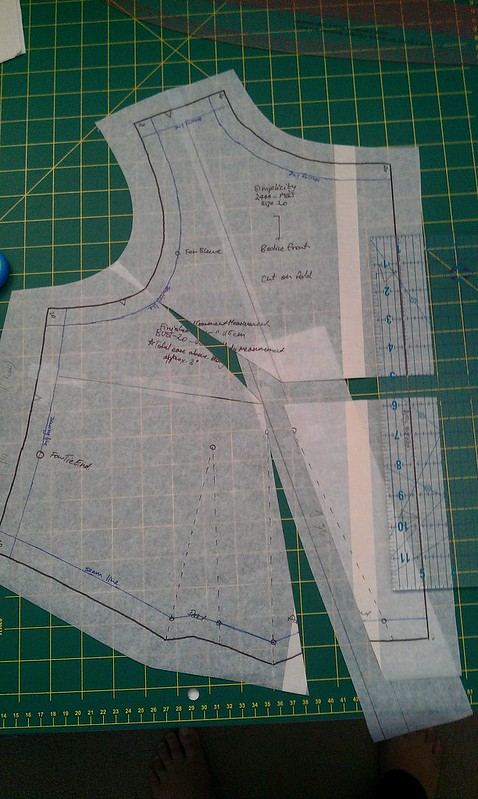
Now I slashed from bust point to centre front fold line and moved it down 3/4", using my cutting ruler as a guide.
I put some paper behind all the gaps and stuck it all together. I redrew the inner waist dart-in black.
I wasn't happy with the uneven waist darts so I redrew the darts-in red below (sorry about the bad photo).
To calculate how to change the darts I measured between the dart legs of both darts at the seam line.
Added them together and then divided by 2.
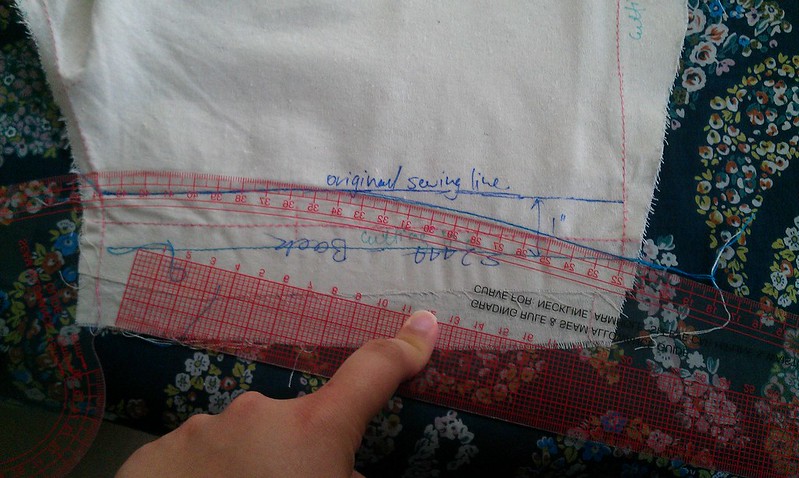
In the picture below I also have drawn in the change in the side seam/waist seam with the side seam pivoting out to add 1" to the waistline.
I drew the dart legs in light blue so I put a bit of paper behind so you could see them in the photo.
I needed to adjust the skirt pieces so they would match up with the bodice, because I had adjusted the bodice side seam by moving it out 1" at the waistline.
POCKET ADJUSTMENT
The pocket that is provided in S2444 is just a basic side seam pocket. I haven't much experience with them, but I just know that having a pocket flapping around in the skirt would annoy me.
So I decided to adjust the skirt so that It attached at the waist seam to stop 'pocket-flap'.
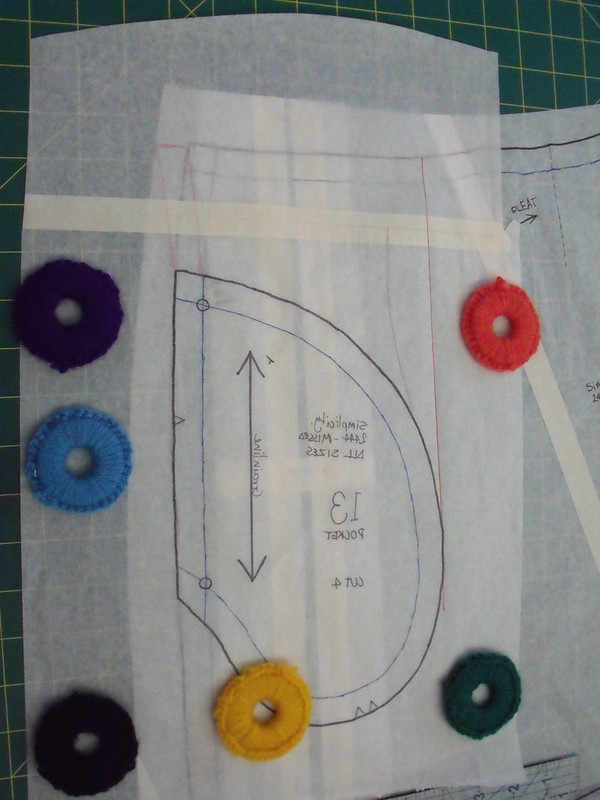
I laid the original pocket pattern on the front skirt, with the pocket facing inwards and the sides seam notches matching.
Initially I laid the pocket piece so that the pocket was facing out, but soon realised my mistake. You can see that I started to trace the side seam in faint red below.
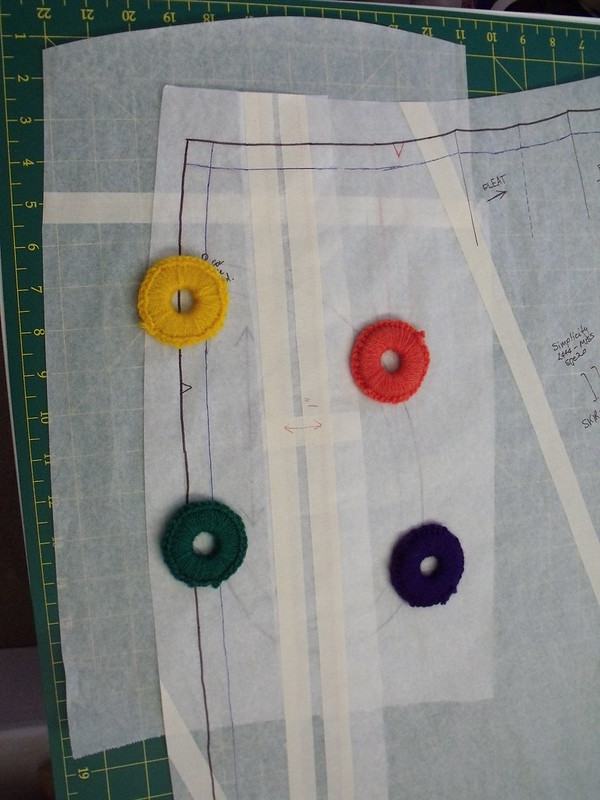
I drew a line from the 'outer-most' part of the pocket straight up to the waistband.
Then I laid the pocket pattern under the skirt pattern and drew a notch where the pocket cutting line would match up with the skirt waistline.
Then I drew in the seam lines and cutting lines on the right side of the pocket pattern.
I hope all of that made sense. Holla at me if you need some help - just pop a comment below.
Have you been puzzled about how to make a pattern adjustment? What did you do?
Leave a comment below, I'd love to hear from you :)
Until next time,







No comments:
Post a Comment
Thanks for stopping by. I really like reading your comments, so drop me a line by clicking to comment
Please don't comment anonymously though - you can leave your email if you don't have an OpenID.